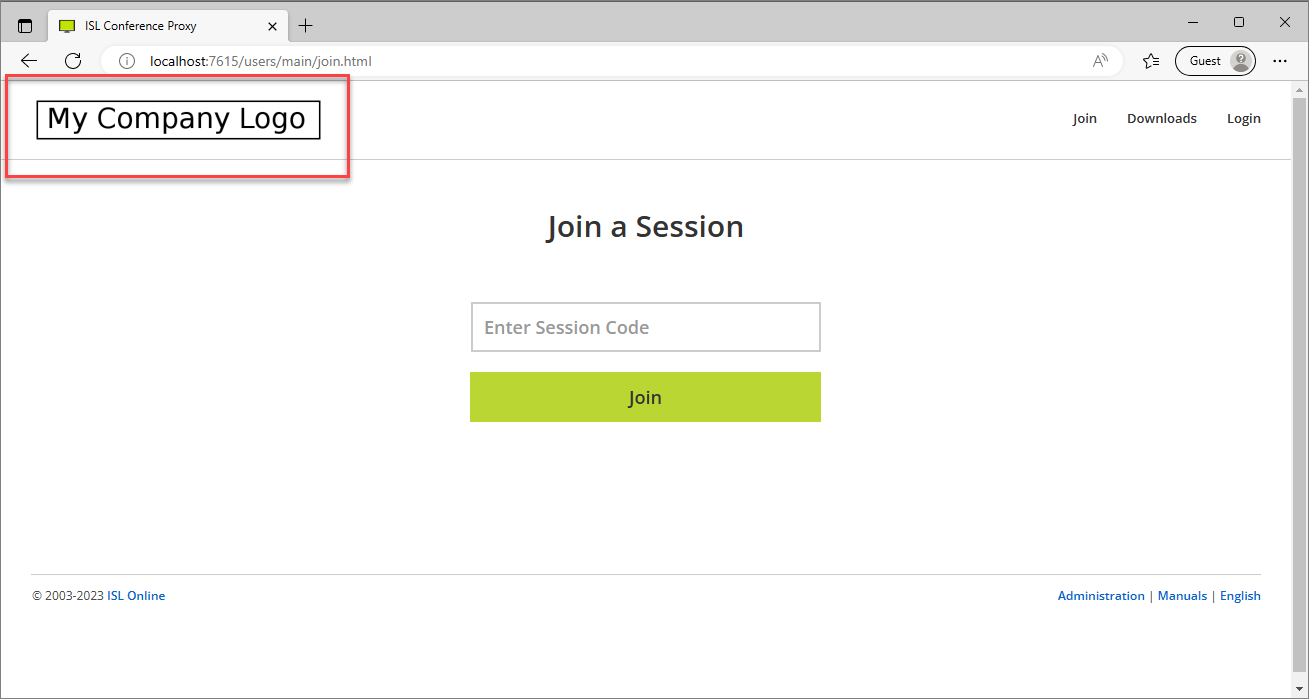
Please refer to the appropriate section to learn how to modify the HTML template of your ICP and customize it to your liking:
Overview
ISL Conference Proxy 4.3.0 has introduced an improved templating system, allowing you to make branding changes quickly and easily, without having to create page overrides. This new templating system is currently the only recommended and supported way of user web pages customization.
This new templating method uses the approach with hooks allowing you to change exactly the desired part without touching the rest of the page. There are a lot of points in the template that you can hook, some are really basic while the other are for advanced users only.
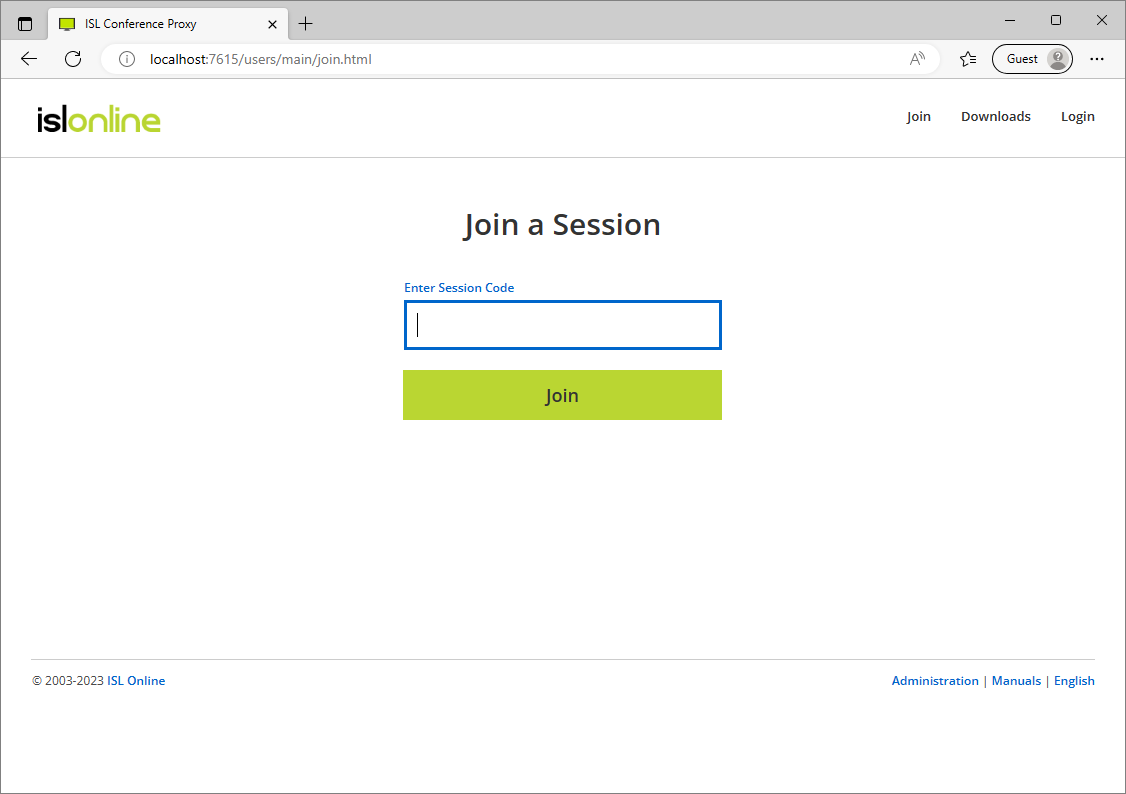
Default look of the "Join" page of your ICP. You can change the logo (top-left), displayed links (bottom-right), colour schema and much more.
Important: Customizing the ICP template can lead to potential unwanted effects due to future changes introduced with updates or due to incorrectly applied templates. We advise that you change the bare minimum to achieve the desired goal and avoid making complex changes unless you are familiar with what you are doing.
Web Templates
Depending on the version of your ICP one of the templates from http://localhost:7615/default_templates/ page will be served. Different Hooks are available depending on the template being served (see chapter Available Hooks).
To check which template is being served by your ICP you can check the requests you browser is making when loading the page.
For example, pressing "F12" (to open developer tools) we can check where the styles.css is loaded from.
In our case the path is: /.../static/core/2200/web_template/styles.css - meaning our ICP is serving the 2200 template.
Important: In this article we are using the 2200 template (http://localhost:7615/default_templates/Base%20v2200/web_template.html) as a reference since it is the latest. If your ICP is serving an older template, please refer to the corresponding template and its hooks.
User Permissions
User permissions can be accessed in the web template, allowing you to display different content based on them:
{{logged_in_user_has_permission|<permission>|}}<permission> can be:
- domain_admin - "Domain Admin" setting under Account section for user is set to "Yes" - user is the administrator of a domain.
- main_user - "Main User" setting under Account section for user is set to "Yes" - user can not be disabled (to avoid lockouts) and his settings are protected from being changed by other domain administrators.
Return value is:
- 1 - when the user has according permission enabled.
- "" (empty) - when the user has according permission disbled.
Hooks
Hooks allow you to target a specific section of the page and have one of the following forms:
{{hook|<target>|<new_content>}} - will replace the <target> html element with <new_content>
{{hook|<target>|}} - will remove the <target> html element
{{hook|<target>#before|<new_content>}} - will add <new_content> before(outside) of the <target> element
{{hook|<target>#begin|<new_content>}} - will add <new_content> to the beginning (inside) of the <target> element
{{hook|<target>#end|<new_content>}} - will add <new_content> to the end (inside) of the <target> element
{{hook|<target>#after|<new_content>}} - will add <new_content> after (outside) to the end of the <target> element
Examples:
{{hook|logo:src|/webspace/mycompany/logo.png}}will target the company logo in the top left of the page and replace it with your image: /webspace/mycompany/logo.png
{{hook|footer-left#begin|<a href="https://www.islonline.com">ISL Online Home Page</a>}} will add a link at the beginning of the left side of the footer.
{{hook|footer-right#end|<a href="https://www.islonline.com">ISL Online Home Page</a>}} will add a link at the end of the right side of the footer.
{{hook|navbar.downloads|}}will remove the "Downloads" link from the navigation bar, leaving user with only "Join" and "Login" options in the top right.
Common Available Hooks
The default templates with all available hooks are located at the following links:
- Default template Base v2200 (ISL Conference Proxy 4.4.2240.57 or newer)
- Default template Base v2100 (ISL Conference Proxy 4.4.2120.54 up to 4.4.2240.57)
- Default template Base (ISL Conference Proxy 4.3 up to 4.4.2120.54)
Note: When you open a template in your browser, use the "View Page Source" feature of your browser to view the actual html code rather than what the browser renders for you. In most browser you can click "View Page Source" when you right-click an empty part of the page or by using Ctrl+u key combination.
Most common and simple to use hooks are:
- {{hook|logo:src|/webspace/logo.png}} - replace the image in the top left of the template with your logo
- {{hook|logo:alt|Company logo}} - provide alternative name to be shown instead of your logo if logo is unavailable
- {{hook|head.title|<title>Page title - {{html_xpp|title}}</title>}} - set the title of the page
- {{hook|navbar.downloads|}} - hide the downloads button in the top right of the page (note the <value> of the hook is empty)
- {{hook|footer.conf|}} - hide the link to administration page in the page footer
- {{hook|footer.help|}} - hide the link to help pages in the page footer
- {{hook|footer| <custom html>}} - provide custom html for the footer of the page - e.g. add additional links to your web pages
Note: Hooks listed above are the most commonly used as they modify the landing page your users will navigate to in order to connect to a remote sessions. Other hooks listed in the "Base" template are more advanced and require deeper technical knowledge of ICP workings to be applied. They modify the behaviour of web pages once the user logs into your ICP with their user account thus they do not affect your customers in the vast majority of use cases. Please come to our live chat (at islonline.com) or write an e-mail to support@islonline.com should you require assistance.
All Available Hooks
Important: Hooks, especially more advanced ones, are subject to change. Modifying or using any of the hooks can result in your ICP becoming inoperational or features becoming unavailable. Modify them at your own risk or consider contacting our support at support@islonline.com
The following hooks are available in the v2200 template:
- {{hook|html:attr - target the html attributes of the outer html tag
-
{{hook|head- target the <head> element of the web page or specific elements within:
- {{hook|head.title
- {{hook|head.shortcut-icon
- {{hook|head.html
-
{{hook|head#js - target the <script> element within the <head> element or target a specific parameter:
- {{hook|head.js.errorhandler
- {{hook|head.js.jquery
- {{hook|head.js.bootstrap
- {{hook|head.js.webutils
- {{hook|head.html_xpp.head
-
{{hook|head#meta- target the <meta> element within the <head> element or target a specific parameter:
- {{hook|head.meta.charset
- {{hook|head.meta.x-ua-compatible
- {{hook|head.meta.description
- {{hook|head.meta.viewport
-
{{hook|head#css- target the <css> element within the <head> element or target a specific parameter:
- {{hook|head.css.font
- {{hook|head.css.bootstrap
- {{hook|head.css.main
- {{hook|software_policy_element- advanced - special element which allows modification of content via software policy - e.g. hide Linux download option only
-
{{hook|body - targed the <body> element of the web page
-
{{hook|web-versions - advanced - target the element specifying which version of web template the ICP should use
- {{hook|logout-form - advanced - add a custom handler when a logged in user clicks on "Log Out"
- {{hook|permanent-notification - place a permanent notification on top of you web page that can not be dismissed - e.g. during maintenance
-
{{hook|nav- target the whole navigation seciotn of the web page - top right corner with "Join"/"Downloads"/"Login" buttons or specific target elements within:
- {{hook|navbar
- {{hook|navbar-header
- {{hook|navbar-brand
- {{hook|navbar-brand.img
- {{hook|logo:src
- {{hook|logo:alt
- {{hook|navbar.ul
- {{hook|navbar.join
- {{hook|navbar.downloads
- {{hook|navbar.user-header
- {{hook|navbar.user-header-toggle
- {{hook|navbar.login
-
Advanced- targeting the content of sidebar, which is shown to logged-in users:
- {{hook|sidebar.content
- {{hook|sidebar.products-1
- {{hook|sidebar.products-separator
- {{hook|sidebar.admin.section
- {{hook|sidebar.admin.title
- {{hook|sidebar.admin.option
- {{hook|sidebar.admin.icon
- {{hook|sidebar.admin
- {{hook|sidebar.logout
- {{hook|sidebar.products
-
{{hook|content- target the "content" of the page - the part between the header and the footer generated by ICP. Content generated by ICP does not support more detailed hooks, apart from the following two:
- {{hook|content.html_xpp - content generated by ICP
- {{hook|content.noscript.js - content shown if user has disabled scripts or their browser does not support them
-
{{hook|footer - target the footer of the webpage or the specific elements within it:
-
{{hook|footer-left
- {{hook|footer-right
- {{hook|footer.copyright
- {{hook|footer.conf
- {{hook|footer.help
- {{hook|footer.language
- {{hook|footer.version
-
{{hook|footer-left
Examples
Upload Custom Logo to ICP
Step 1

Prepare your custom logo. Max height should be 40px and width should be kept under 300px for optimal layout. Name of the image file should begin with webspace__ prefix (note the double underscore).
Step 2
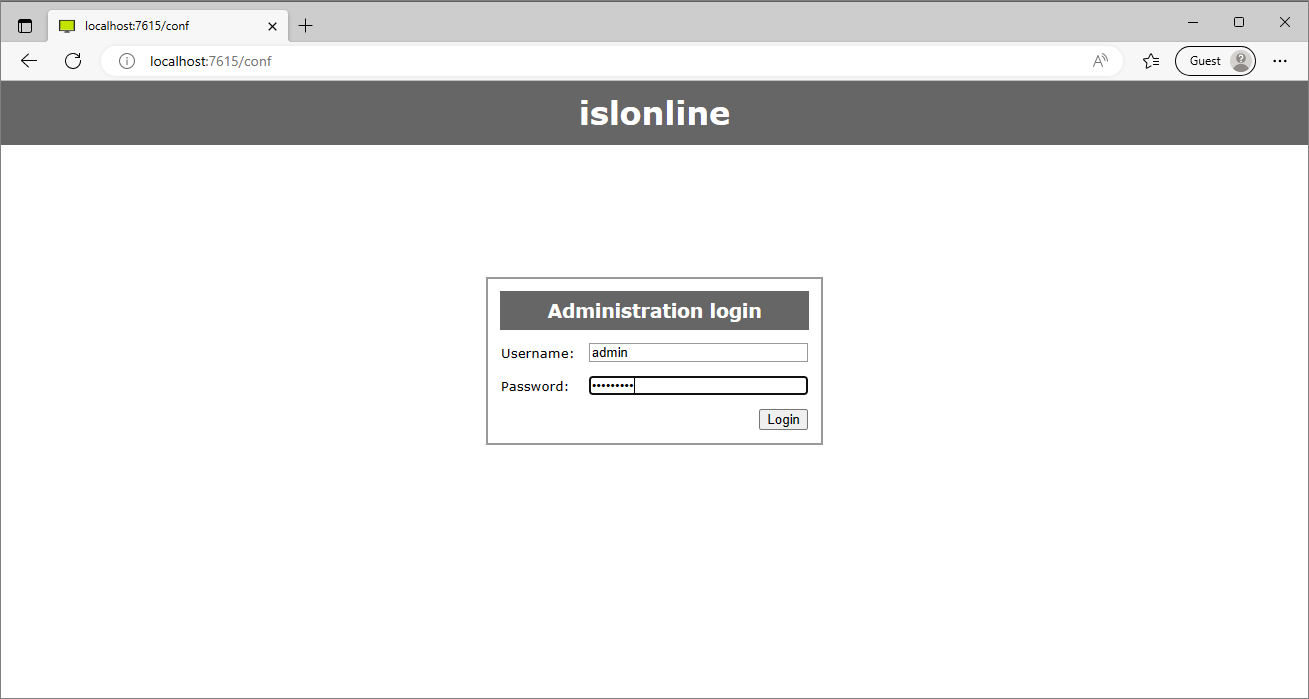
Log in to ICP administration console at <server_address>/conf
Step 3
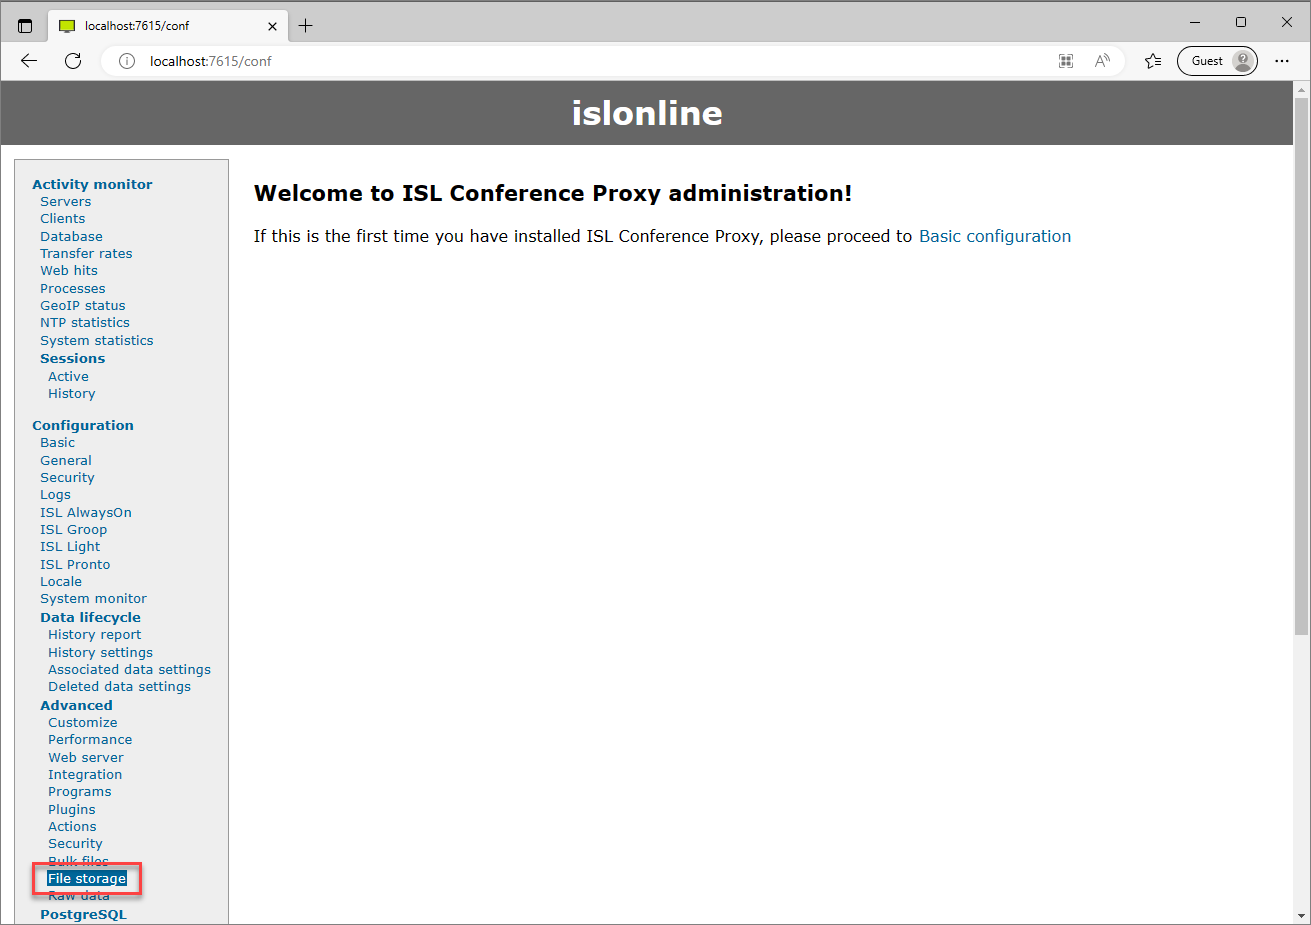
Open "File storage" section under “Configuration” -> “Advanced”
Step 4
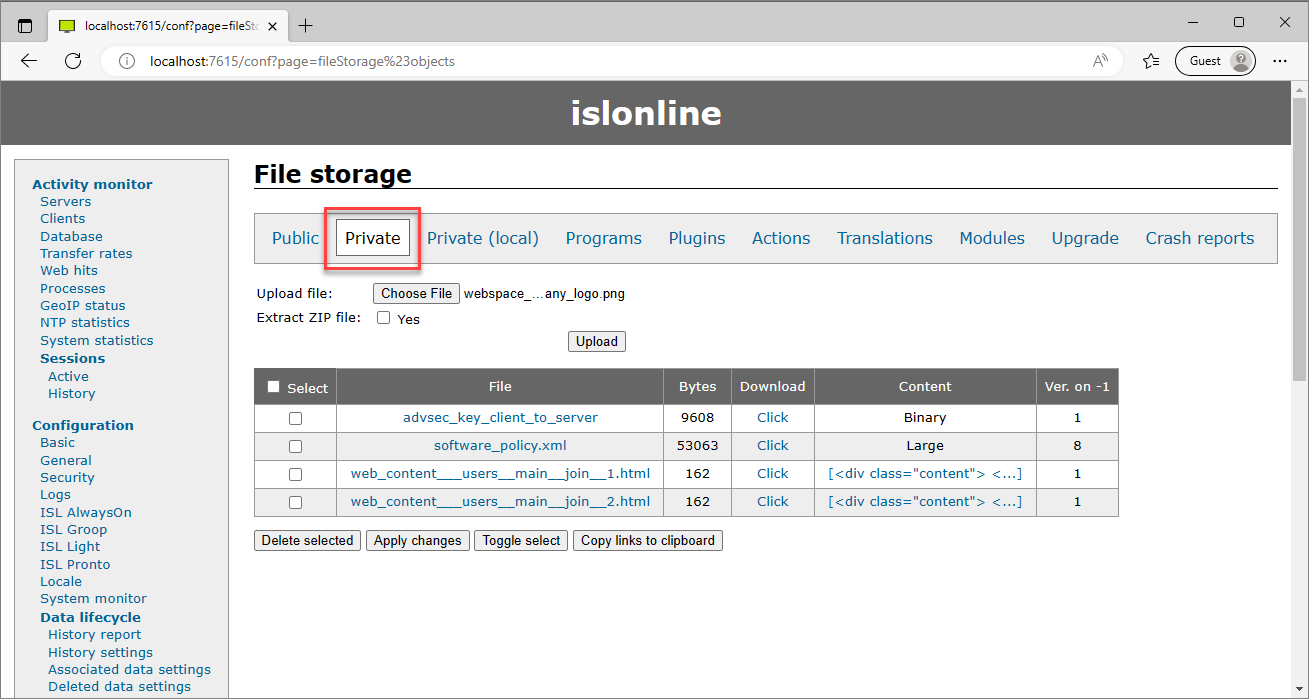
Open "Private" storage section
Step 5
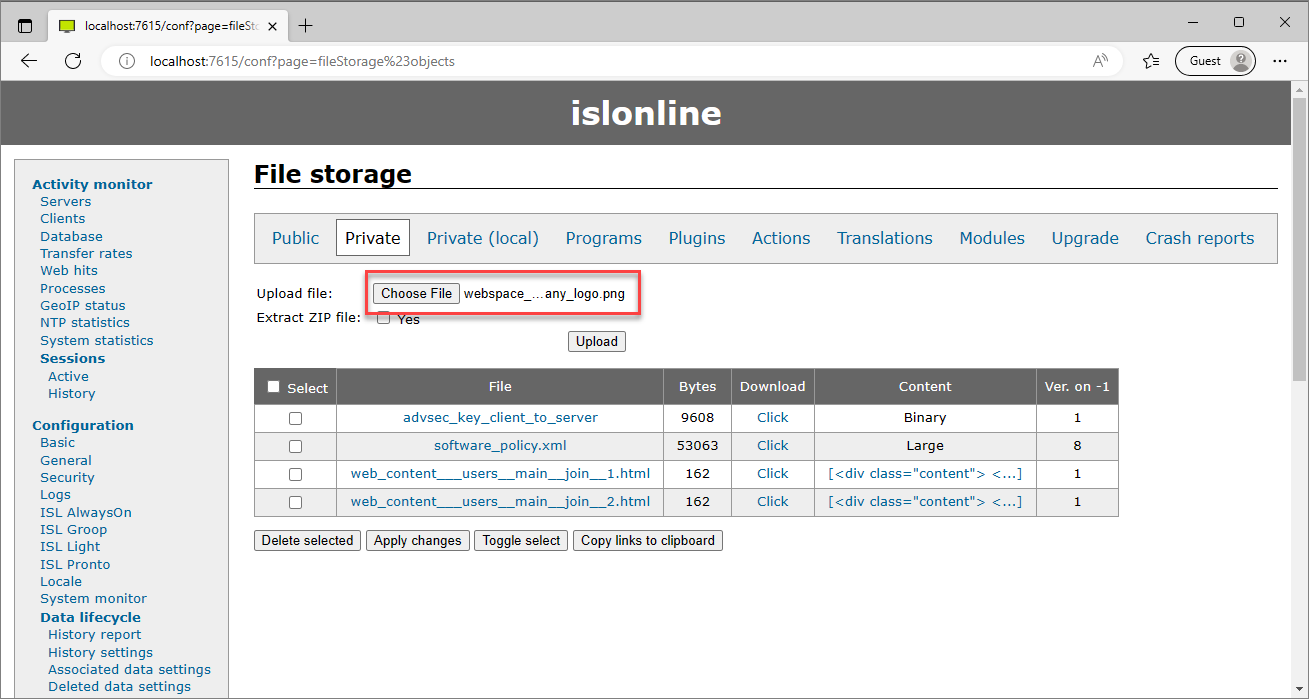
Select your logo file and click "Upload" to upload it to ICP storage. In our example the logo is named webspace__mycompany_logo.png
Important: Names of images and other static content you upload to ICP and wish to reference from template should begin with "webspace__" prefix (note the double underscore).
Note: Double underscore (__) in the image name is changed into "/" in the src attribute path to image when referencing it from the html template. e.g. If you upload an image "webspace__web__image__logo.png" into ICP storage, then you will reference it with "/webspace/web/image/logo.png" in the template.
Step 6
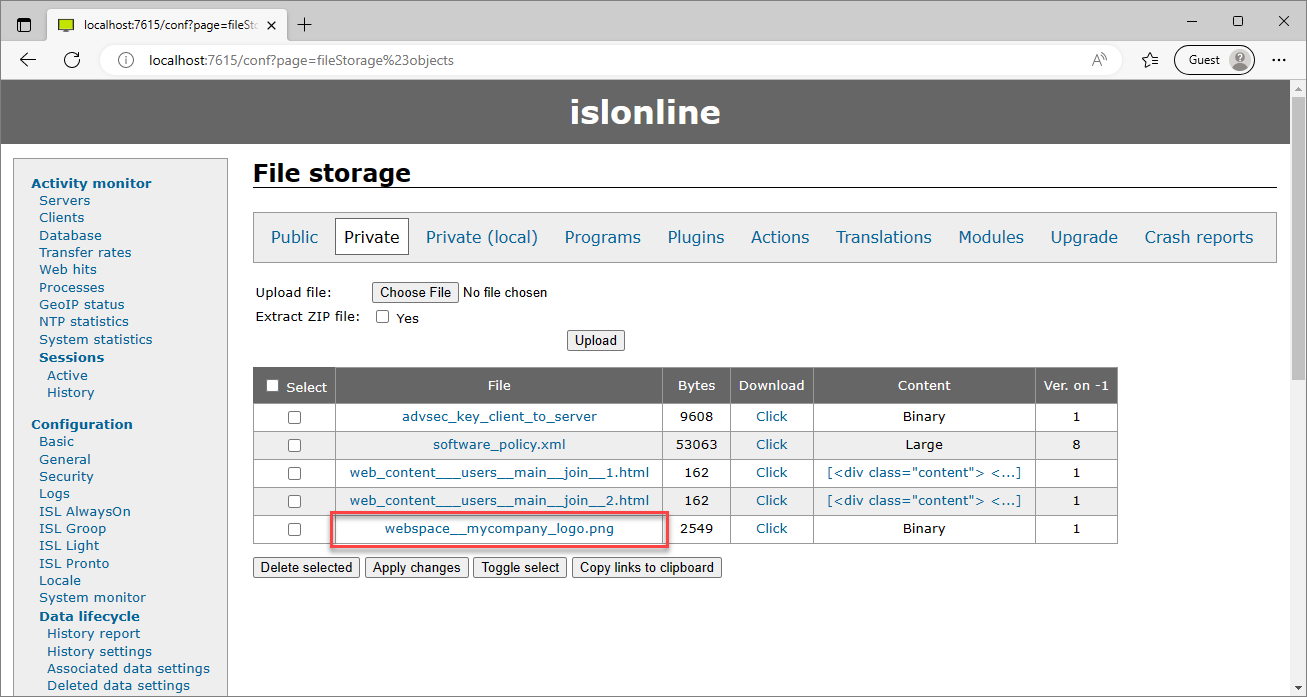
Assert the image is uploaded to storage and continue to the next example to see how to reference it in the html template
Change Logo
Save the following code as: web_template_hooks.html
{{hook|logo:src|/webspace/mycompany_logo.png}}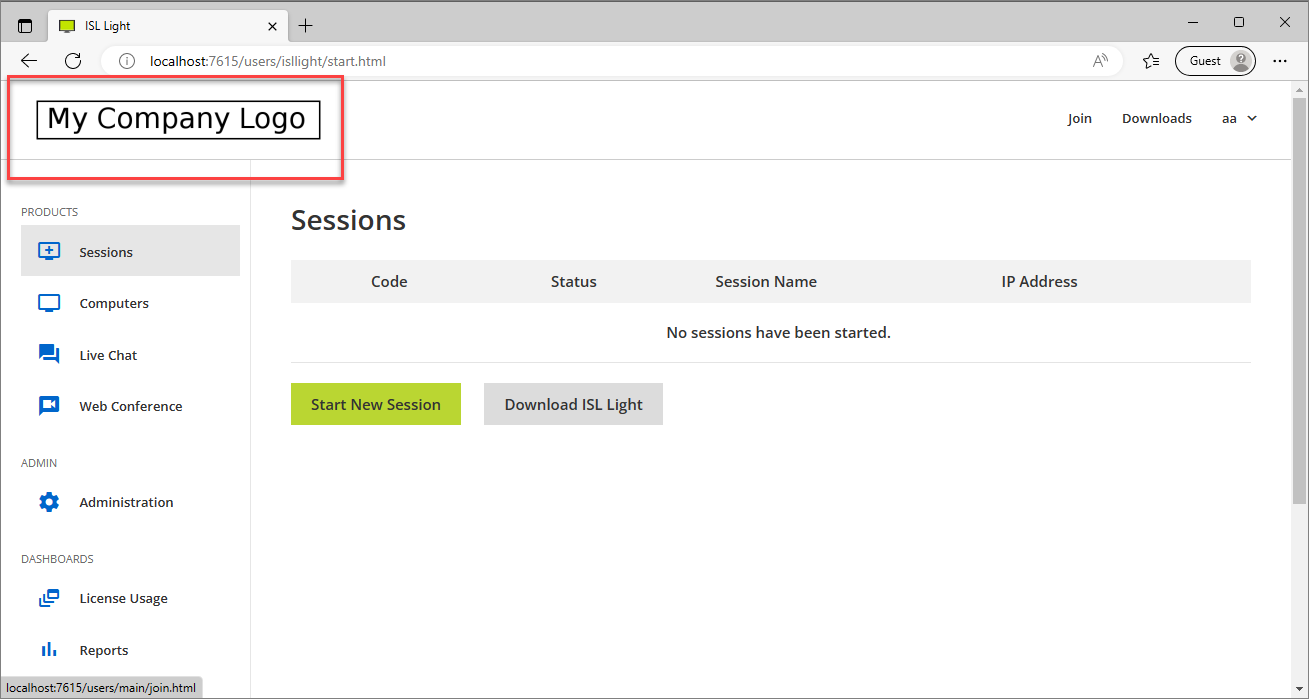
The code will replace the logo image of the web template. The logo will be replaced everywhere it appears on the web page, e.g. once the user logs into their account.
Remove links
Save the following code as: web_template_hooks.html
{{hook|logo:src|/webspace/mycompany_logo.png}}
{{hook|footer.conf|}}
{{hook|footer.help|}}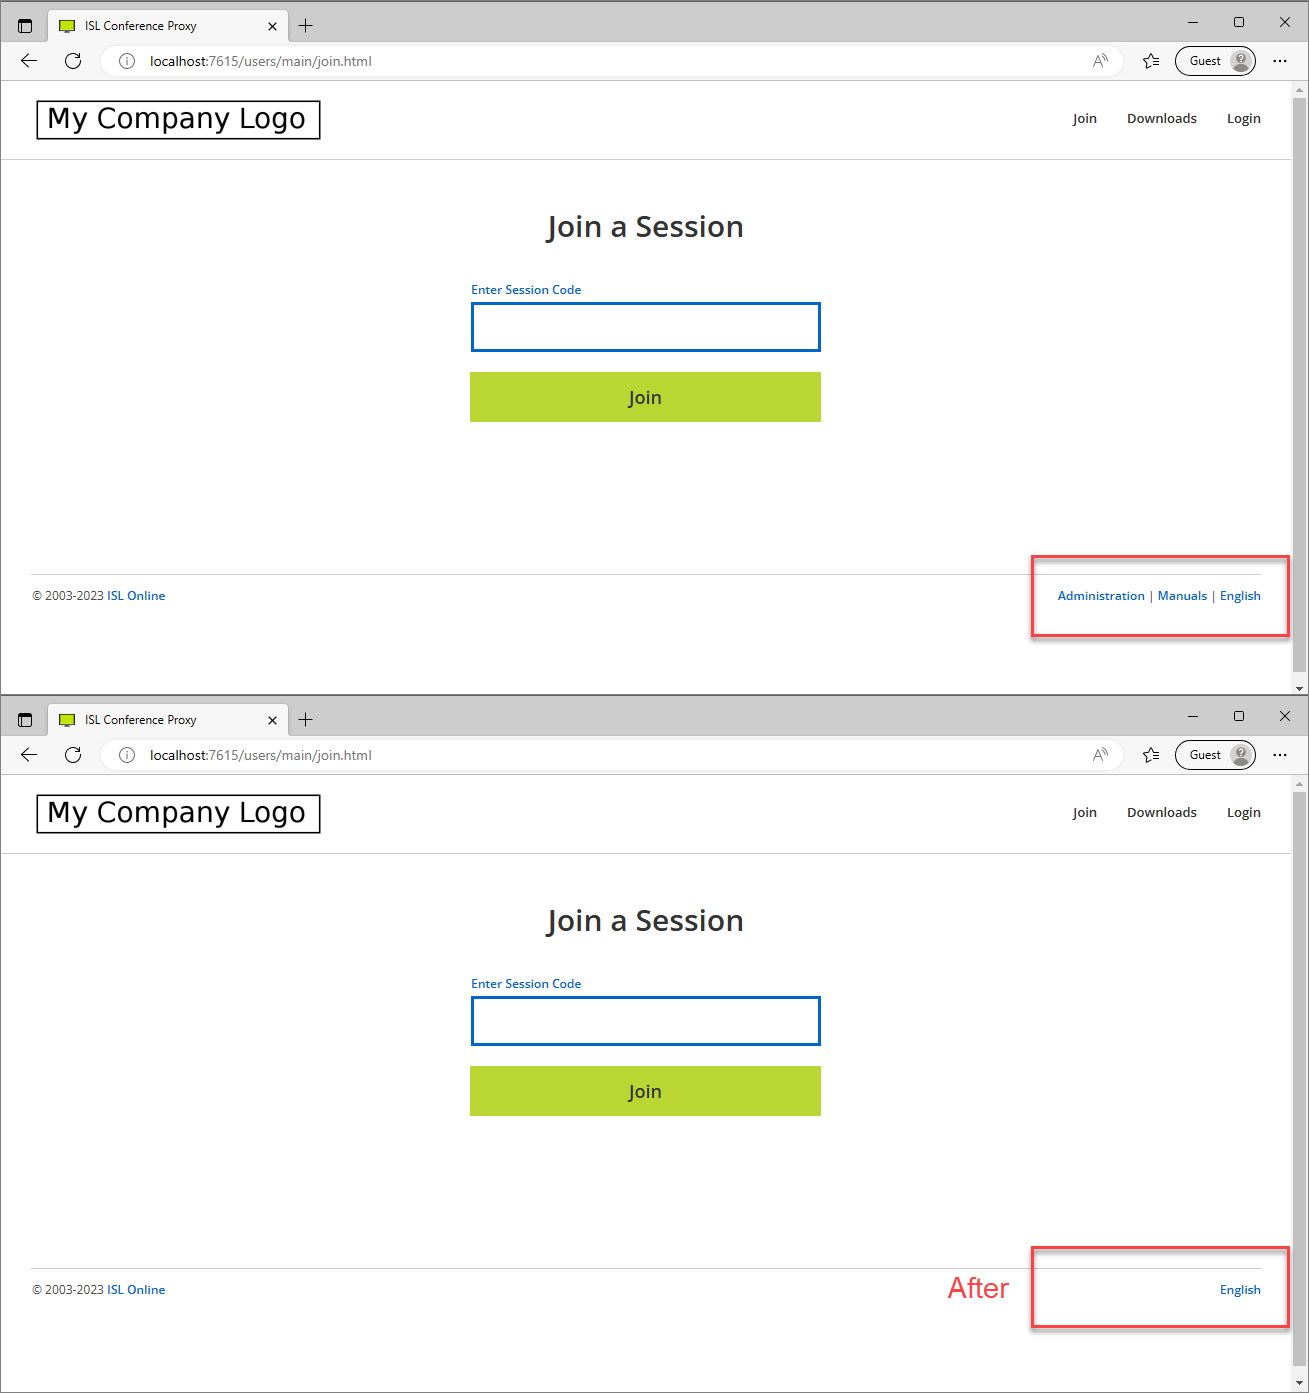
The code will remove the links in the footer of the page.
Branded Access Point
Save the following code as: web_template_hooks.html:
{{hook|logo:src|/webspace/mycompany_logo.png}}
{{hook|logo:alt|My Company Ltd. logo}}
{{hook|head.title|<title>MyCompany Support - {{html_xpp|title}}</title>}}
{{hook|navbar.downloads|}}
{{hook|footer.conf|}}
{{hook|footer.help|}}
{{hook|head#css|
<style>
a, .btn-link, .ui-dialog .ui-widget-content a {color:#b737c1;}
a:focus, a:hover, .btn-link:focus, .btn-link:hover {color:#b737c1;}
.ui-dialog button.ui-button:not(:first-child) {color: #b737c1;}
.ui-dialog button.ui-button:hover:not(:first-child) {color: #b737c1;}
a.isl-green, input.isl-green, .button.scta, .btn-cta, .ui-dialog .ui-dialog-buttonset button:first-child {color:#444444 !important;background-color:#2babe2 !important;border-color:#2babe2 !important;}
a.isl-green:hover, input.isl-green:hover, .button.scta:hover, .btn-cta:hover, .btn-cta.hover, .ui-dialog .ui-dialog-buttonset button:first-child:hover {color: #444444 !important;background-color:#a2c4c9 !important;border-color:#a2c4c9 !important;}
div.icp-input.icp-input-large input[type="text"]:focus, div.icp-input.icp-input-large input[type="password"]:focus, div.icp-input.icp-input-large input[type="email"]:focus, div.icp-input.icp-input-large input[type="tel"]:focus {border-color:#f44336;}
.search-bar.active input, .search-bar.focused input, .search-bar input[type="text"]:focus,
div.icp-input input:focus:not([readonly='readonly']), div.icp-input textarea:focus, textarea:focus, .form-control:focus, div.icp-input select:focus {border-color:#f44336;}
.float-label > label:first-child.focused {color:#b737c1 !important;}
#product-navigation-menu > li > a.active, #product-navigation-menu > li > a:hover, #product-navigation-menu > li > a:active, #product-navigation-menu > li > a:focus, #product-navigation-menu > noscript > li > a.active, #product-navigation-menu > noscript > li > a:hover, #product-navigation-menu > noscript > li > a:active, #product-navigation-menu > noscript > li > a:focus {color:#b737c1 !important;}
.float-label.focused .bordered.icp-input {border-color:#f44336;}
.isl-nav-tabs > li.nav-item > a.nav-link.active, .isl-nav-tabs > li.nav-item > a.nav-link:hover {color:#b737c1 !important;}
div.inplace-container.focus, .custom-inputs-select-container.open .button-main.dropdown-toggle, .custom-inputs-chbx-container:hover input ~ .custom-inputs-chbx-checkmark {border-color: #f44336 !important;}
.custom-inputs-chbx-container input:checked ~ .custom-inputs-chbx-checkmark {background-color: #f44336 !important;}
div.datepicker > .datepicker_inner_container > .datepicker_calendar > .datepicker_table > tbody > tr > td.active, div.datepicker > .datepicker_inner_container > .datepicker_timelist > div.timelist_item.active {background-color: #b737c1 !important;}
div.datepicker > .datepicker_inner_container > .datepicker_calendar > .datepicker_table > tbody > tr > td.today {border-color: #b737c1 !important;}
.sidebar-icon-color {color:#b737c1;}
</style>
}}
{{hook|footer|<footer class="clear">
<div class="footer wrapper">
<p class="copyright">
<span class="footer-left">Powered by <a target="_blank" href="https://www.islonline.com">ISL Online</a></span>
<span class="footer-right">
<a target="_blank" href="http://www.islonline.com">About Us</a>
|
Language: <a href="{{escape|{{change_language_link}}}}">{{escape|{{lang|native|{{lang_code}}}}}}</a>
</span>
</p>
</div>
</footer>}}
{{hook|body#end|
}}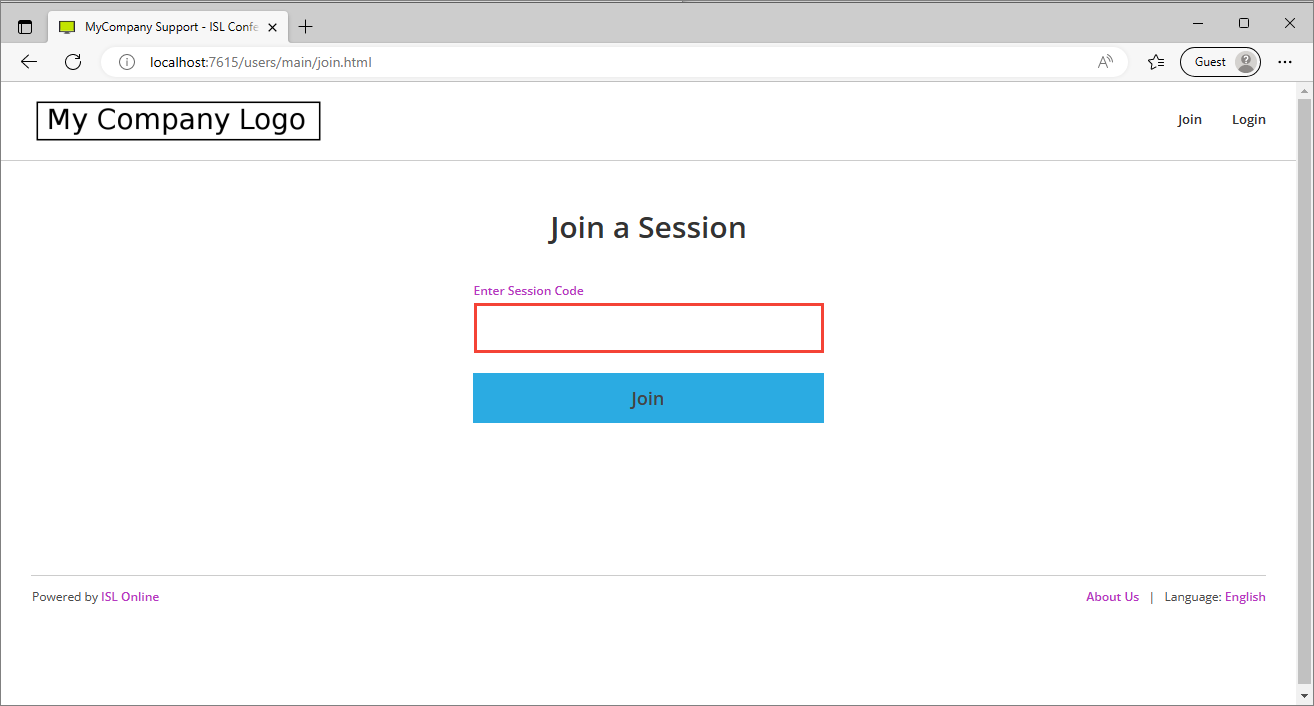
The code will make changes to the landing page of your ICP:
- Logo (in the top left is change),
- The whole colour scheme is update - button and text colours (see contents of <style> tags),
- Links in the top right ("Downloads") and bottom right ("Manuals", "Administration") are hidden,
- A new link is added in the bottom right - "About Us".
Upload and enable the template
Once the new template is ready, you need to upload it to your ICP and enable the setting so that ICP begins serving your custom template rather than the default one.
Step 1
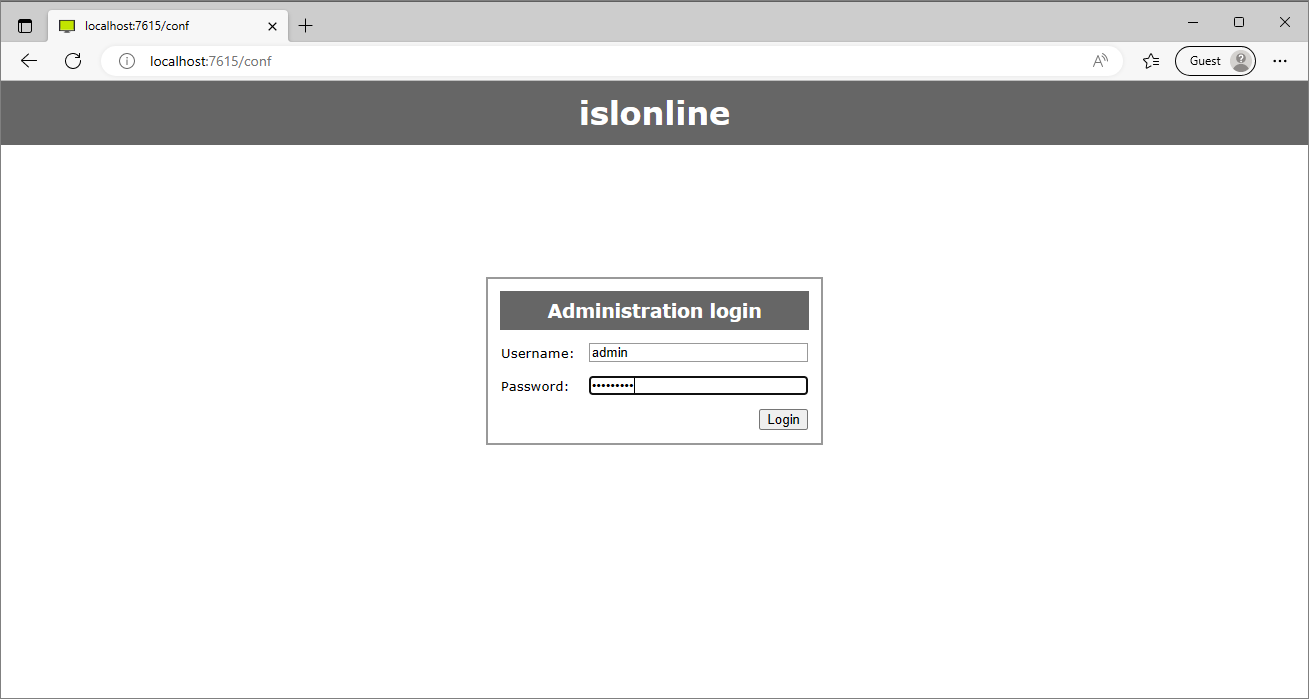
Log in to ICP administration console at <server_address>/conf
Step 2
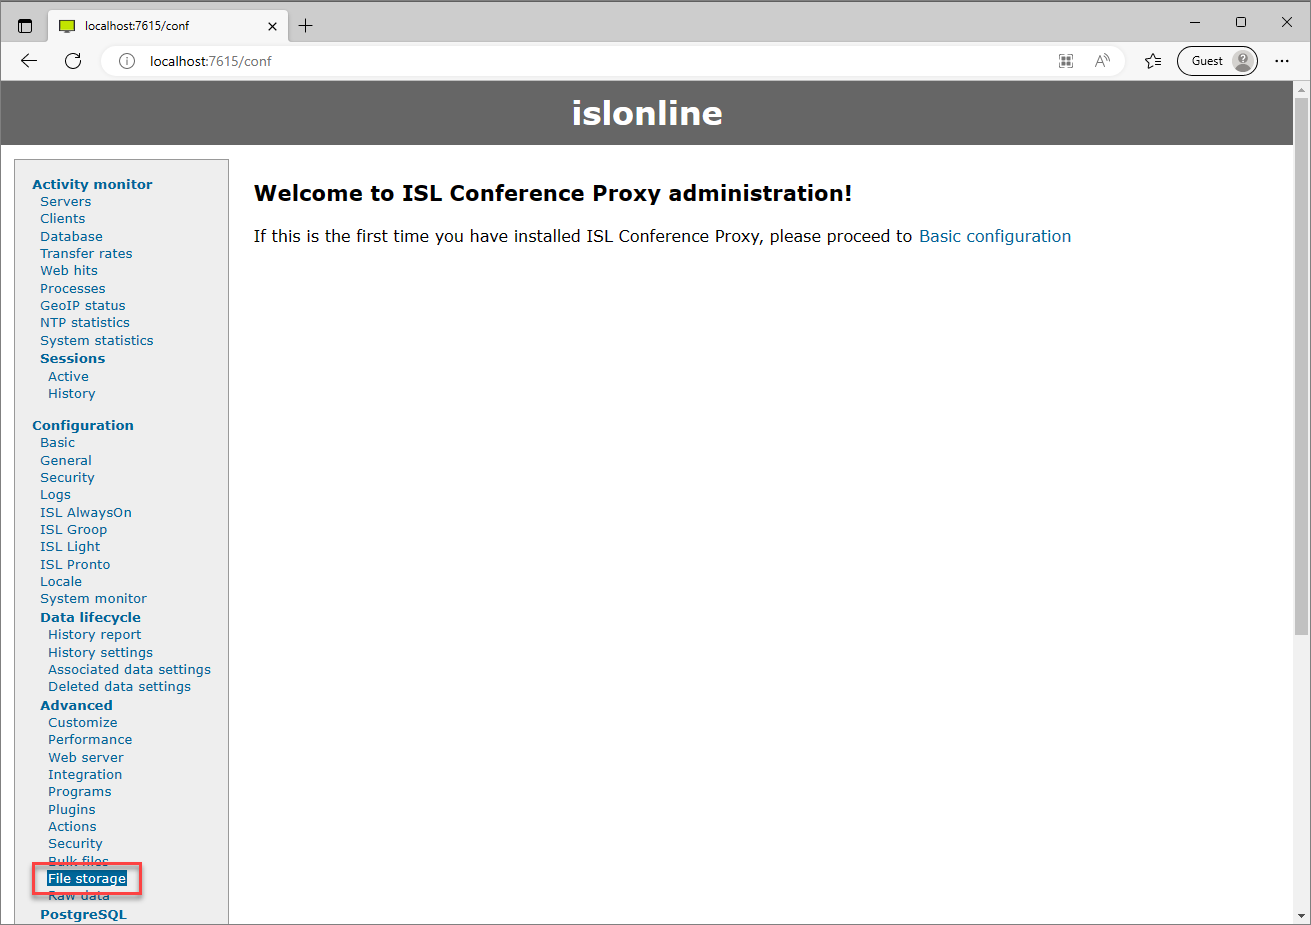
Open "File storage" section under “Configuration” -> “Advanced”
Step 3
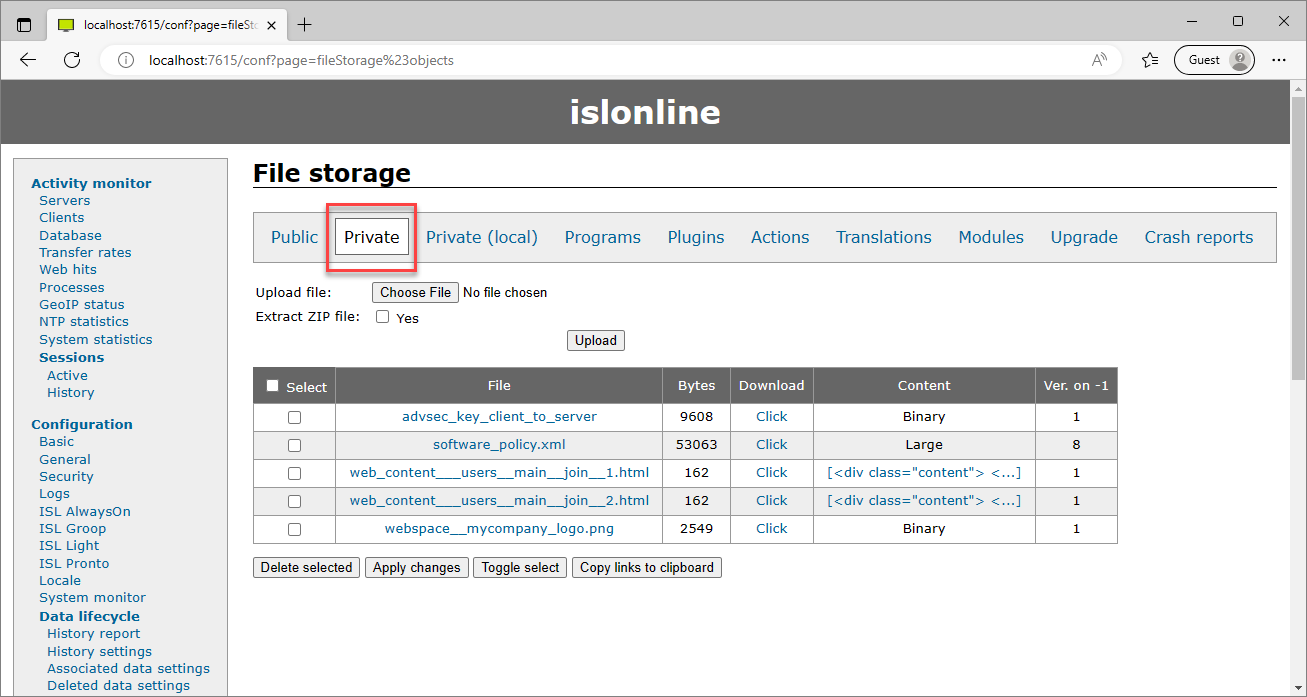
Open “Private” section
Step 4
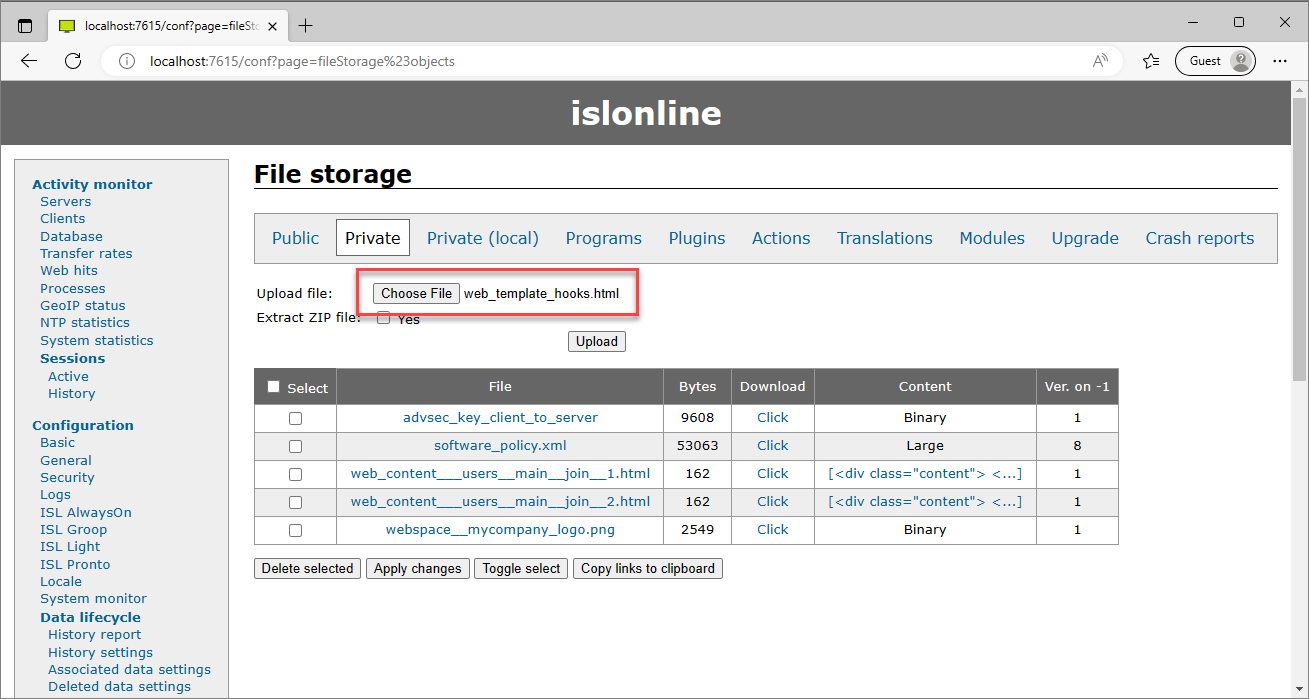
Select your html template (web_template_hooks.html) and click "Upload" to upload it to ICP storage
Step 5
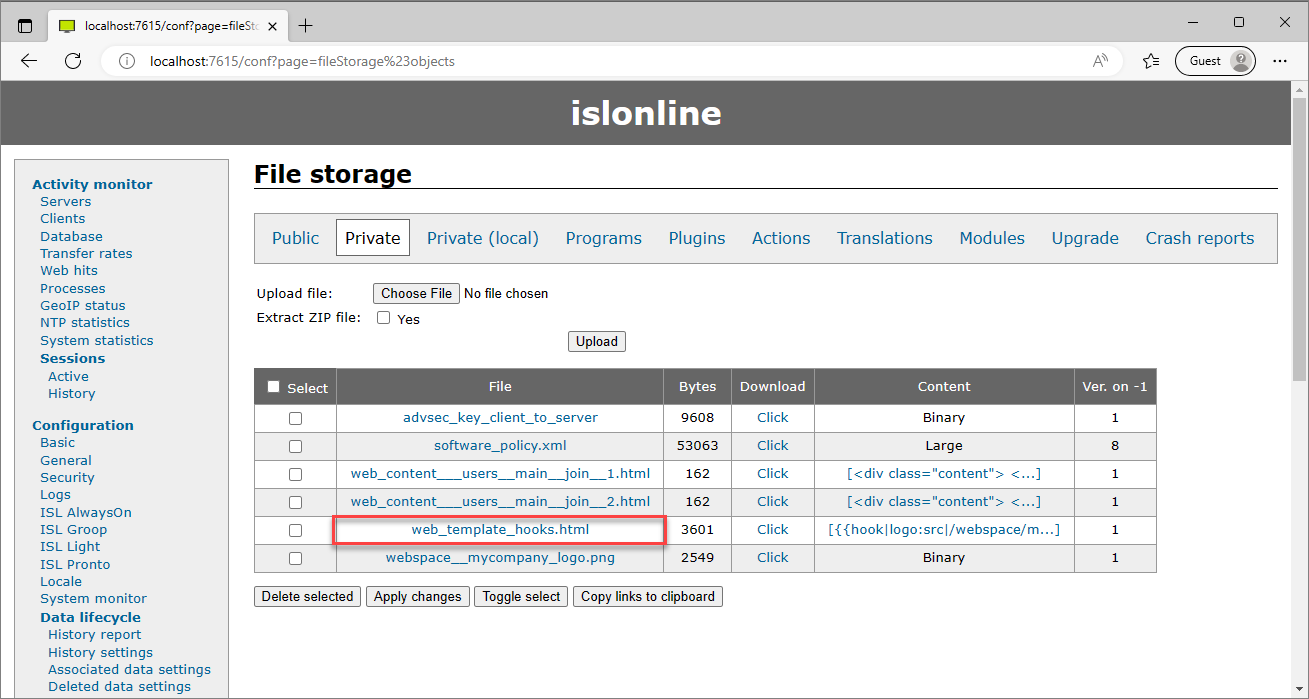
Assert the file is uploaded to storage
Step 6
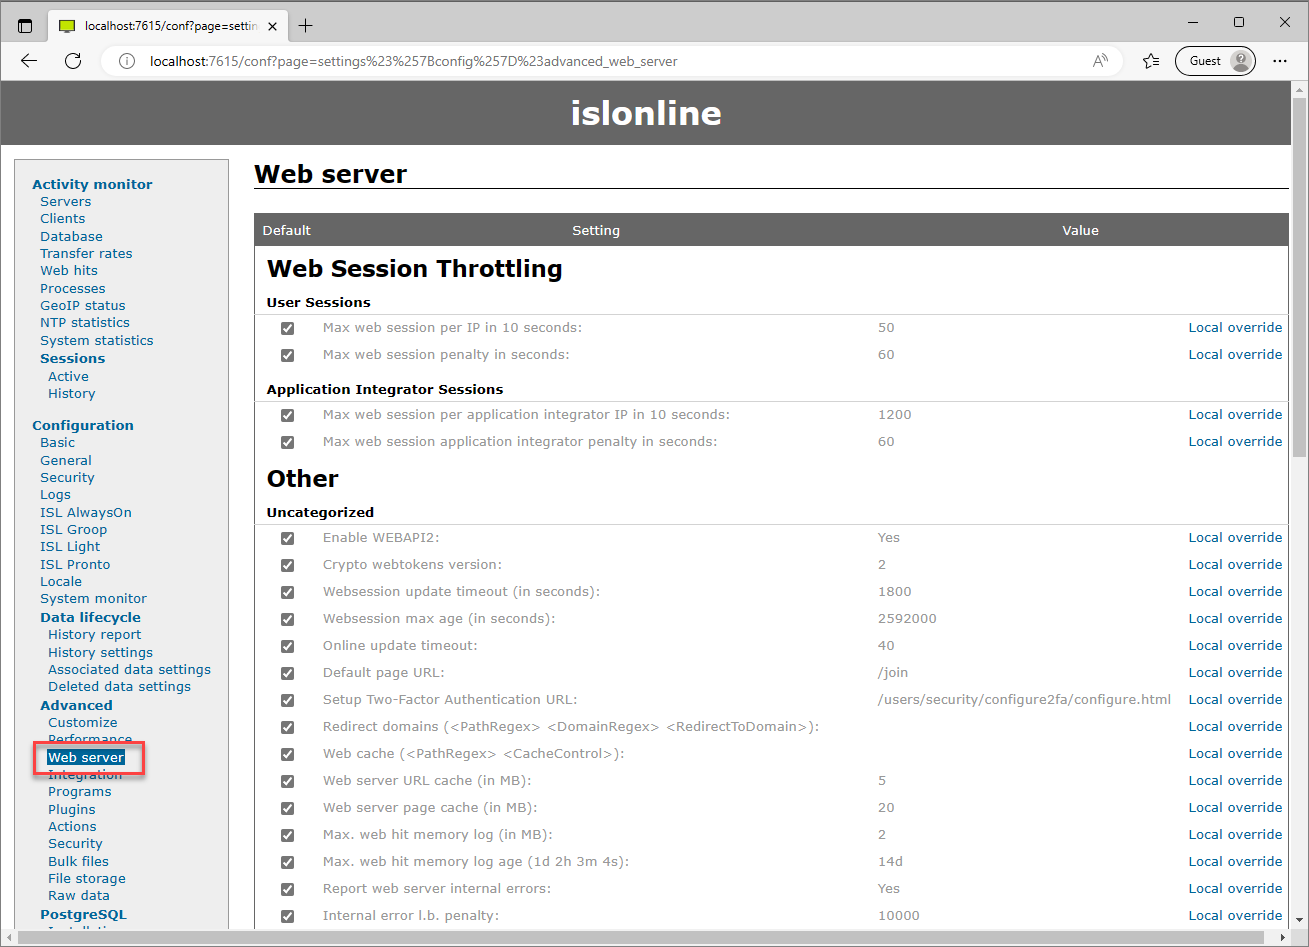
Open “Web server” section under “Configuration” → “Advanced”
Step 7
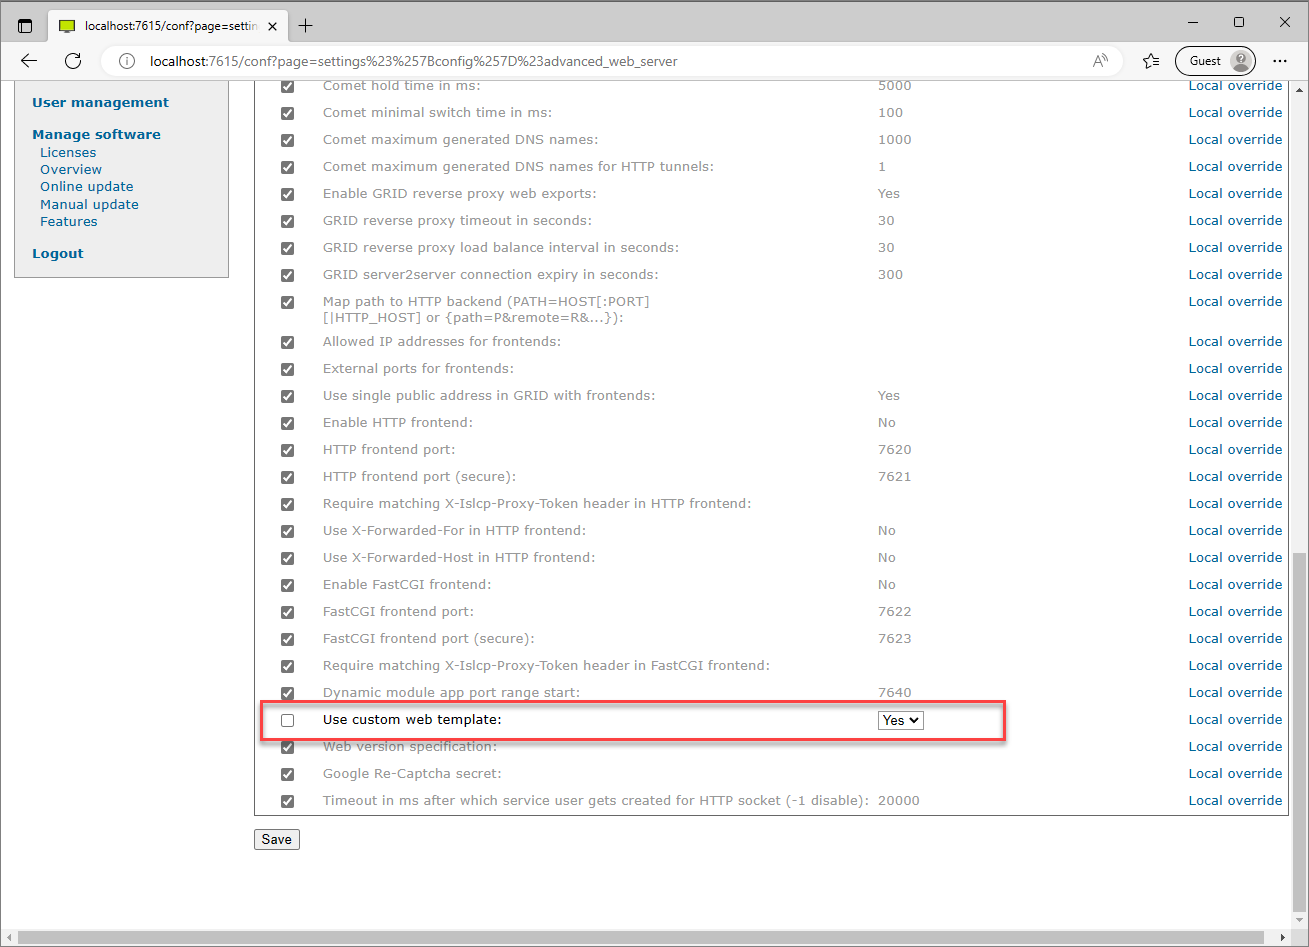
Uncheck the “Use custom web template” option and set it to “Yes”
Step 8
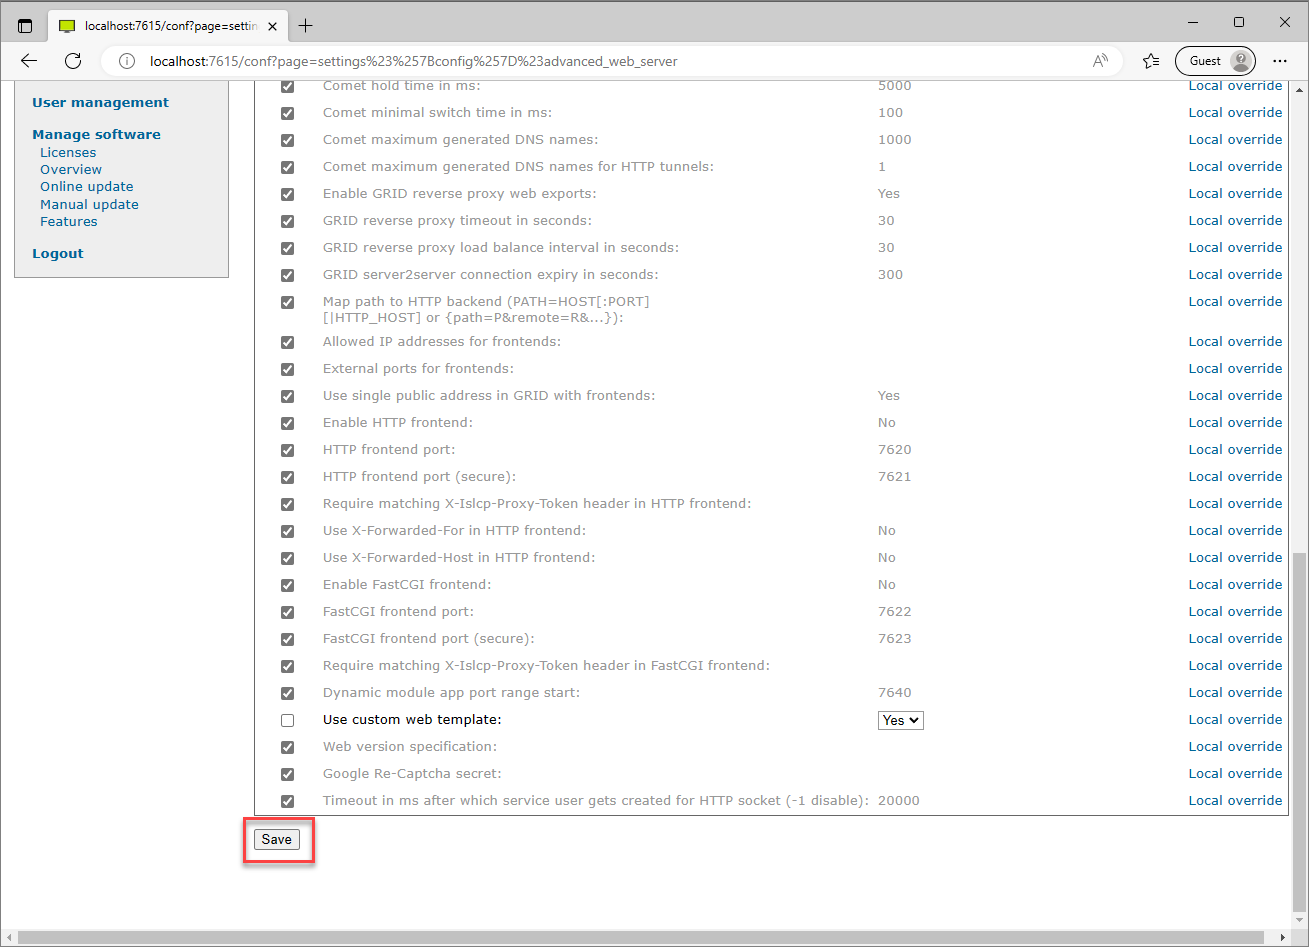
Click “Save” to begin serving your custom web template
Step 9
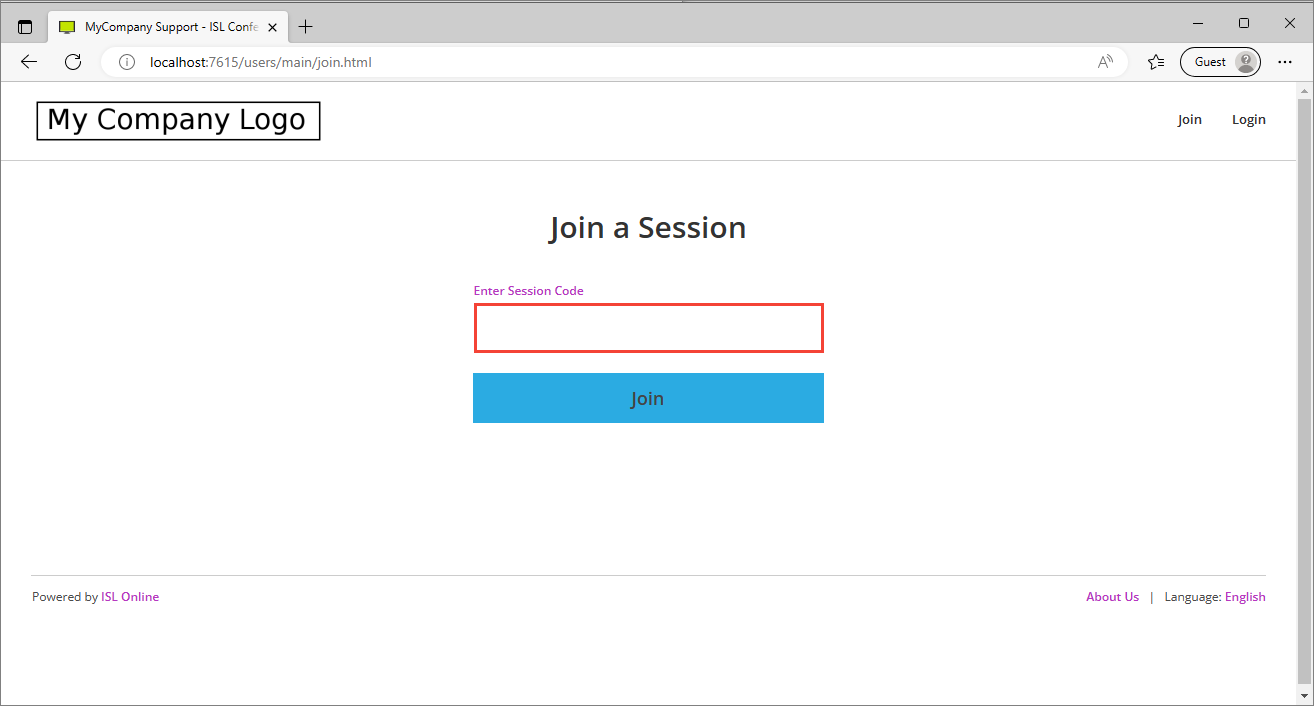
Open the “Join a Session” page of your ICP (<server_address>/users/main/join.html) to assert your new template is applied
