This topic contains the following subtopics:
Single User Limitations
You can set different limitations only for a particular user.
Step 1
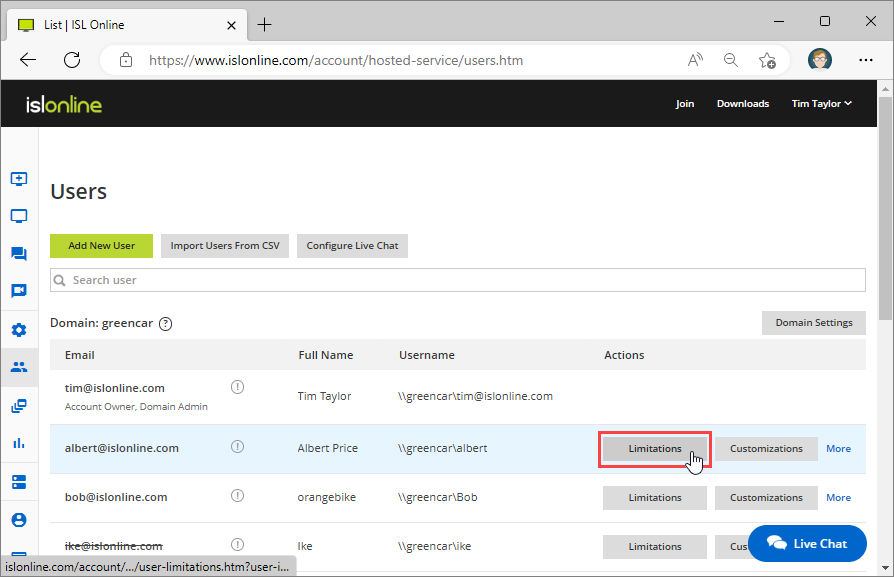 Navigate to Users tab and click "Limitations".
Step 2
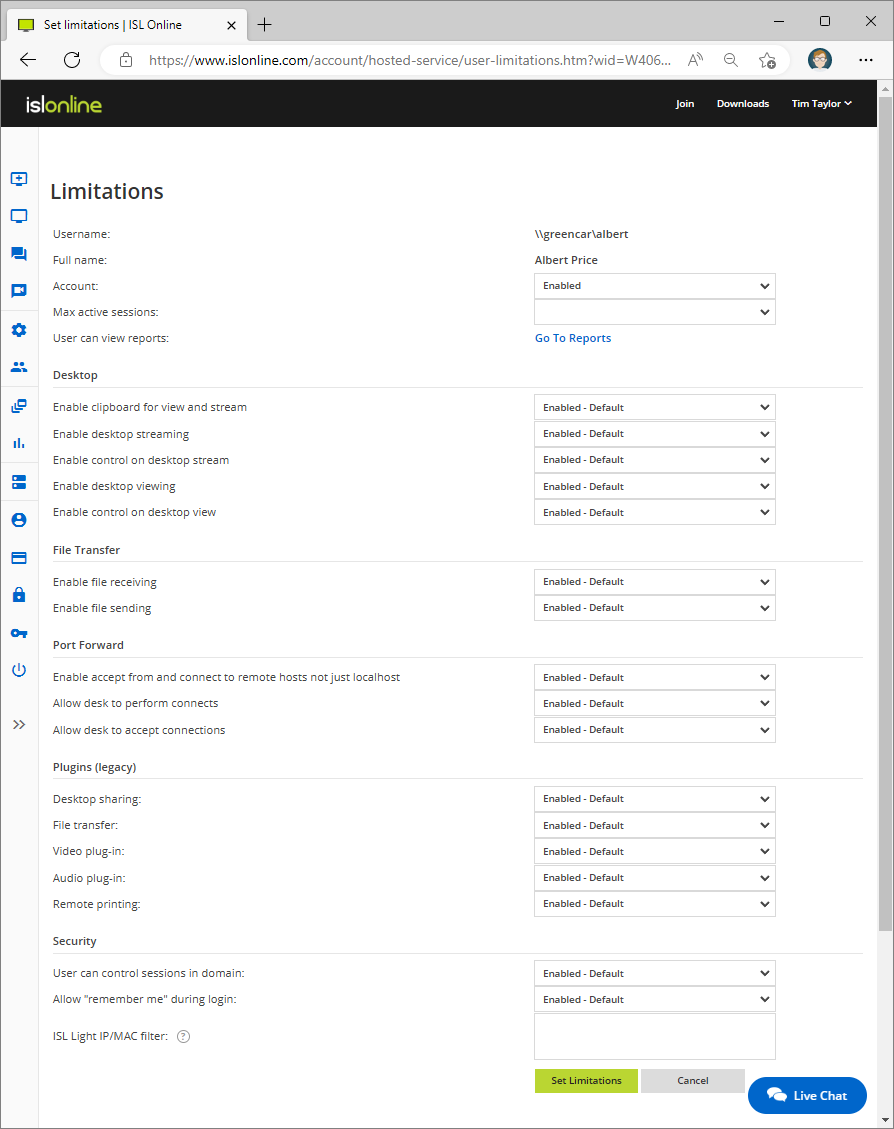 Modify the user's limitations. You can set the following limitations:
- Account (enable/disable the user account)
- Max active sessions (set the maximum number of active sessions)
- User can view reports
Desktop
- Enable clipboard for view and stream (Enables clipboard between local and remote computers. Operator can utilize the Copy (Ctrl-C) command on the remote computer and Paste (Ctrl-V) it on the local computer or vice versa. This allows for much faster work flow eliminating the need to send snippets of text via the text chat or any other means of transport to the remote side.)
- Enable desktop streaming (When enabled operator can share his screen to remote computer (client). If disabled, then the connection to your computer can still be established, but the viewing side will have no way of seeing or controlling your desktop.)
-
Enable control on desktop stream (When enabled remote computer can control operators local computer. If disabled, then the remote (client) side will enter the session in whiteboard mode. They will be able to see your desktop (If Share My Screen is enabled), but won't be able to control it. In order for the remote (client) side to control your computer, the client will ask for permission and the local (operator) side will have to grant it.)
- Enable desktop viewing (When enabled operator can view remote (client) desktop. When disabled the connection to the remote computer can be established, but the operator won't be able to see the remote desktop.)
- Enable control on desktop view (When enabled operator can control remote (client) desktop. When disabled the operator will be able to see the remote desktop but won't be able to control it.)
File Transfer
- Enable file receiving (If disabled, operator can't receive any files from remote (client) computer. Operator is still able to send files given "Send Files" is enabled.)
- Enable file sending (If disabled, operator can't send any files to remote (client) computer. Operator is still able to receive files given "Receive Files" is enabled.)
Port Forward
-
Enable accept from and connect to remote hosts not just localhost (Enable jumpbox functionality) (Enables the possibility to include tunnel endpoints other than localhost on either operator side or client side, but it also depends on the value of "Enable operator-side tunnel creation" (and also "Enable client-side tunnel creation" if doing the reverse Jumpbox tunnel). Read more about Jumpbox functionality here. )
- Allow desk to perform connects (Enables the client to create tunnels to operator. Please note that when disabled, tunnels can still be created from operator to client, unless this is prohibited by "Enable operator-side tunnel creation".)
- Allow desk to accept connections (Enables the operator to create tunnels to client. Please note that when disabled, tunnels can still be created from client to operator, unless this is prohibited by "Enable client-side tunnel creation".)
Plugins (legacy)
- Desktop sharing (enable/disable the desktop sharing)
- File transfer (enable/disable the file transfer)
- Video plugin (enable/disable the video plugin)
- Audio plugin (enable/disable the audio plugin)
- Remote printing (enable/disable the remote printing)
Security
- User can control sessions in domain
- Allow "remember me" during login
- ISL Light IP/MAC filter (set IP/MAC filters for connection)
Click "Set limitations" button when you are finished modifying the limitations.
Step 3
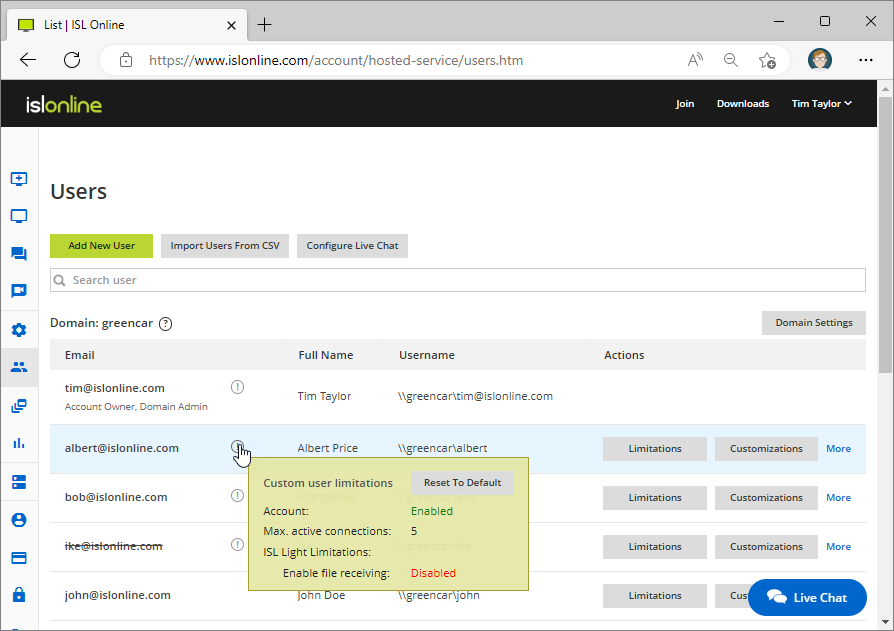 You can view the user's current limitations by hovering over "info" icon next to the user's name.
Multiple Users Limitations (Domain Limitations)
You can set certain limitations for multiple users (domain members) by modifying the domain limitations.
Step 1
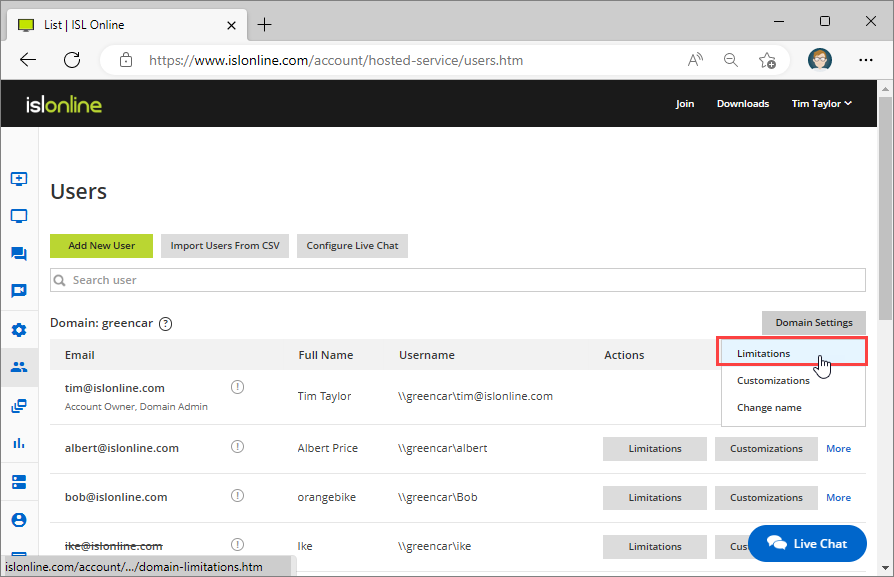 Click "Limitations" from "DOMAIN SETTINGS" drop-down menu.
Step 2
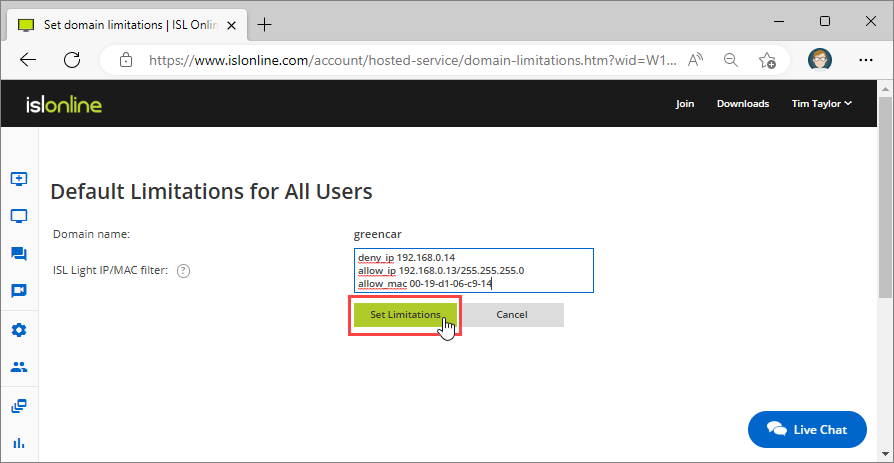 Modify the domain's limitations. You can set the following limitations:
- ISL Light IP/MAC Filter (set IP/MAC filters for connection)
Each filter definition consists of pairs of filter name and filter descriptions. Pairs are delimited with a new line or using the ; character.
Filter syntax:
(allow_|deny_)(all|ip|mac) <filter description> [;(allow_|deny_)(ip|mac) <filter description 1> ...]
First part of the pair begins with allow_ or deny_ and is followed by ip or mac (applying IP or MAC filtering). The second part (filter_description) depends on the filtering type - either an IP address/subnet/... or a MAC address using the aa-bb-cc-dd-ee format.
Example:
deny_ip 192.168.0.14
allow_ip 192.168.0.13/255.255.255.0
allow_mac 00-19-d1-06-c9-14
This will allow connections from any IP in the 192.168.0.* subnet -except a connection coming from 192.168.0.14 or from the 00-19-d1-06-c9-14 MAC address with any IP.
When accessing a computer, its access rules are read from the top down and stop immediately, when a rule is matched (whether it is allow or deny). If it gets to the bottom of the list, deny_all is implicitly used - i.e. if all the rules fail to match and it gets to the bottom of the list, access is denied. This means that you do not need to append deny_all to your list.
Important: IP and MAC addresses can be spoofed, so filters alone are not a substitute for a strong access password!
For more information about how to write filters please check the manual.
Click "Set limitations" button when you are finished modifying the limitations.
Step 3
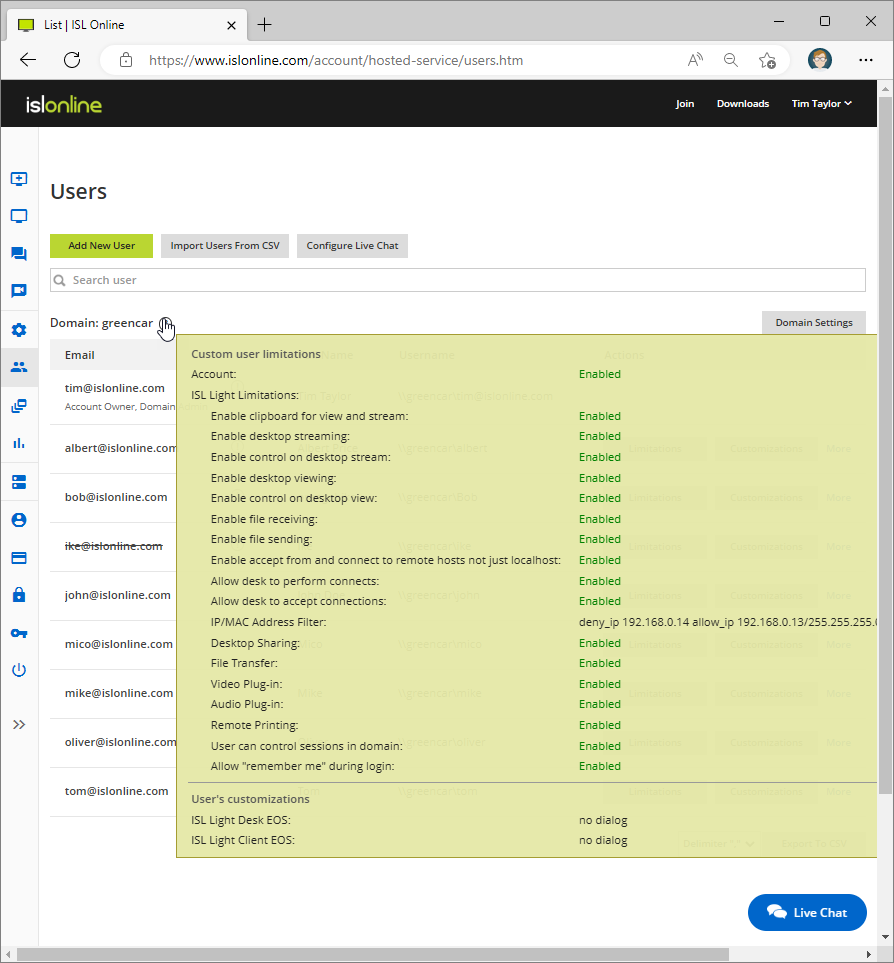 Hover the "Info" icon next to the "Domain" to see the domain limitations and customizations.