For easier deployment of ISL AlwaysOn to multiple computers, you can use one of the many different deployment tools available. In this guide, we will show you how to deploy ISL AlwaysOn on macOS computers via Microsoft Intune.
Note: If you have customized ISL AlwaysOn that you wish to deploy, change the naming of files and paths accordingly to your customization.
To deploy ISL AlwaysOn to macOS computers please follow the following guide.
macOS
ISL AlwaysOn can be deployed to macOS computers via a shell script. There are a few prerequisites that have to be met before deploying the shell script. Please check if your devices meet the following prerequisites:
- Devices are running macOS 11.0 or later.
- Devices are managed by Intune.
- The device must have Rosetta installed and working
- Devices are connected directly to the Internet. Connection through a proxy is not supported.
- Shell scripts begin with #! and must be in a valid location such as #!/bin/sh or #!/usr/bin/env zsh.
- Command-line interpreters for the applicable shells are installed.
When you have confirmed that all of the prerequisites are met, you can proceed with the next steps.
Note: If your mac device does not have Rosetta installed, the deployment will fail. You can add a function to the script that installs Rosetta for you.
Step 1
You will have to prepare an ISL AlwaysOn silent installer URL. Please check Custom Deployment Link manual on how to do that. Once you have the prepared URL, you will have to remove “+ignore_system_account” argument from the URL and add “&platform=mac” at the end of the URL. Here is an example on how the prepared ISL AlwaysOn silent installer URL should look like:
https://ICP_ADDRESS/download/ISLAlwaysOn?cmdline=%2FVERYSILENT+grant_silent+%22GRANT_BLOB%22+password+%22URL_ENCODED_PASSWORD%22&platform=mac
Note: You can use this example to prepare ISL AlwaysOn silent installer URL for your case. Please adjust ICP_ADDRESS, GRANT_BLOB and URL_ENCODED_PASSWORD to your use case. Additionally please make sure to use /download, the deployment fails if /start is used!
Step 2
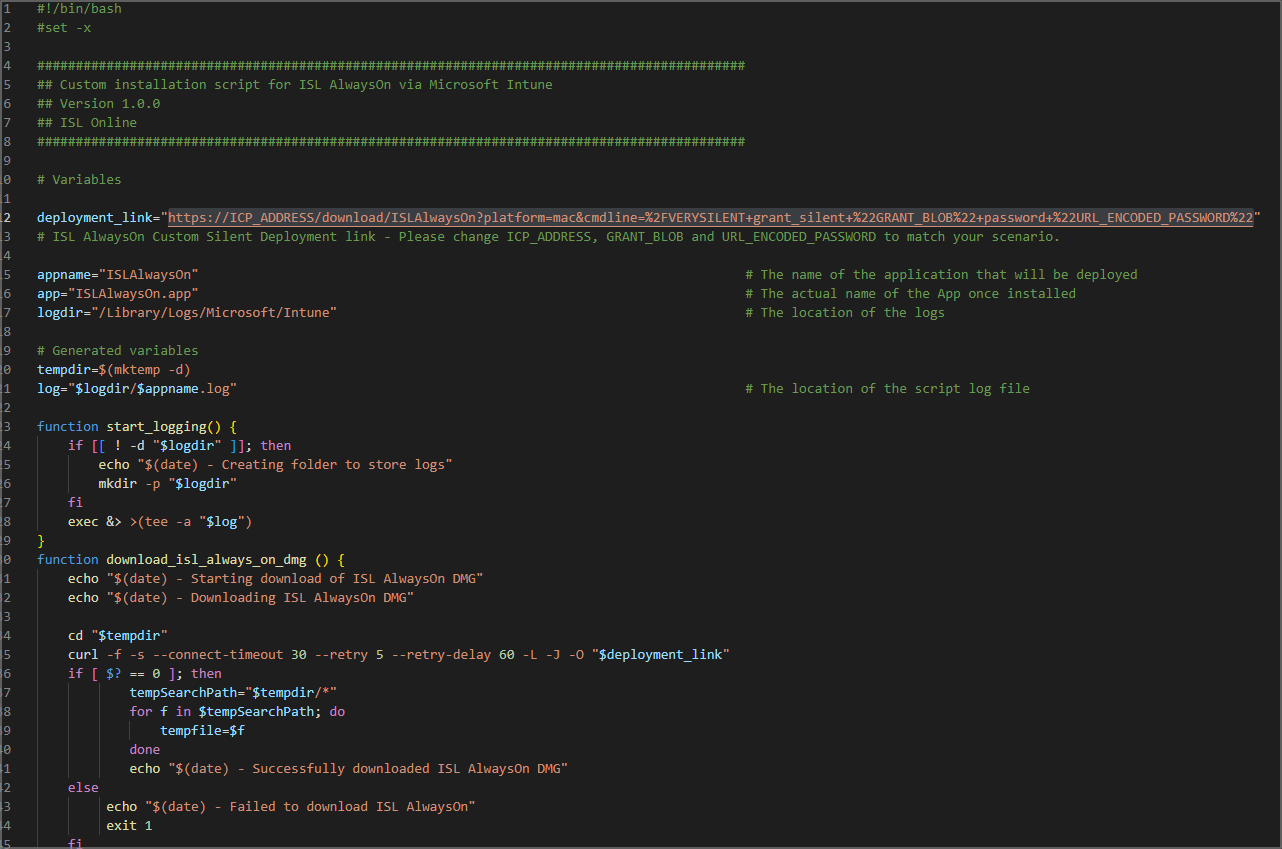
Download the shell script from here. Edit the downloaded script, replace the value of variable deployment_link with the URL that you have created in the previous step and save the adjusted script.
Note: If you are using a selfsigned certificate on your ISL Conference Proxy, you should add -k flag to curl command to allow “insecure” connections.
"curl -f -s -k --connect-timeout 30 --retry 5 --retry-delay 60 -L -J -O "$deployment_link""
Step 3
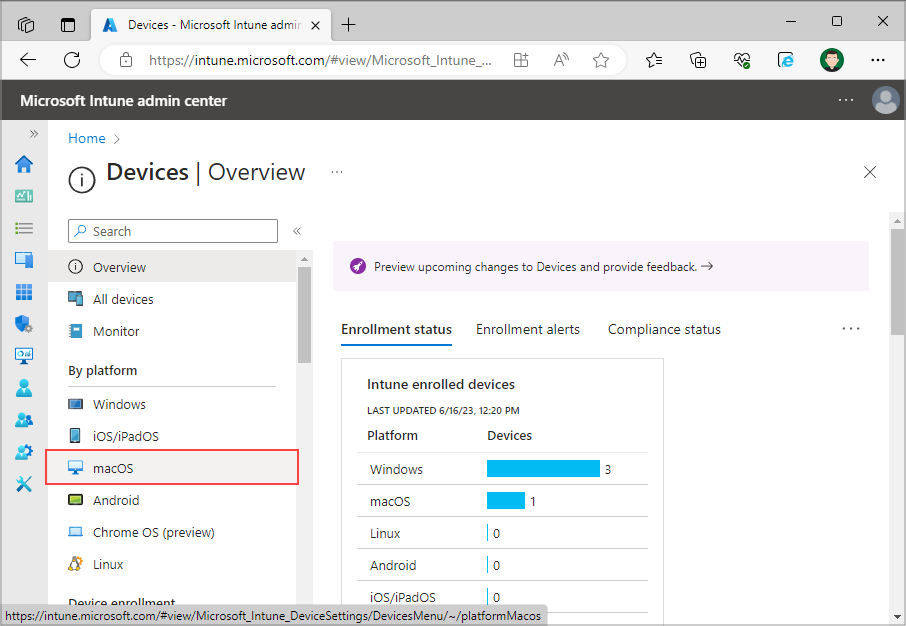
Navigate to Microsoft Intune, select Devices on the left menu and click on “macOS” under “By platform”.
Step 4
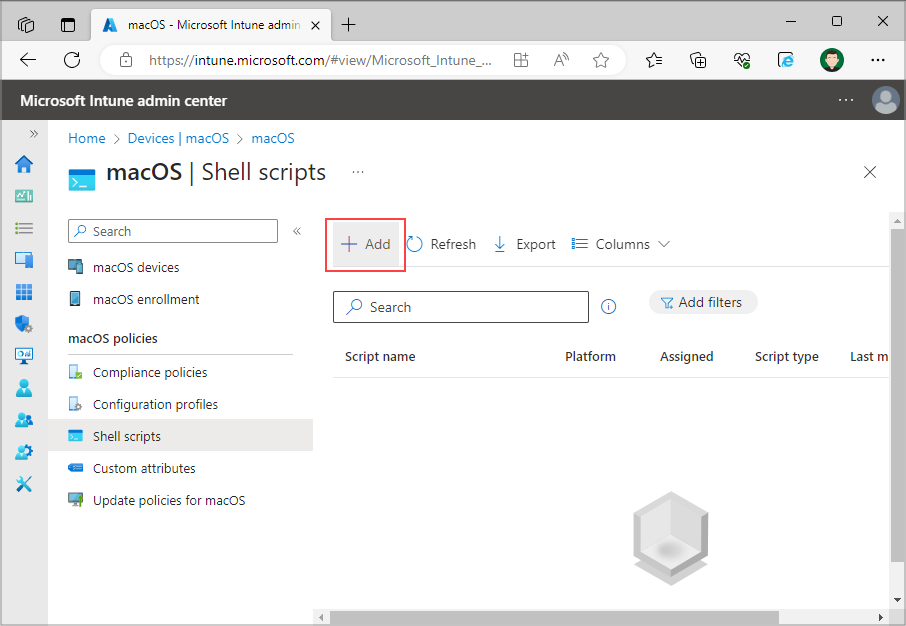
On the following page select “Shell scripts” under “macOS policies” and click on “Add button” in order to add new script.
Step 5
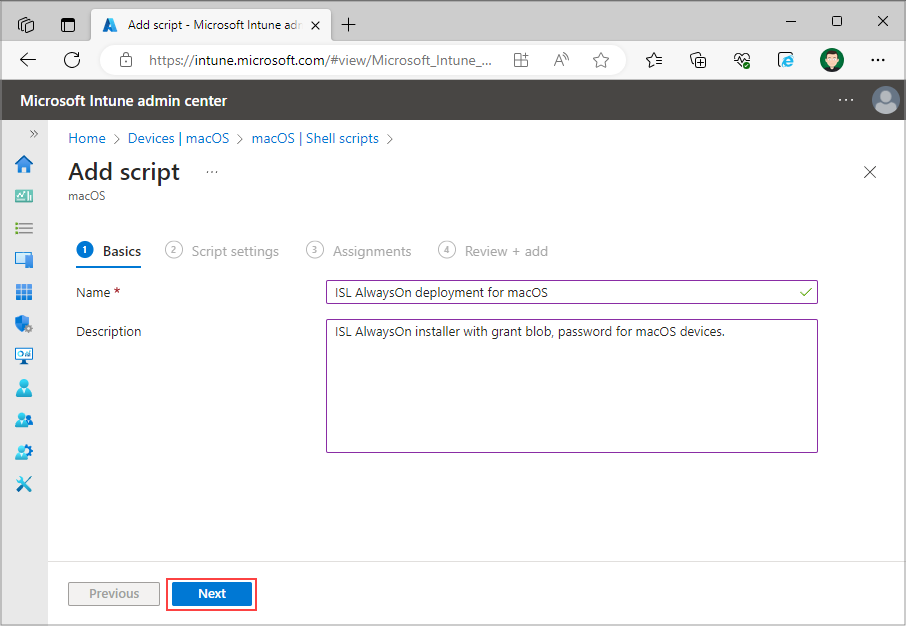
Add a name for your script, a description and then proceed to the next page.
Step 6
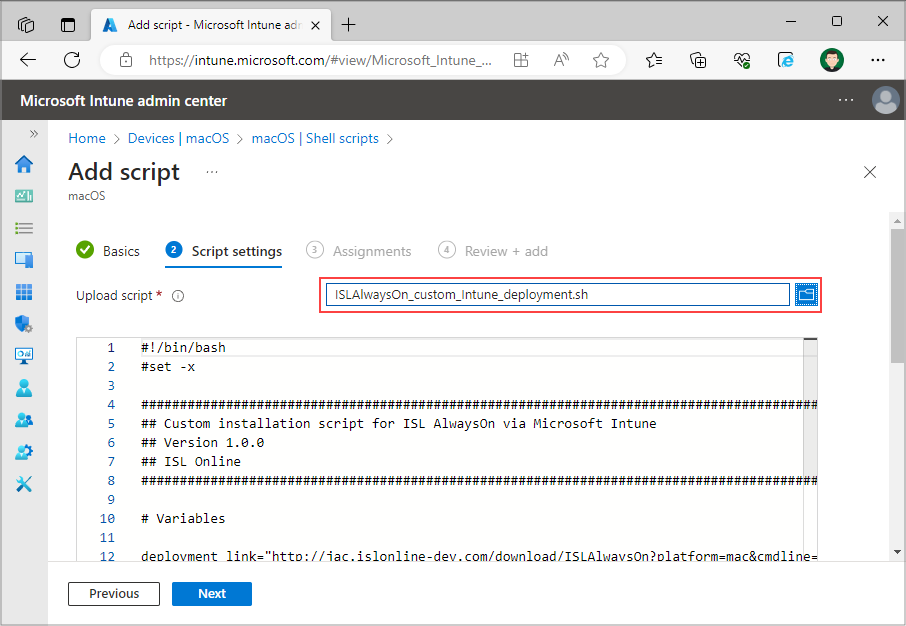
Click on “Select a file” and upload your adjusted script.
Step 7
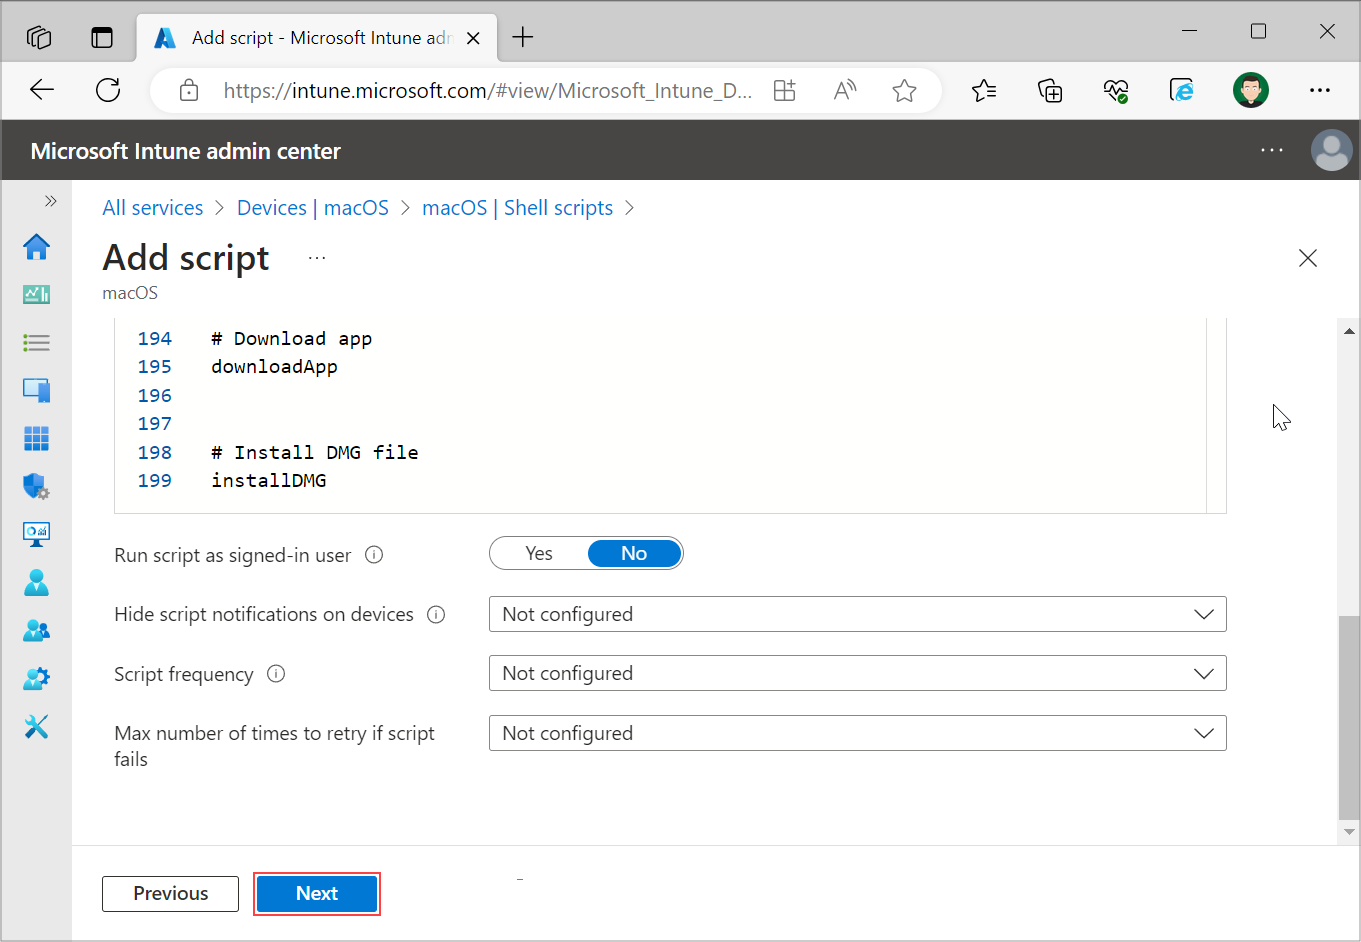
Under the script adjust the deployment setting and select “Next”.
Note: Set setting “Run script as signed-in user” as no. The script is supposed to be executed as root on the macOS device.
Step 8
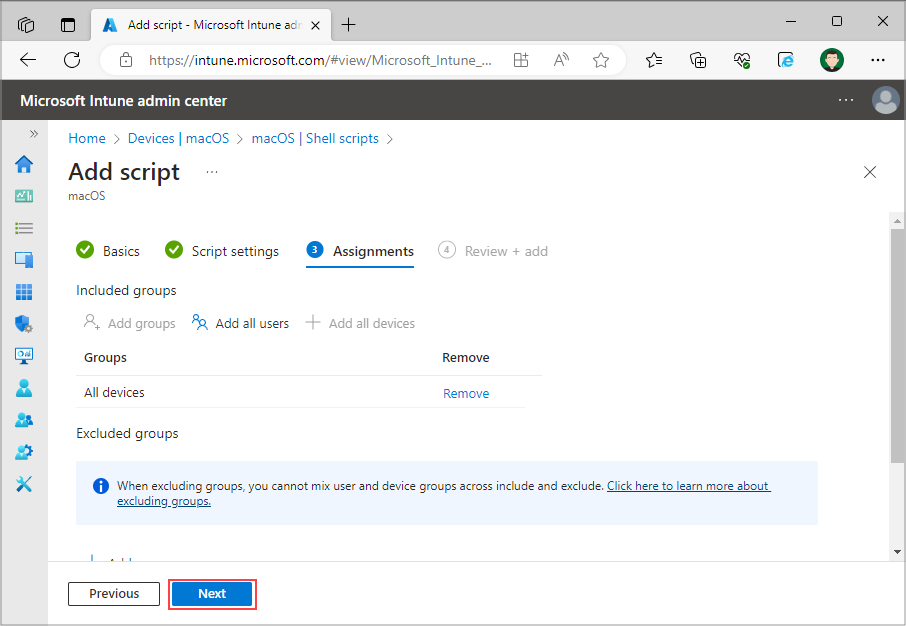
On “Assignments” page assign the script to the groups, users or devices on which you want to deploy the script and select “Next”.
Step 9
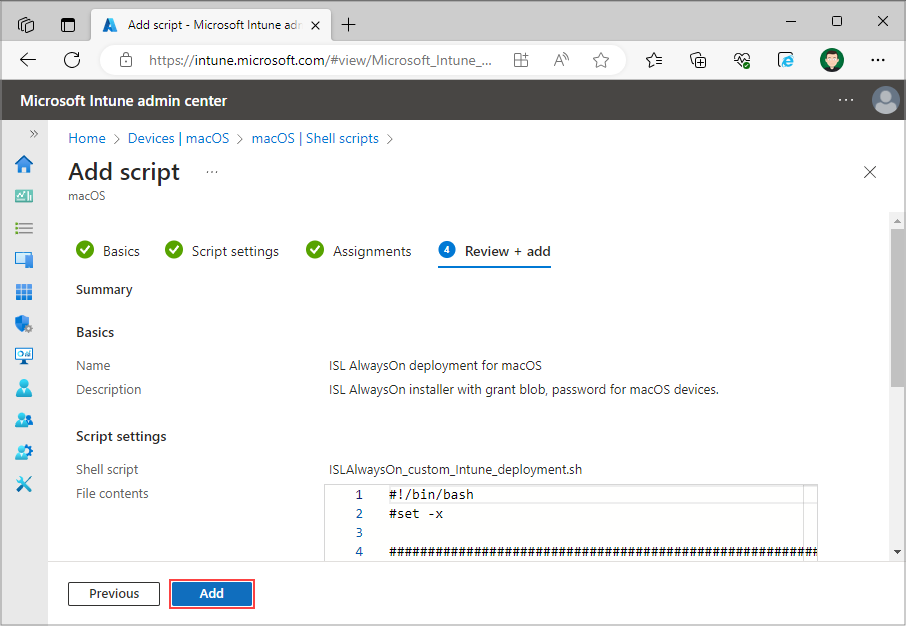
Review and add the deployment script by selecting “Add”.
Step 10
Script will be executed automatically on the devices that were assigned in step 8.
Step 11
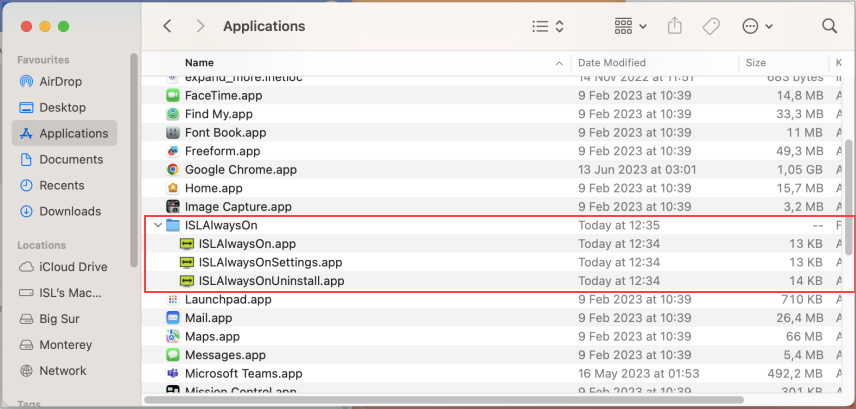
You have successfully deployed ISL AlwaysOn on macOS via Microsoft Intune.