The Microsoft AD FS setup is separated into two parts. Firstly the steps that need to be performed on ISL Conference Proxy (ICP) are shown, followed by the steps that need to be performed in the Microsoft AD FS system. Please refer to the relevant part:
Setup - ISL Conference Proxy
Step 1
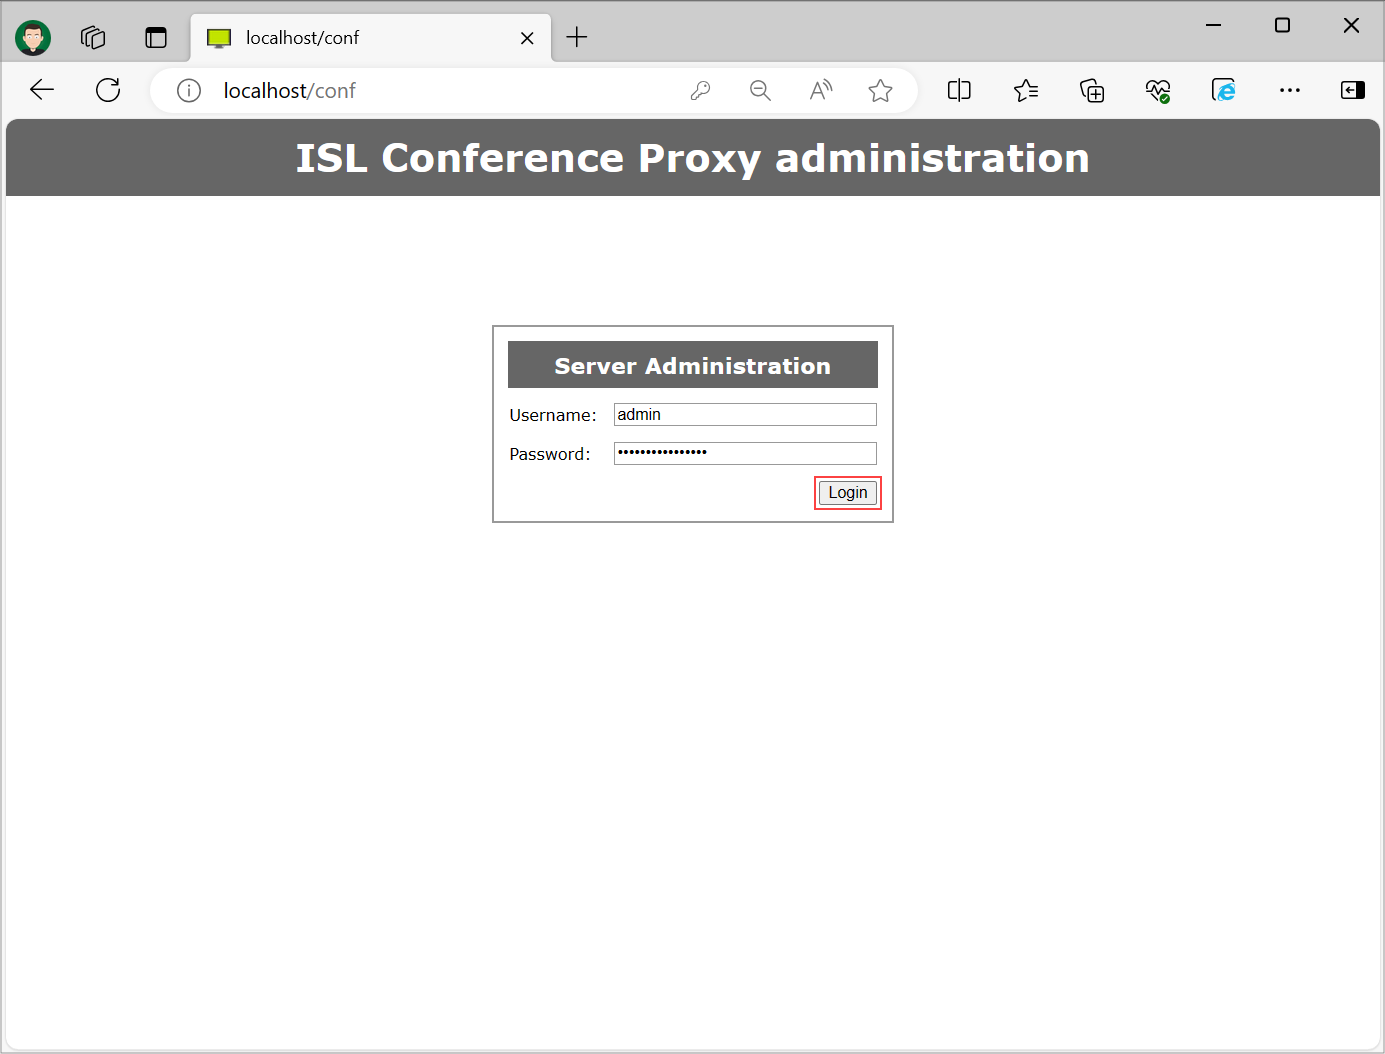
Login to your ISL Conference Proxy configuration page.
Step 2
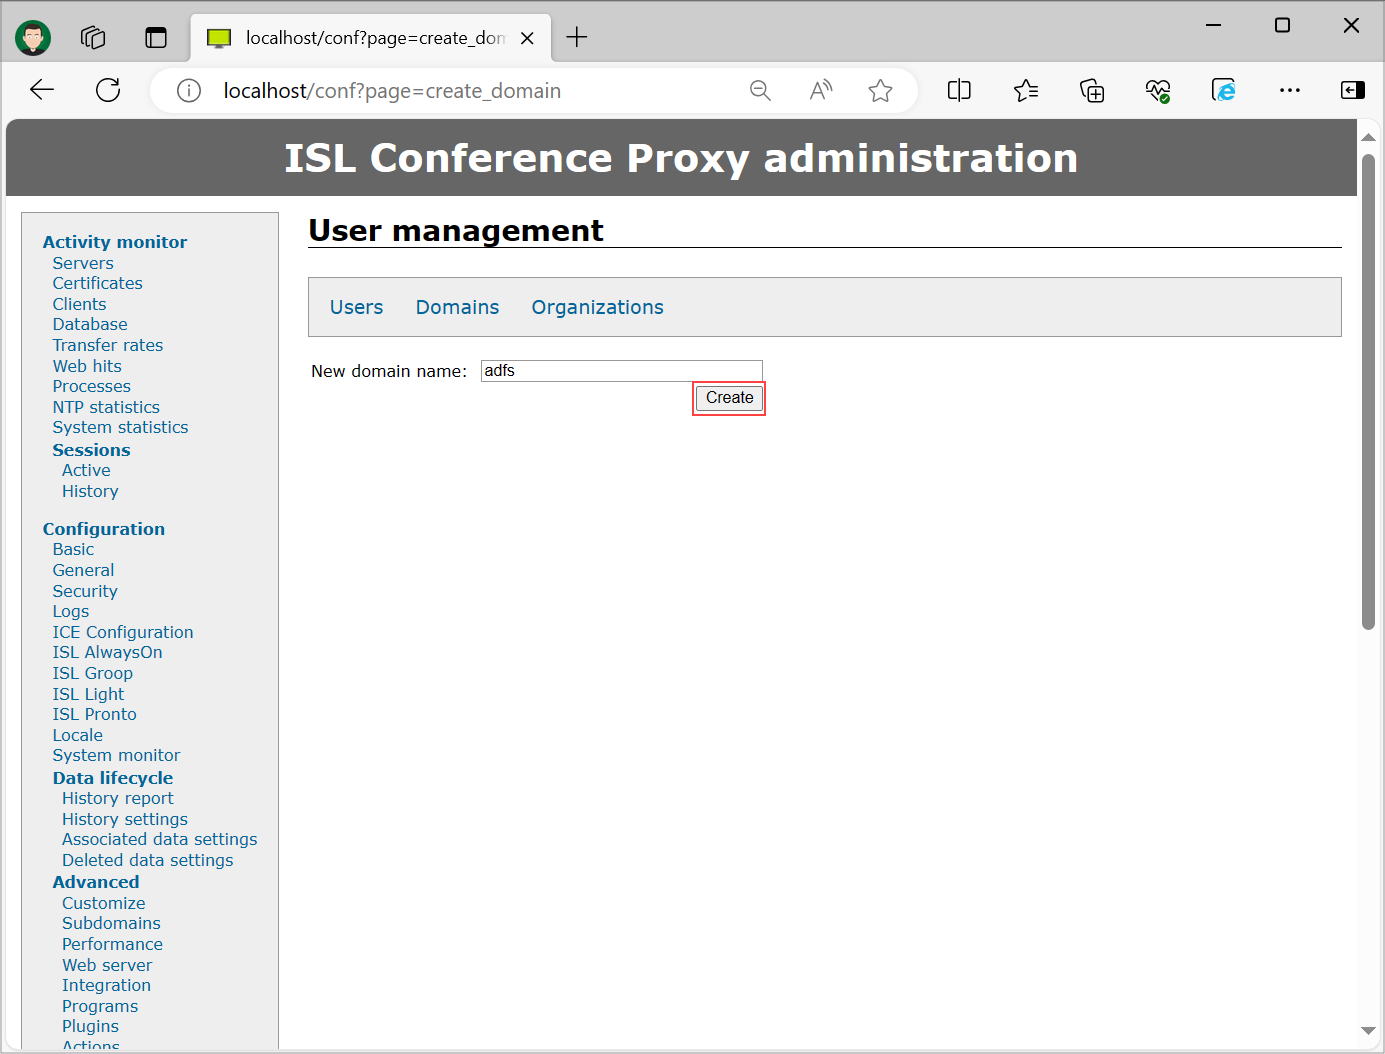
Create an additional domain for Single Sign-On users. A new domain can be created under "User management" -> "Domains" -> "Create domain".
Step 3
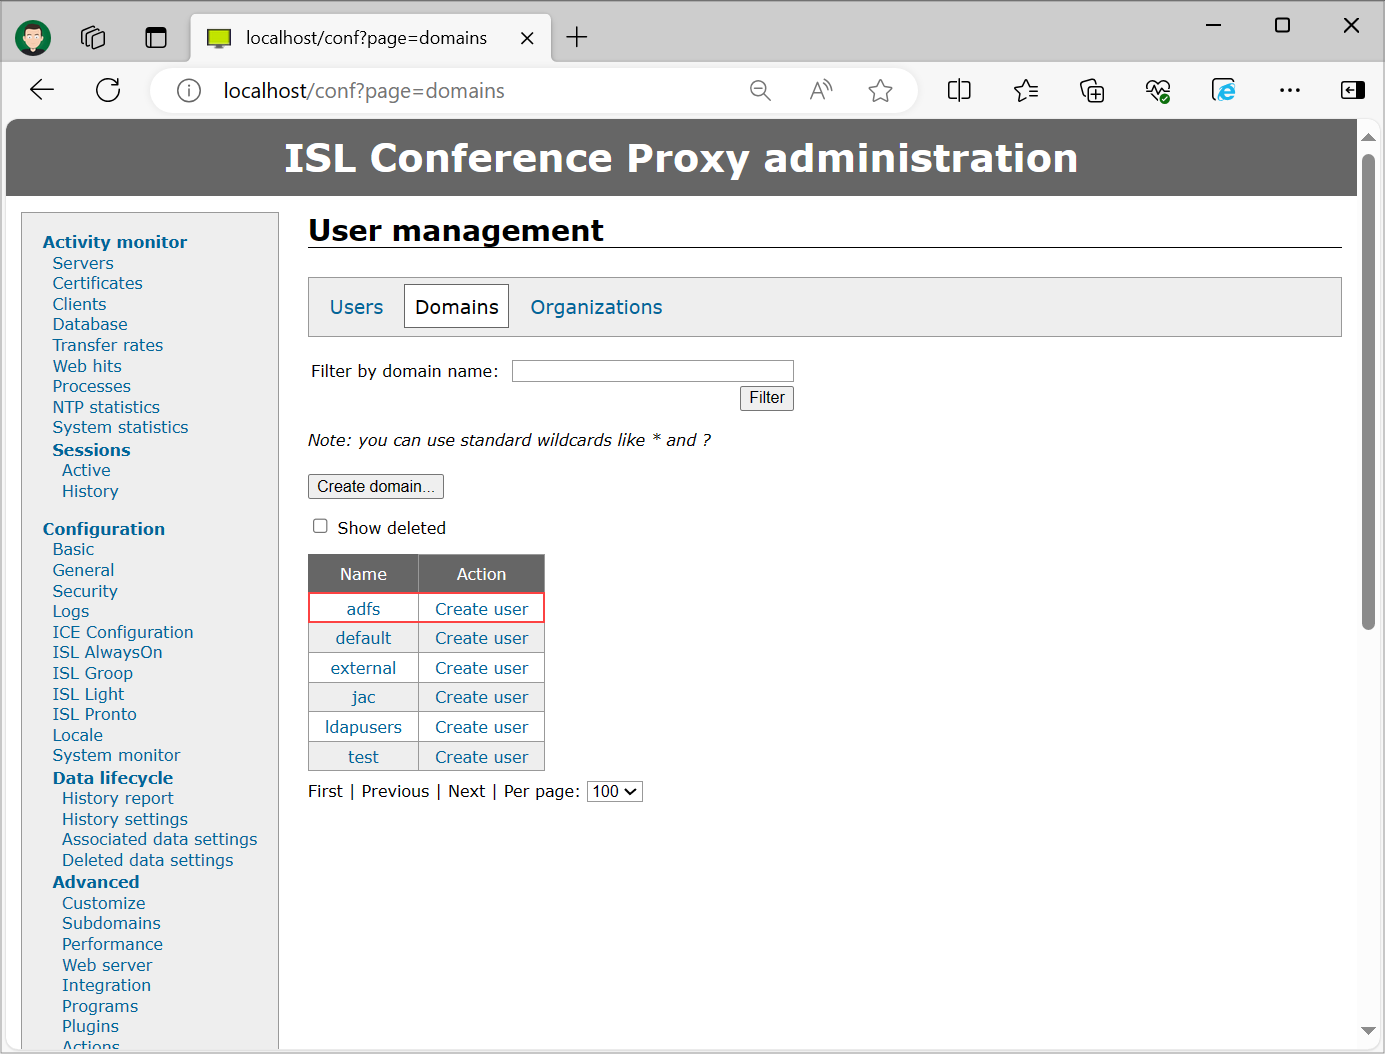
In this example we have created a Domain "adfs".
Step 4
Generate Service Provider (ICP) key-pair (public certificate file and private key). These keys will be used when Service Provider (ICP) communicates with Identity Provider (Microsoft AD FS). The simplest way of generating the key par is using the OpenSSL tool and issuing the commands below. In the first and the second command replace the domain with your domain that you have created on ISL Conference Proxy and in the second command replace the isl.example.com with your ISL Conference Proxy server address.
openssl genrsa -out sso_saml_domain_sp.key -aes128 2048
openssl req -x509 -key sso_saml_domain_sp.key -out sso_saml_domain_sp.cert -days 3650 -subj "/CN=isl.example.com"
Important: ISL Conference Proxy supports the traditional PEM format (Non PKCS 8). If you are generating a key with OpenSSL 3.x.y, which generates the PKCS 8 by default, use the -traditional flag.
openssl genrsa -traditional -out sso_saml_domain_sp.key -aes128 2048
Step 5
Obtain Identity Provider metadata XML and save it to XML file (e.g. sso_saml_domain_idp.xml). For Microsoft AD FS the metadata file can be accessed via an endpoint on your Microsoft AD FS server (as described here: Configuring ADFS as an identity provider - step 2). The endpoint for file download should look something like: https://<your_adfs_server>/FederationMetadata/2007-06/FederationMetadata.xml
Important: Replacing Identity Provider metadata XML file on your ISL Conference Proxy requires restart of module apps. Navigate to "ISL Conference Proxy web administration" -> "Activity monitor" -> "Servers", select each server and click "Restart module apps" one by one.
Step 6
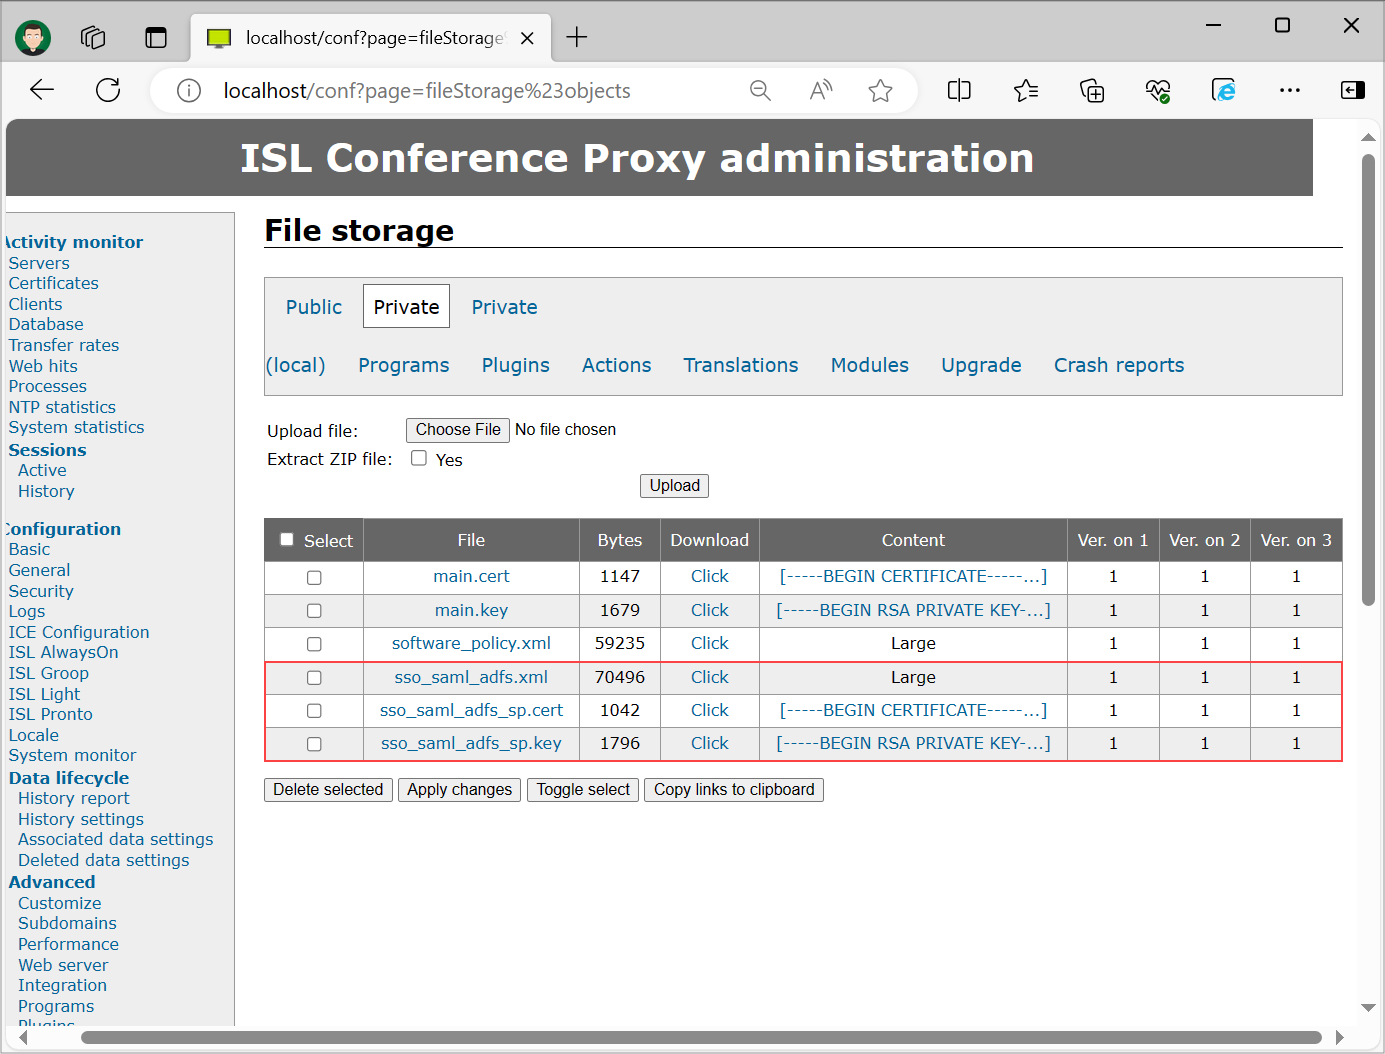
Upload the key-pair (from Step 4) and metadata XML (from Step 5) to ICP Private File storage. you can access Private File storage by opening “ISL Conference Proxy web administration" -> "Configuration" -> "Advanced" -> "File storage" -> "Private”.
Step 7

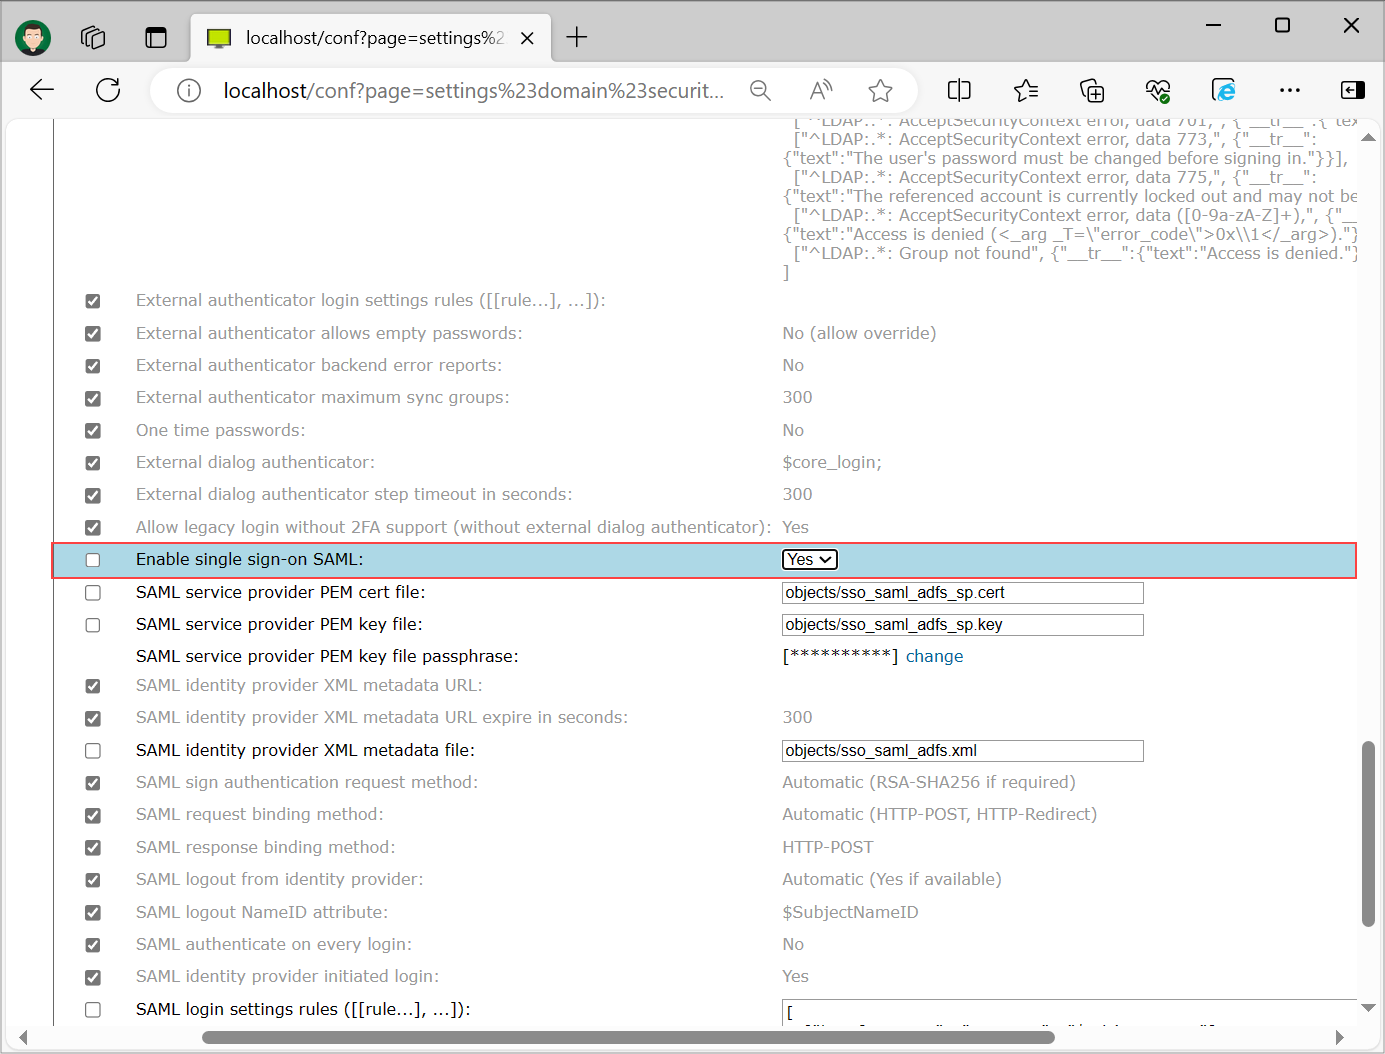
Configure ICP to use the uploaded files in previous step for SAML communication. Settings are found under "User management" -> "your_domain" -> "Security". To access files place in Private storage you have to append "objects/" before the filename.
Important: For the "SAML service provider PEM key file passphrase" enter the passphrase that you entered when generating the key-pair in Step 2.
Note: You can set the URL that points to your SAML identity provider XML metadata file in setting "SAML identity provider XML metadata URL" in order to avoid re-uploading the SAML identity provider XML metadata file when you perform changes.
Step 8 (Optional)
Enable additional logs in Core Login module for easier debugging. Under "Configuration" -> "Logs" set the following settings to log anything with severity greater than 6 (info):
- Log subsystem [Core Login] Application web login severity report level
- Log subsystem [Core Login] Login dialog severity report level
- Log subsystem [Core Login] Single sign-on: SAML severity report level
Step 9
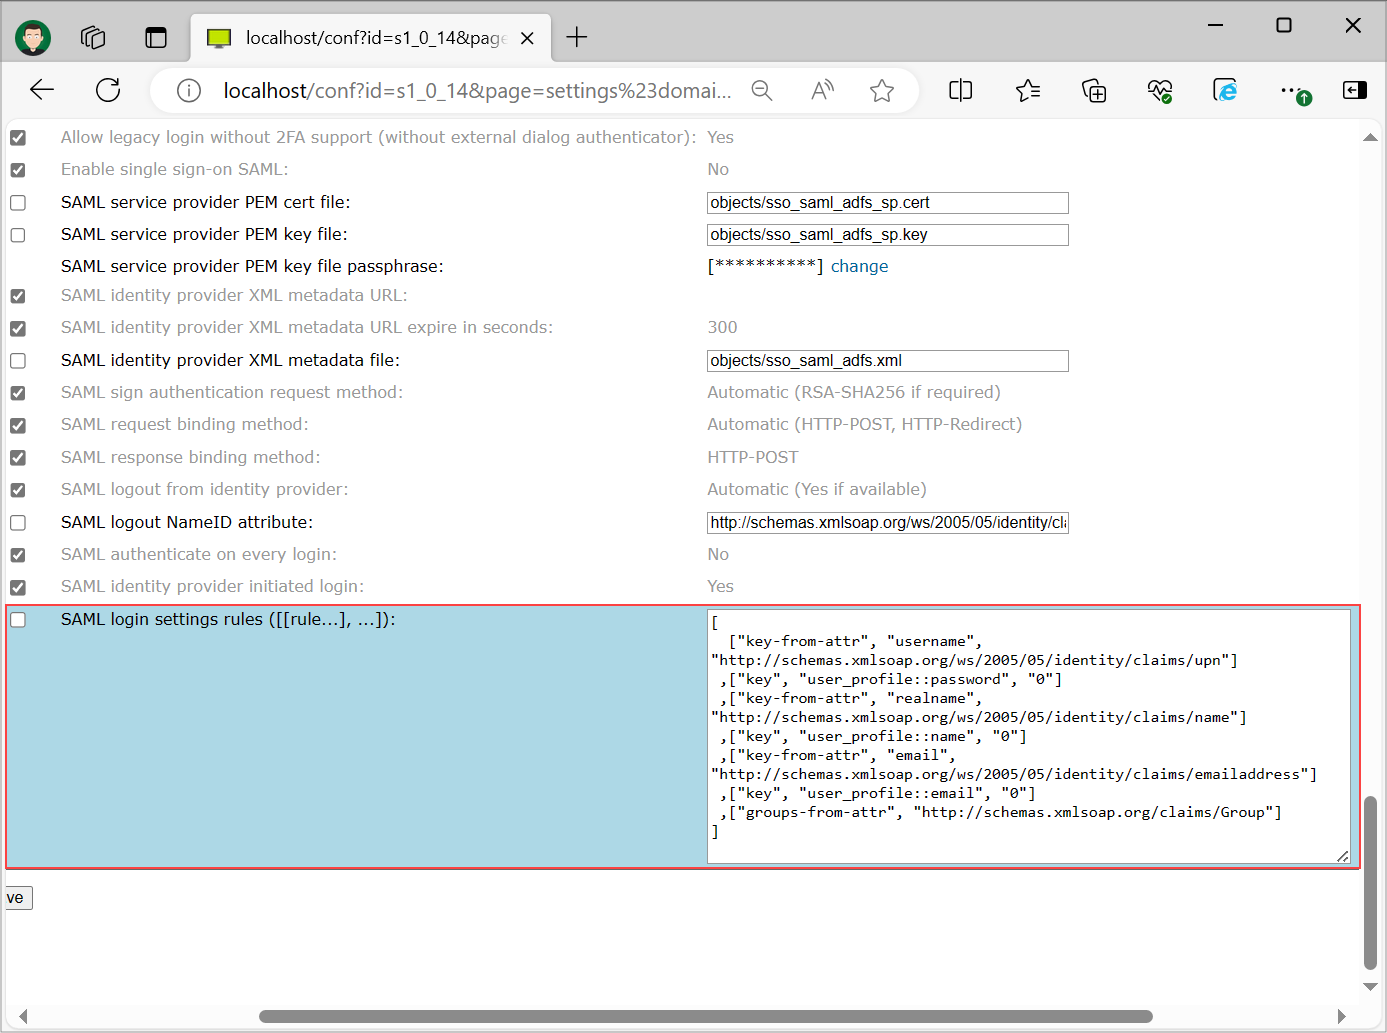
Set SAML login setting rules under "User management" -> "your_domain" -> "Security". These settings specify how credentials obtained via SAML are mapped to ISL Conference Proxy credentials and settings. An example configuration looks like this:
[
  ["key-from-attr", "username", "http://schemas.xmlsoap.org/ws/2005/05/identity/claims/upn"]
 ,["key", "user_profile::password", "0"]
 ,["key-from-attr", "realname", "http://schemas.xmlsoap.org/ws/2005/05/identity/claims/name"]
 ,["key", "user_profile::name", "0"]
 ,["key-from-attr", "email", "http://schemas.xmlsoap.org/ws/2005/05/identity/claims/emailaddress"]
 ,["key", "user_profile::email", "0"]
 ,["groups-from-attr", "http://schemas.xmlsoap.org/claims/Group"]
]
Settings are described in depth in the following topic: Security
Note: If you want to synchronize external user groups with ISL Conference Proxy user groups, add ["sync-external-groups", ""] SAML login rule after "sync-external-groups-rename" and "groups-from-attr" rules.
Step 10
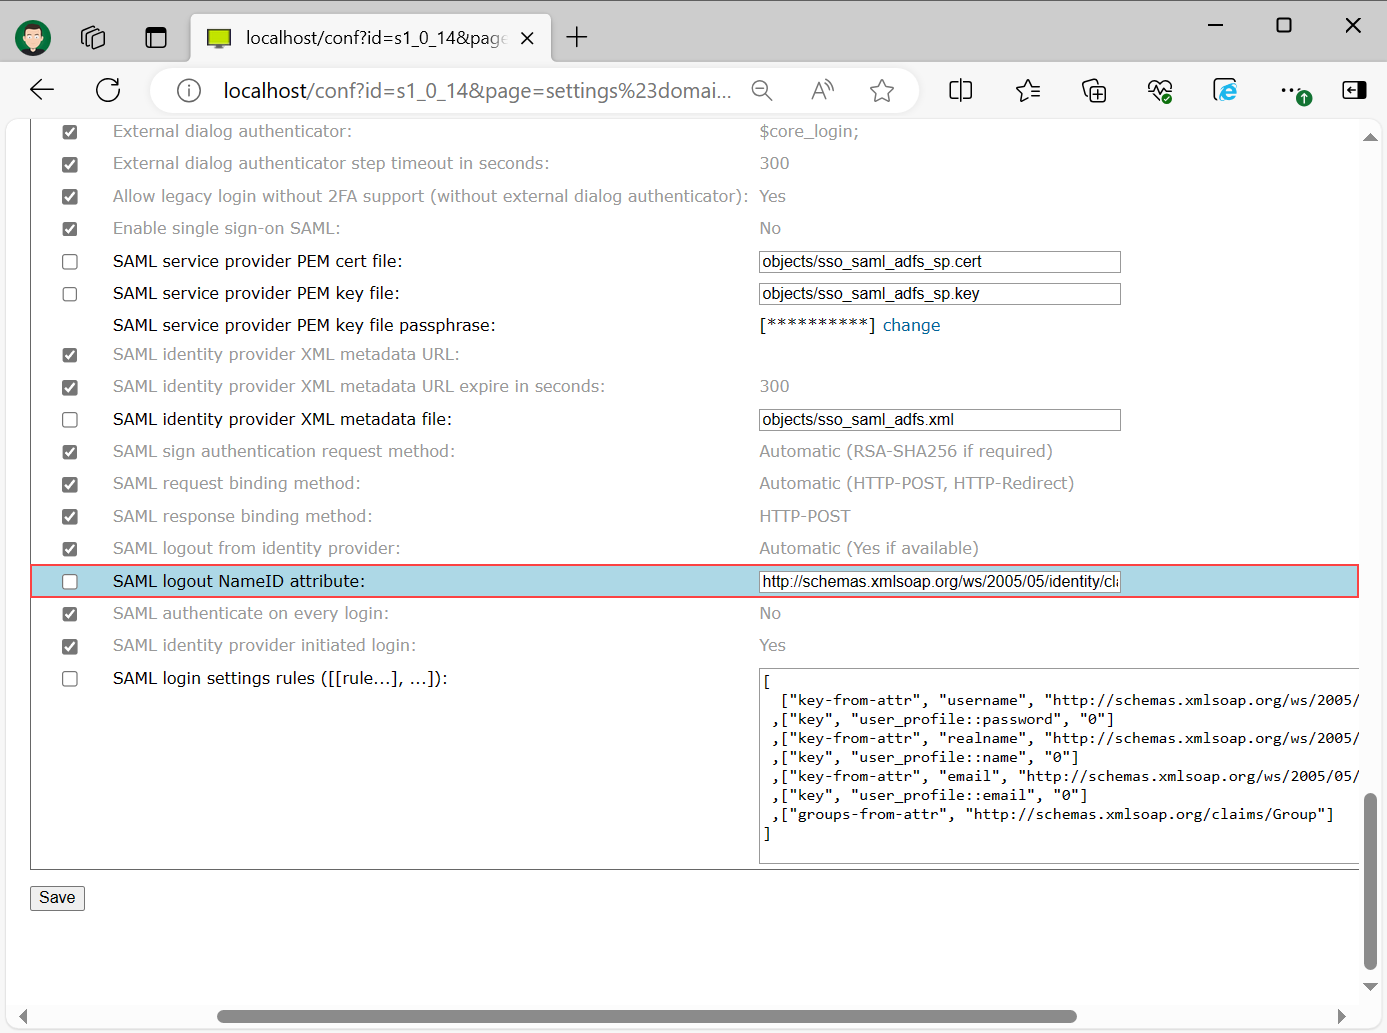
Set "SAML logout NameID attribute" with the URL that you have set as "username" in previous step. In our case we have set "http://schemas.xmlsoap.org/ws/2005/05/identity/claims/upn". Select "Save" at the bottom of the page.
Step 11
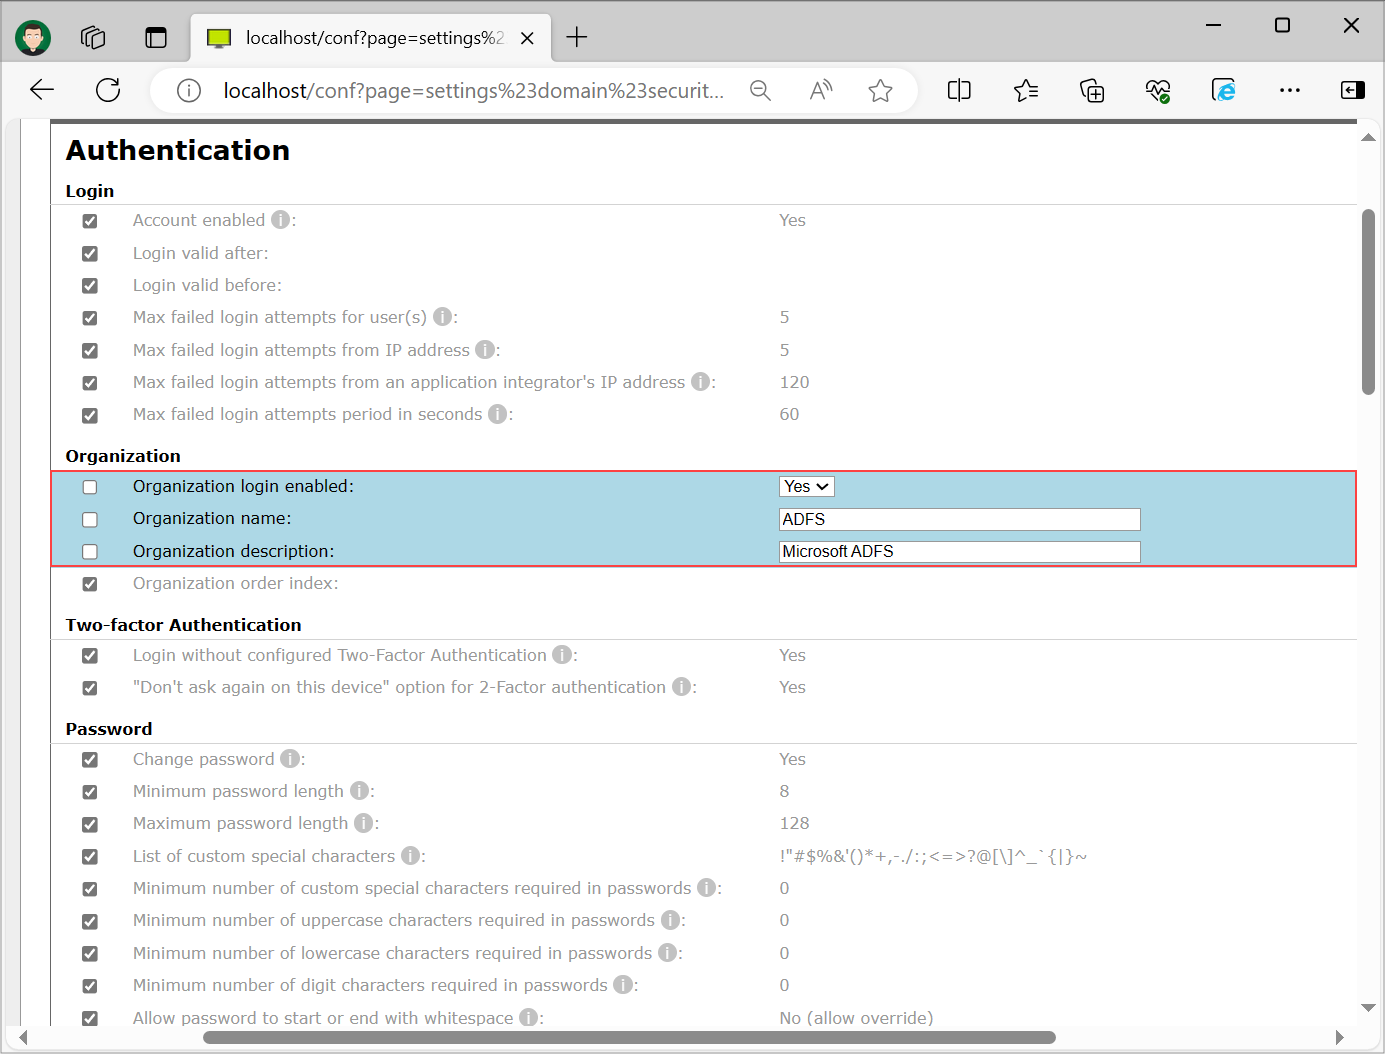
On the same page enable the setting "Organization login enabled", set the "Organization name" and "Organization description". You can set custom name and description, make sure that name and description are unique in order to avoid confusion for users upon logging in. Select "Save" at the bottom of the page.
Note: The "Organization name" parameter must be a valid identifier, starting with a letter or underscore, followed only by letters, digits, or underscores — spaces are not allowed.
Step 12
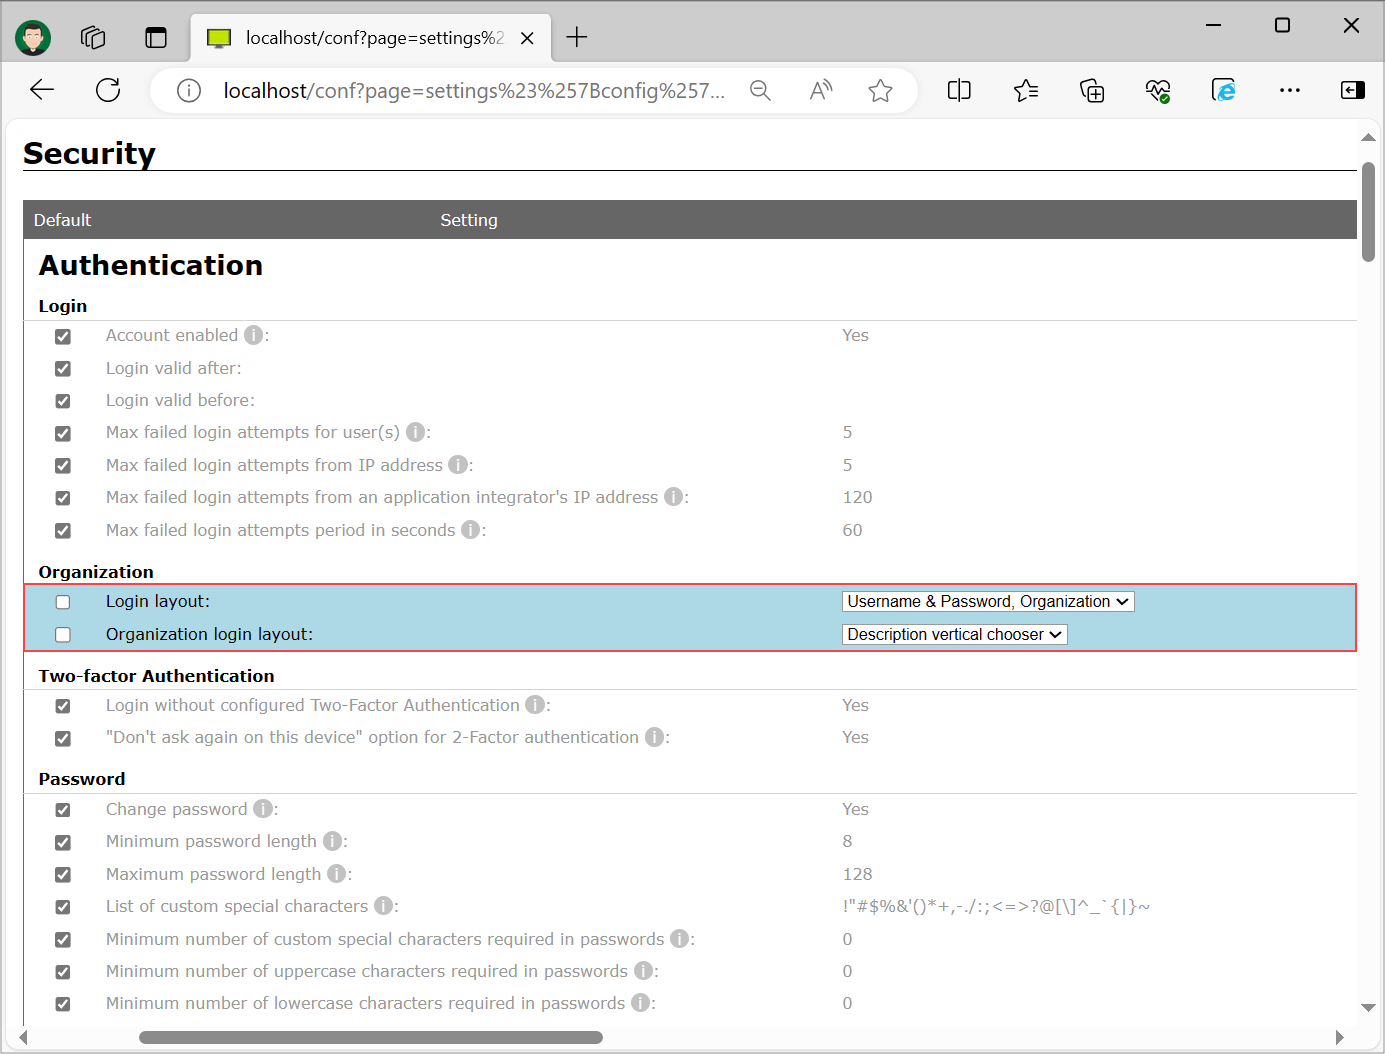
Navigate to "Configuration" -> "Security", find settings "Login layout" and "Organization login layout" and set them to settings that will suit your use case. In our case we've set the settings to "Username & Password, Organization" and "Description vertical chooser". Select "Save" at the bottom of the page.
Important: If you are going to set "Login layout" setting to "Organization", users on domains that don't have Single Sign-On enabled, will not be able to log in to their account on ISL Conference Proxy.
Step 13
Enable Single Sign-On under "User management" -> "your_domain" -> "Security" to force the logins to be redirected to the Identity Provider and thus enable the Single Sign-On functionality. Select "Save" at the bottom of the page.
Step 14
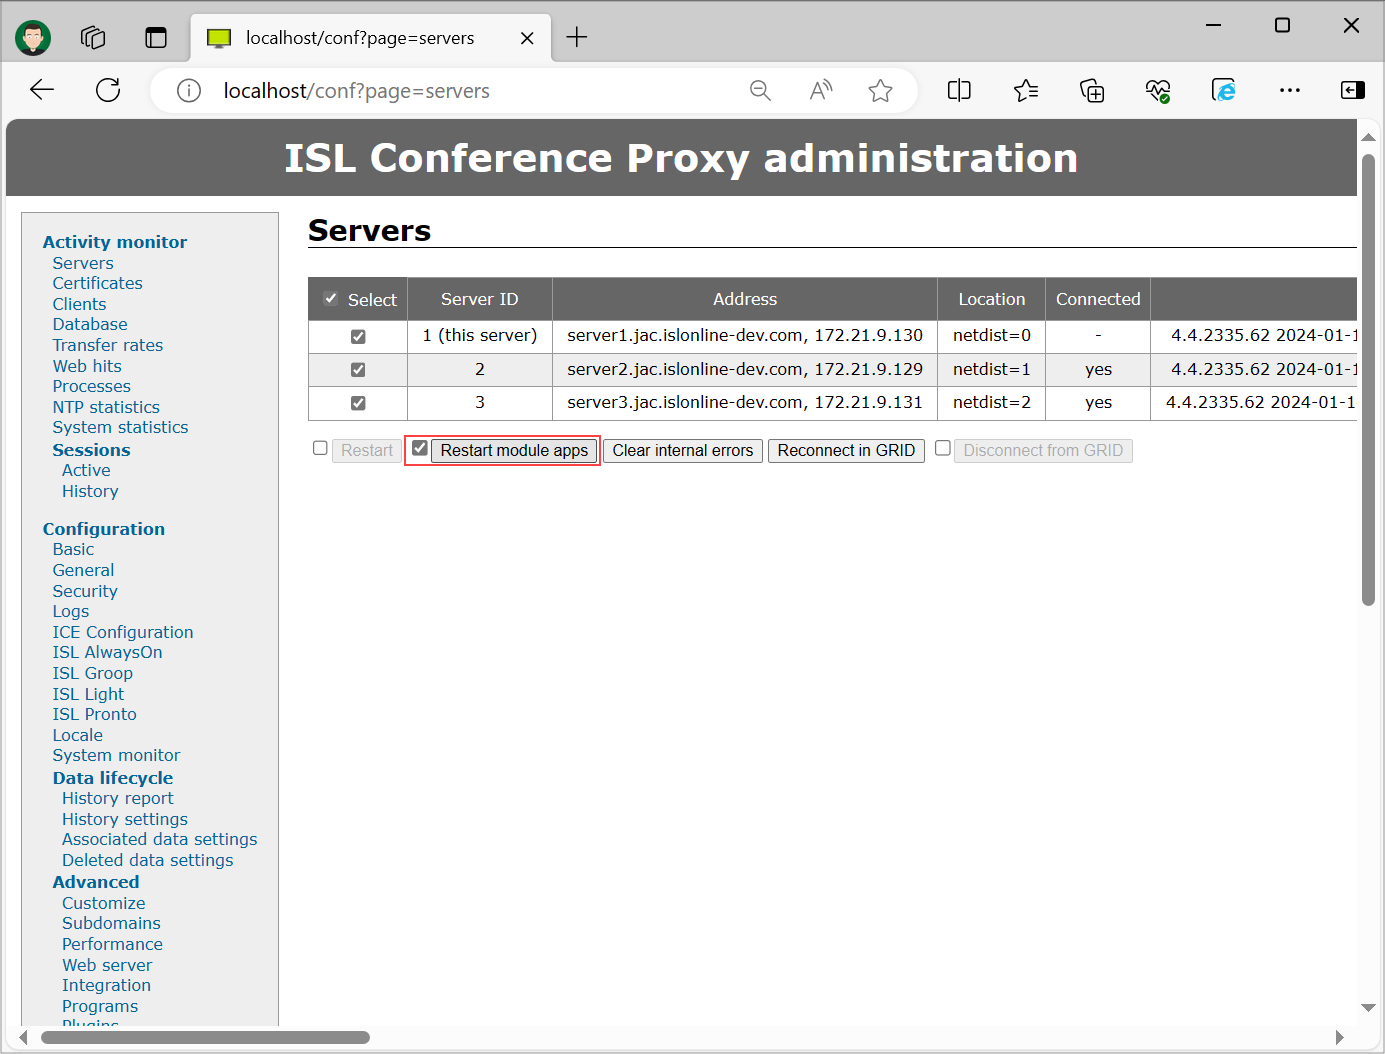
As the final step navigate to "Activity monitor" -> "Servers", select all of your servers and click "Restart module apps".
Setup - Microsoft AD FS
Step 1 (Adding Relying Party Trust)
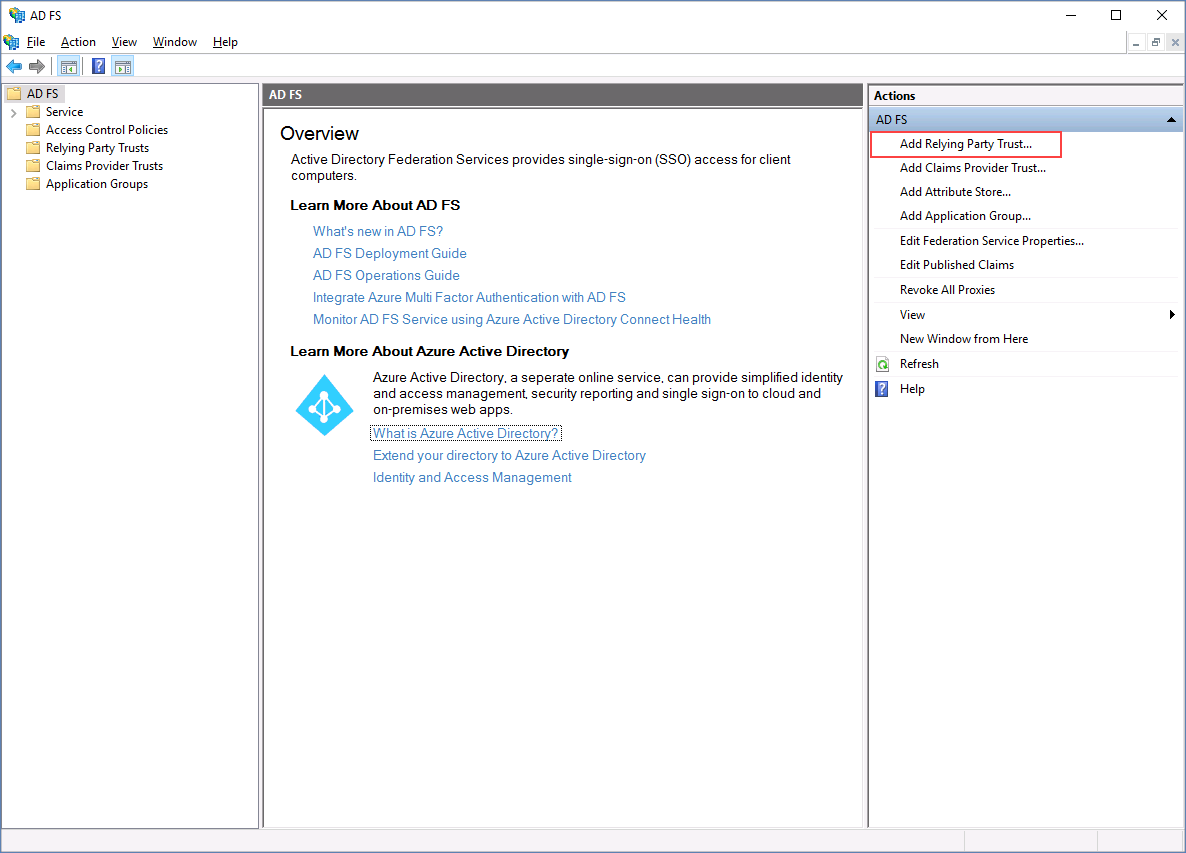
Open Microsoft AD FS management console and click on "Add Relying Party Trust".
Step 2
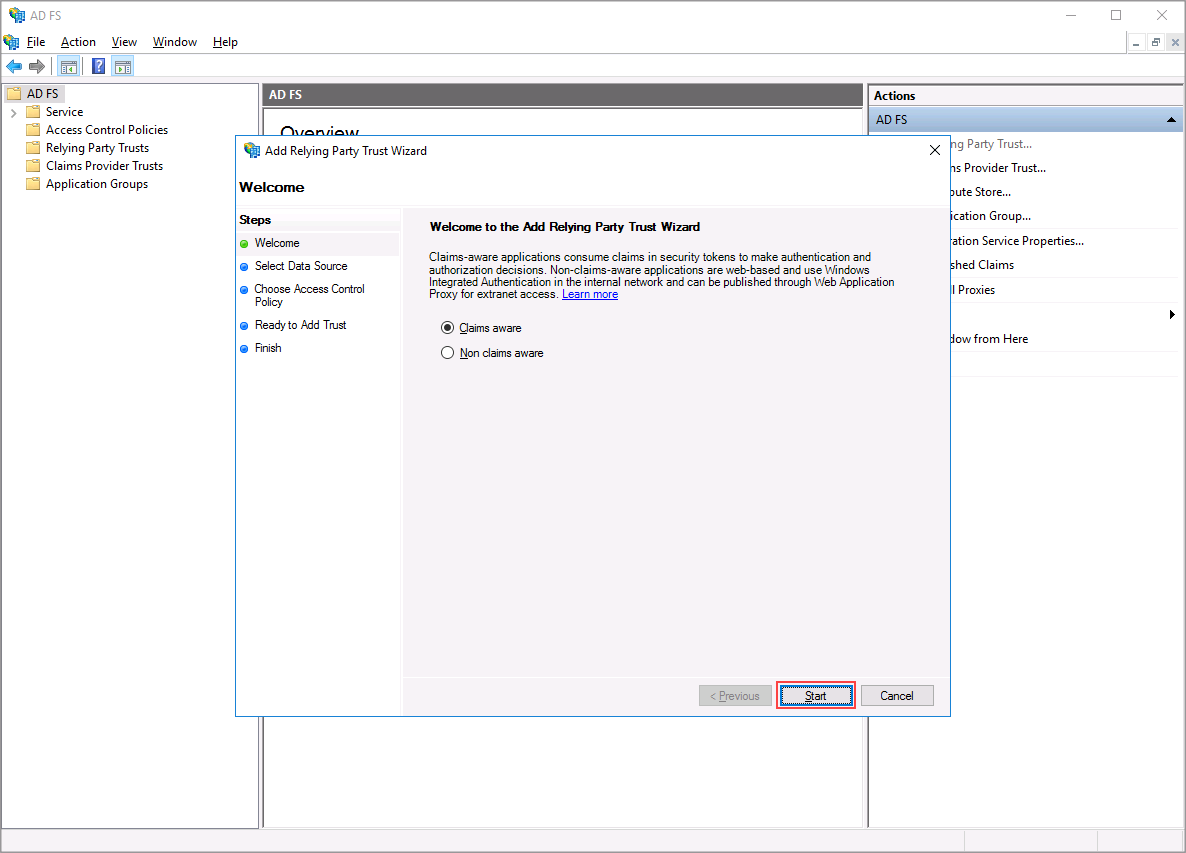
Select Claims aware and click "Start".
Step 3
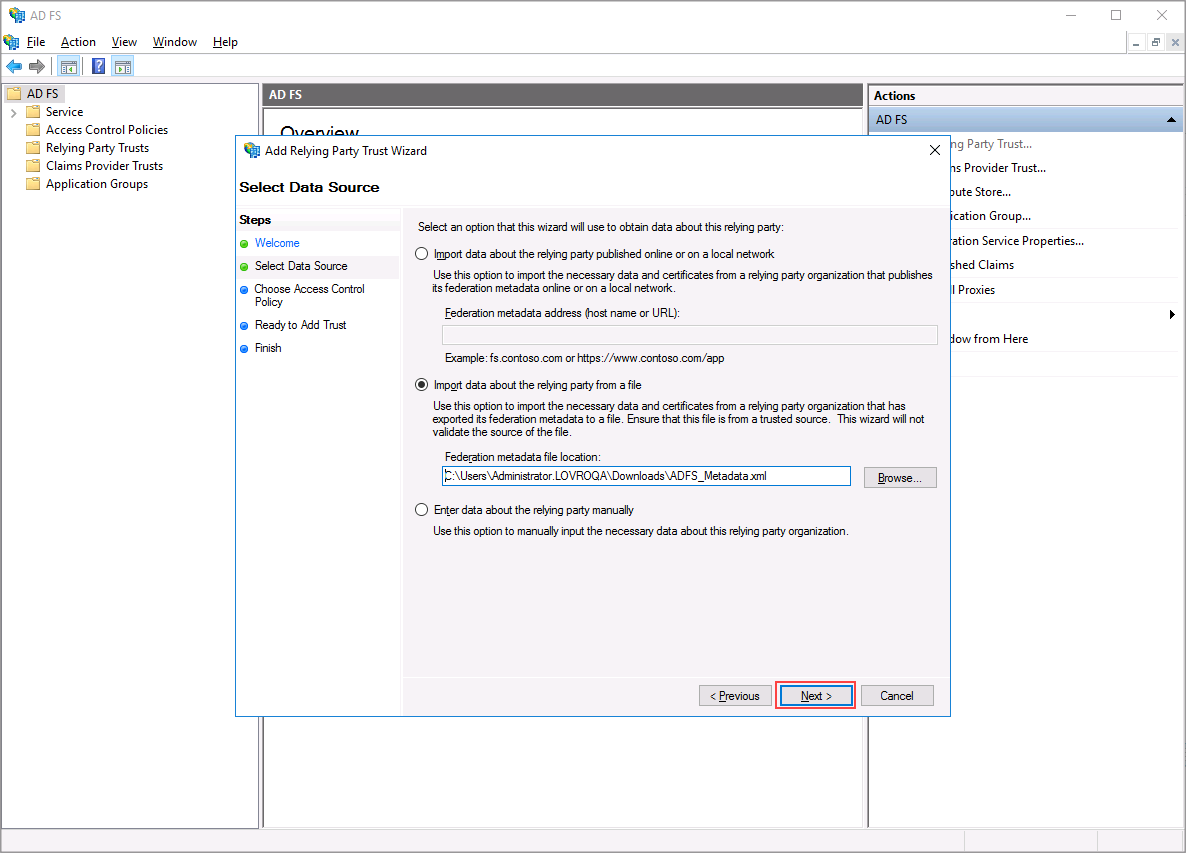
Select how the metadata of Data Source (ICP) should be imported. ICP's metadata file is available at the following address: https://<your-icp-server-address>/sso/saml/sp/domain/your_domain/metadata.xml. You can download the file from ICP and upload it to Microsoft AD FS or provide the URL to the Microsoft AD FS.
Replace https://<your-icp-server-address> with your ISL Conference Proxy server address and "your_domain" with the domain name of the ISL Conference Proxy domain which you have created at the beginning of this guide.
Note: If you wish to provide the URL to Microsoft AD FS you need to have SSL connections configured correctly on your ICP, since Microsoft AD FS only supports encrypted (https) connection when obtaining the metadata file. Steps on how to enable SSL for ICP webpages are shown in this topic: Web Pages.
Step 4
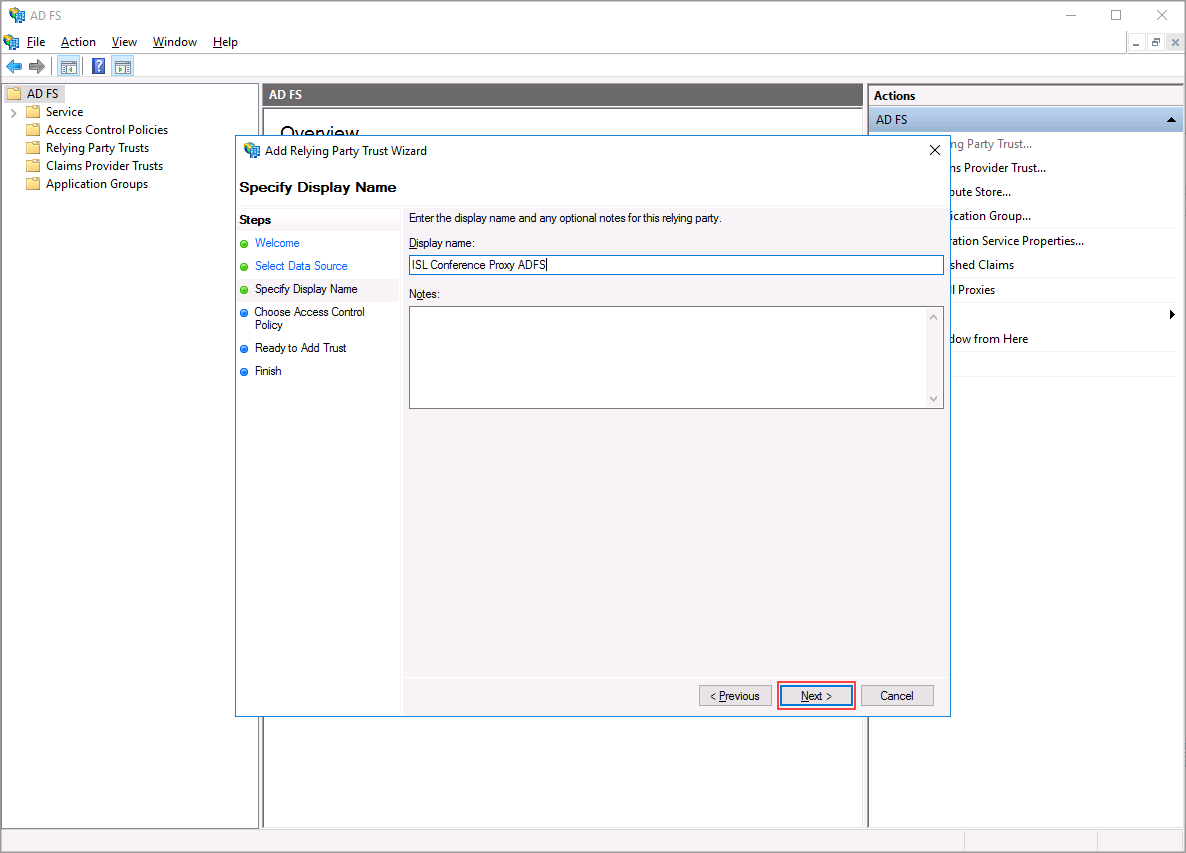
Enter the display name of the relying party.
Step 5

Choose the access control policy. For the basic setup select "Permit everyone", allowing anybody that has credentials in the Active Directory to log in.
Step 6
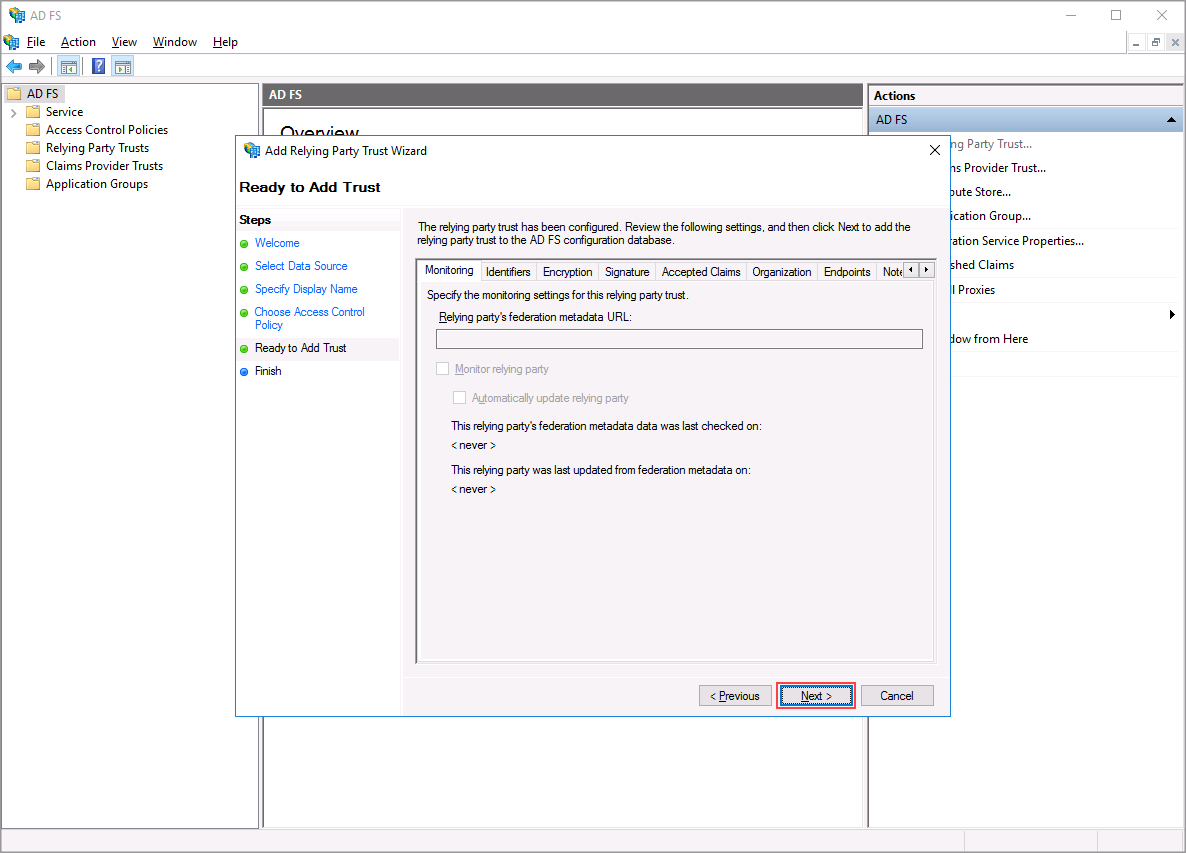
Review the information you entered then click "Next" to add the Relying Party Trust.
Step 7
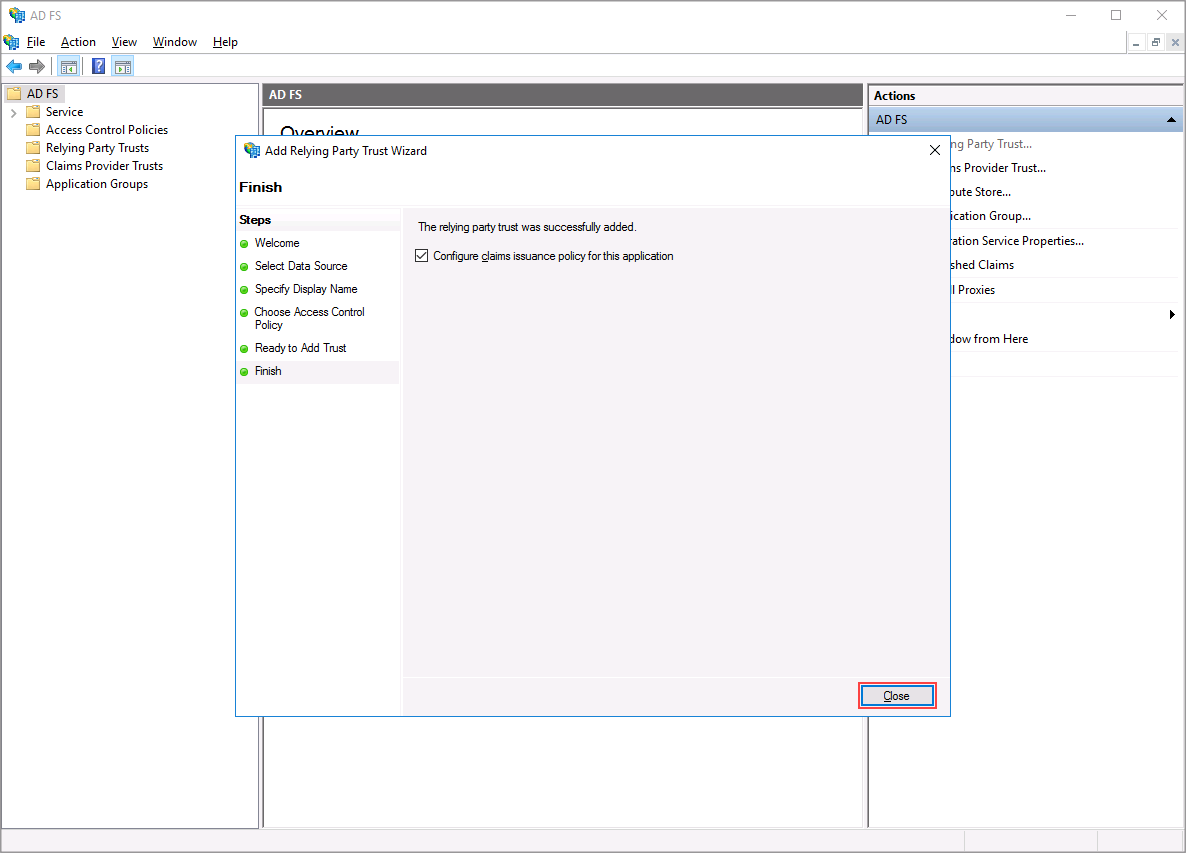
Relying Party Trust is now added and you can move on to configuring it.
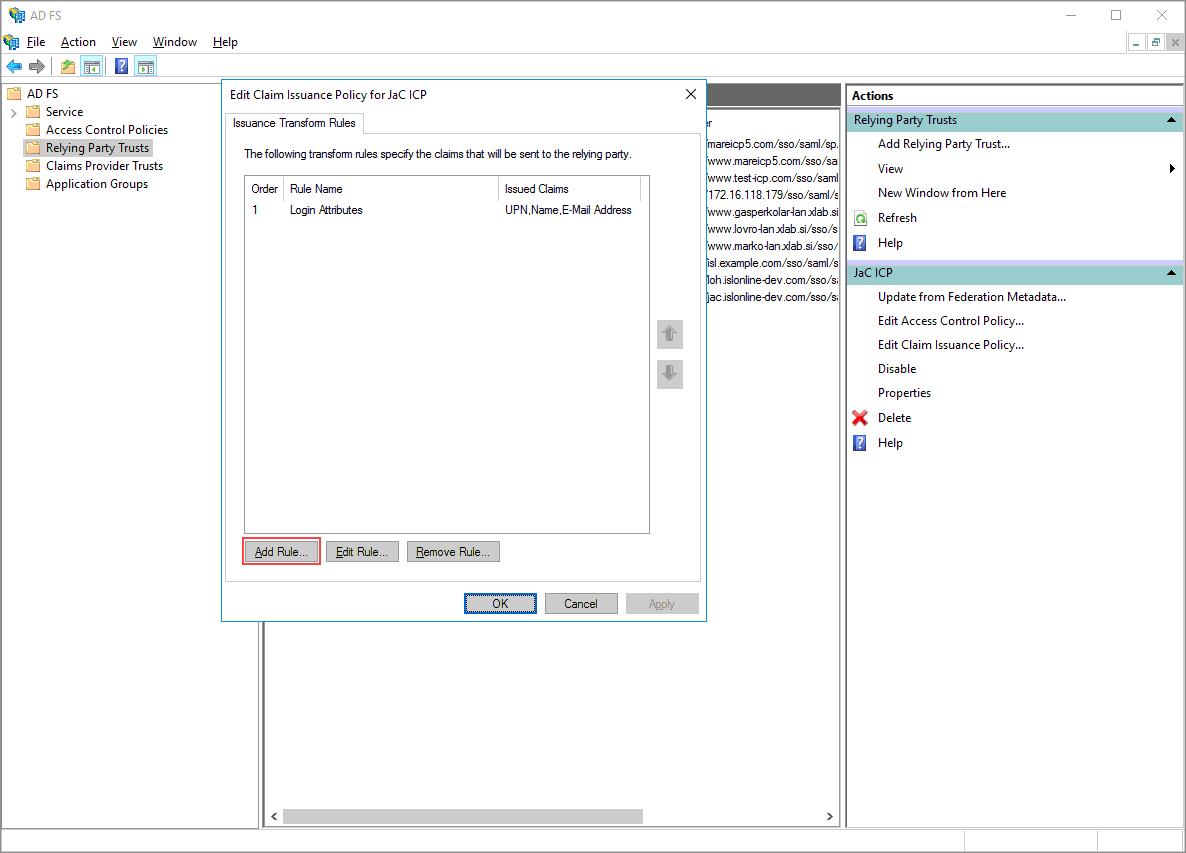
Step 1 (Edit Claim Issuance Policy)
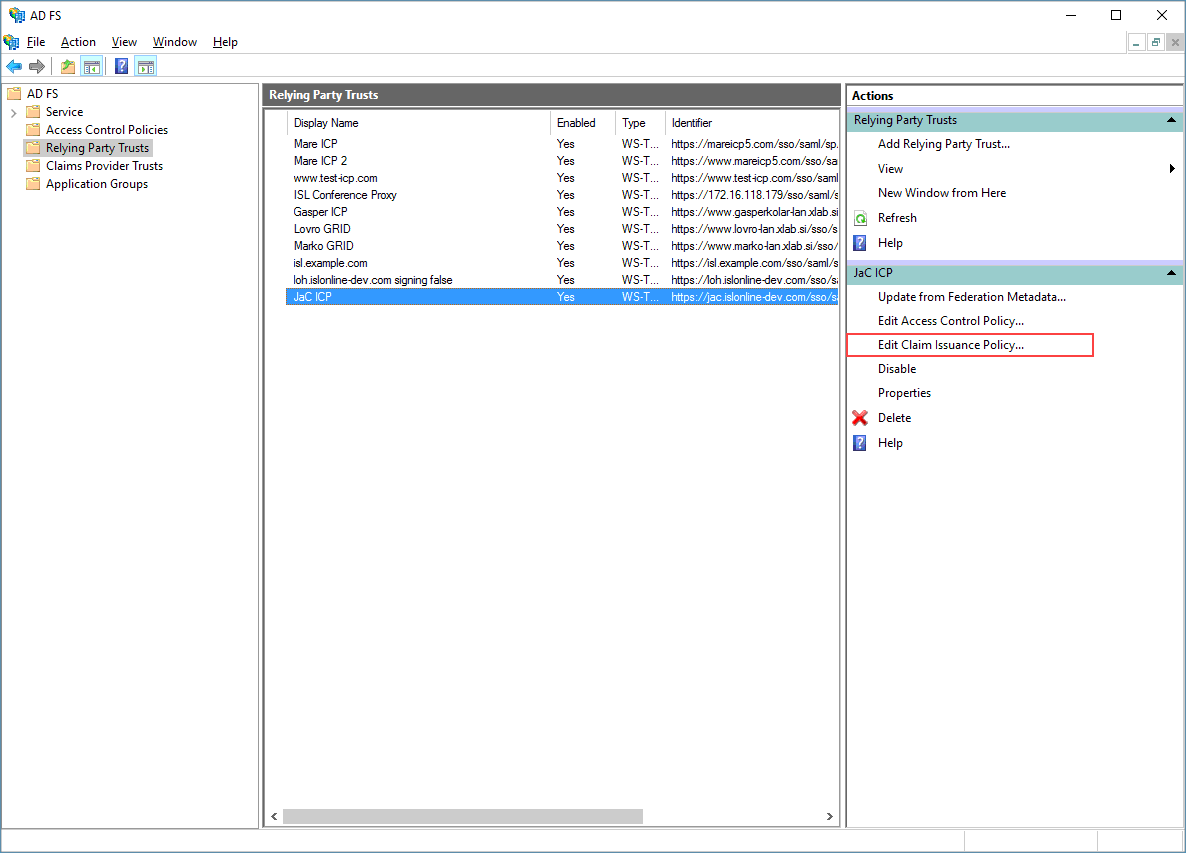
With Relying Party Trust added (and selected - in gray), click on "Edit Claim Issuance Policy" to configure which claims (parameters) will be sent to ICP when user logs in. We will add two rules, one will be responsible for sending name, username and email address and the other rule will send the information in which group the user is present.
Step 2
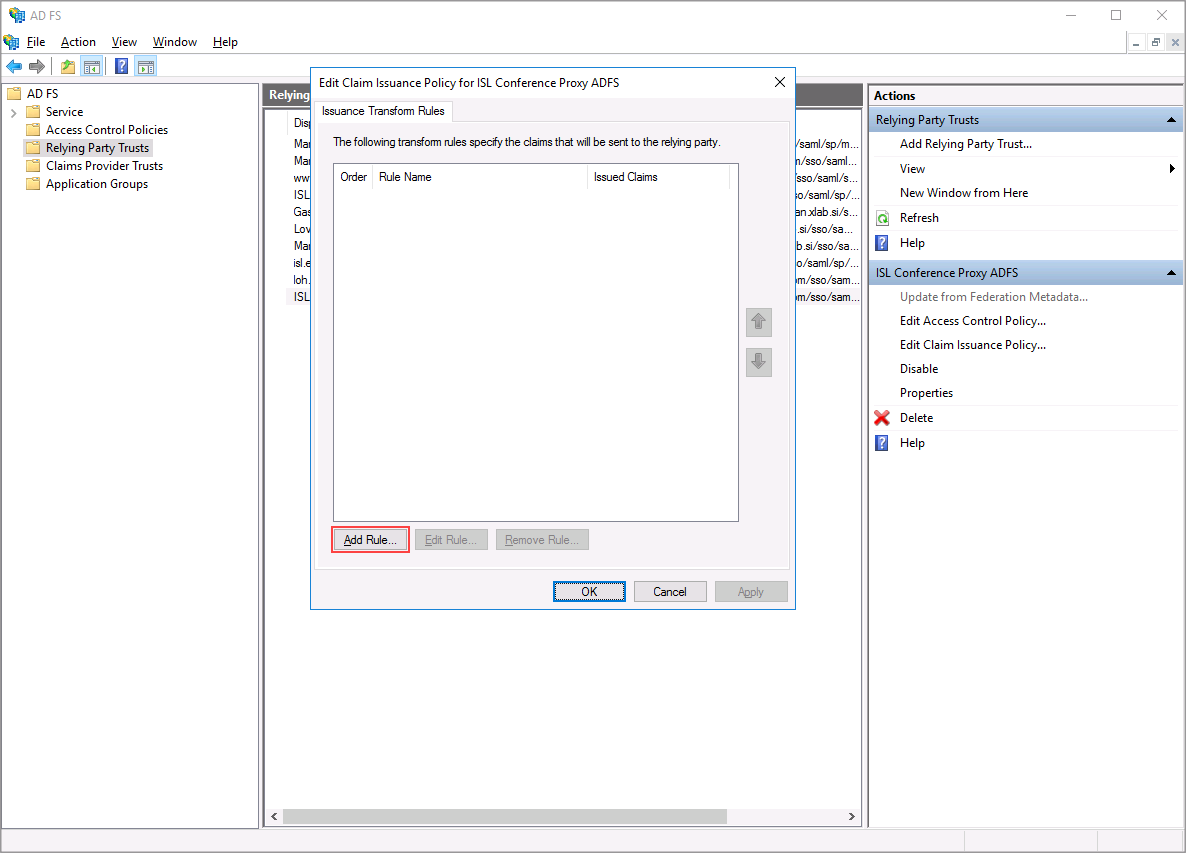
Click on "Add Rule".
Step 3
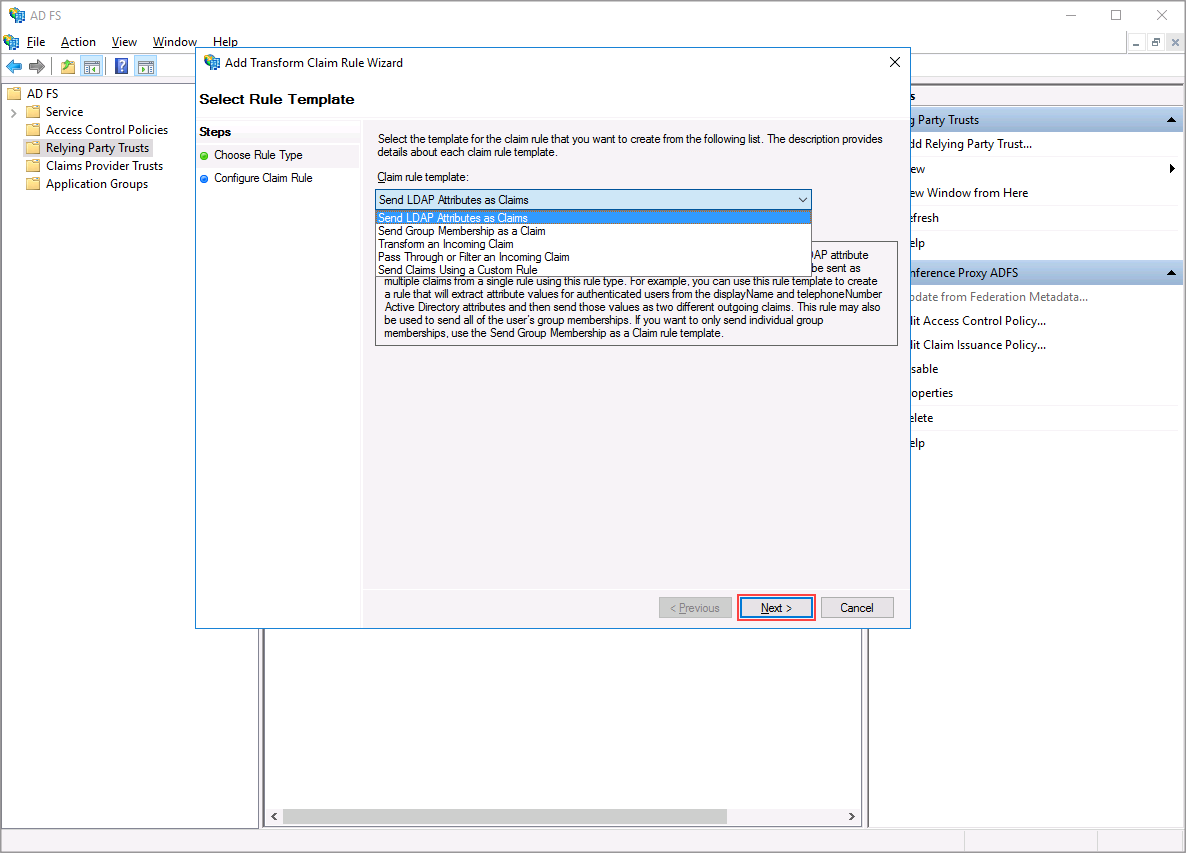
Select "Send LDAP Attributes as Claims" and click "Next".
Step 4
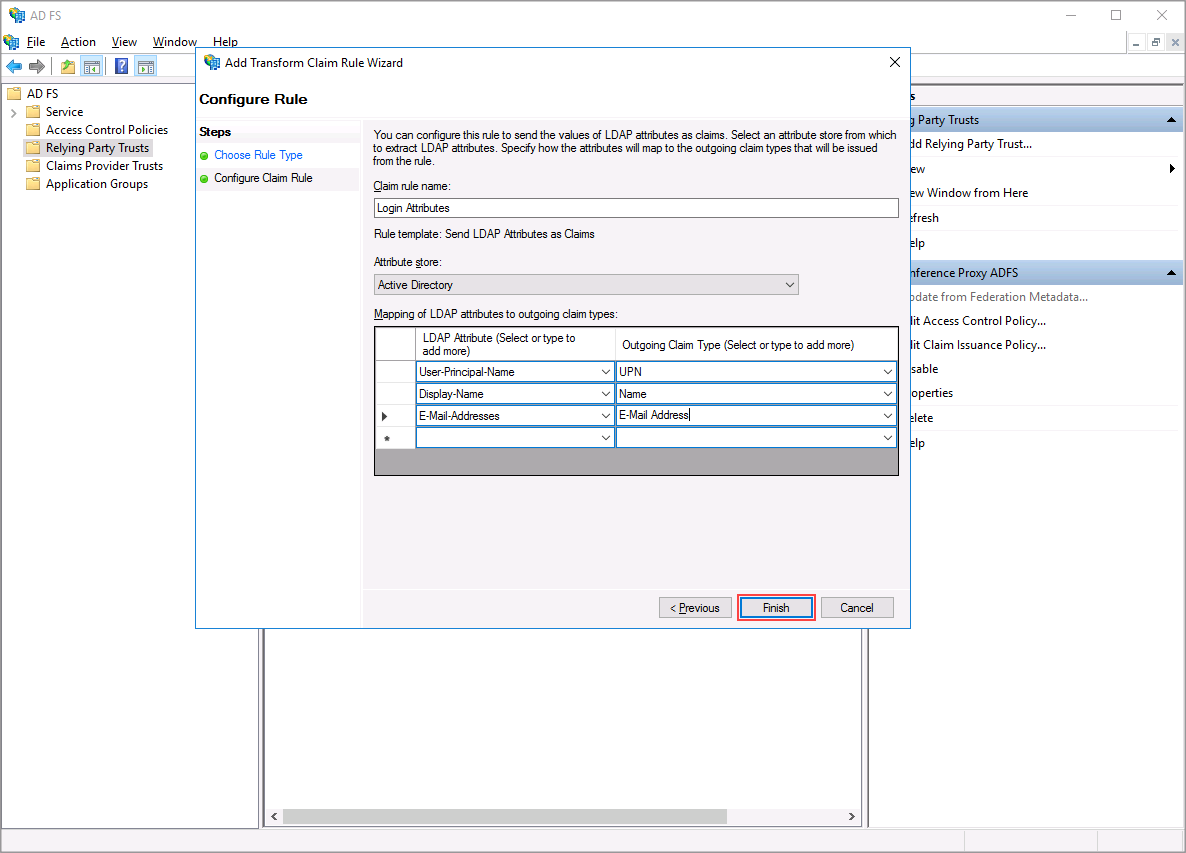
Select the LDAP attribute on the left that you wish to send over as a claim to ICP. For ICP select User-Principal-Name, Display-Name and E-Mail-Adresses and send them over as UPN, Name and E-Mail Address claims.
Step 5
Click on "Add Rule" again, to configure sending the group membership as a claim over to ICP. Sending of the groups is optional and you can skip this steps.
Step 6 (Optional - Group membership)
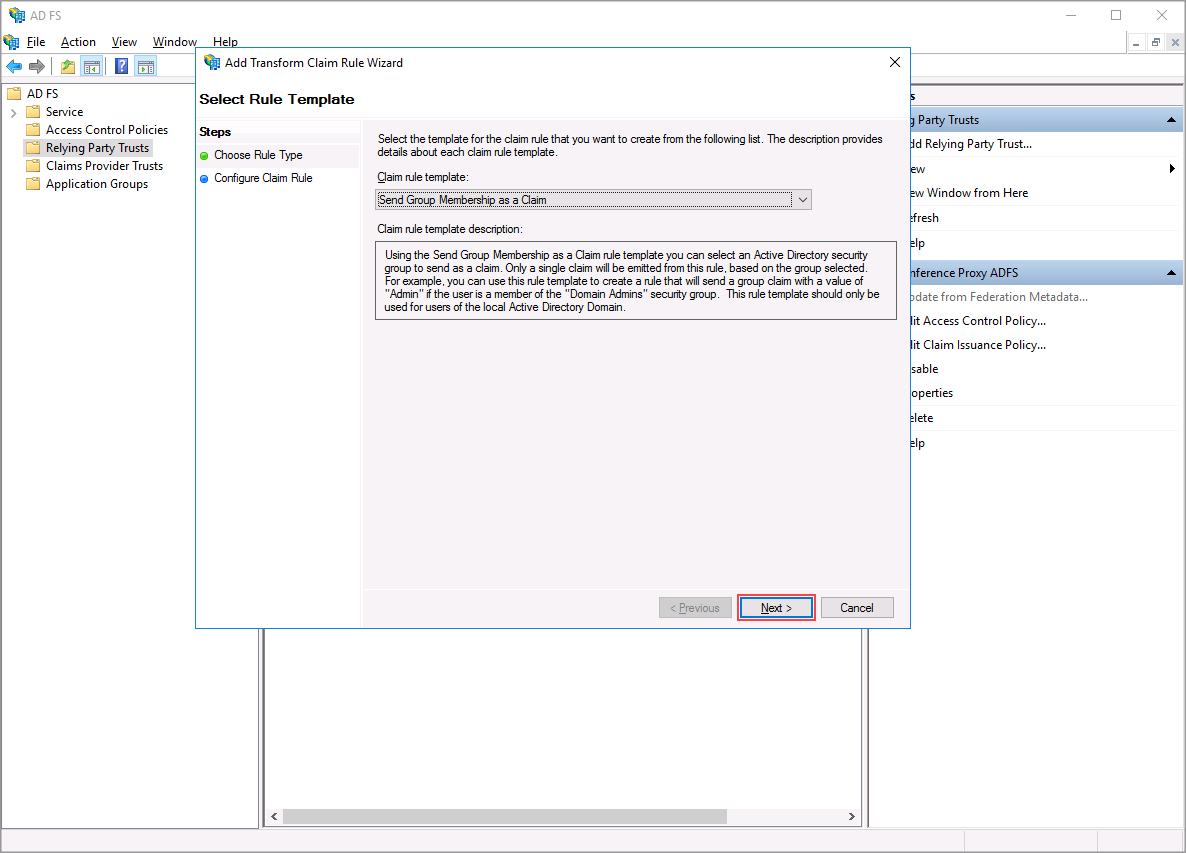
For Claim rule template select "Send Group Membership as a Claim" then click "Next".
Step 7 (Optional - Group membership)
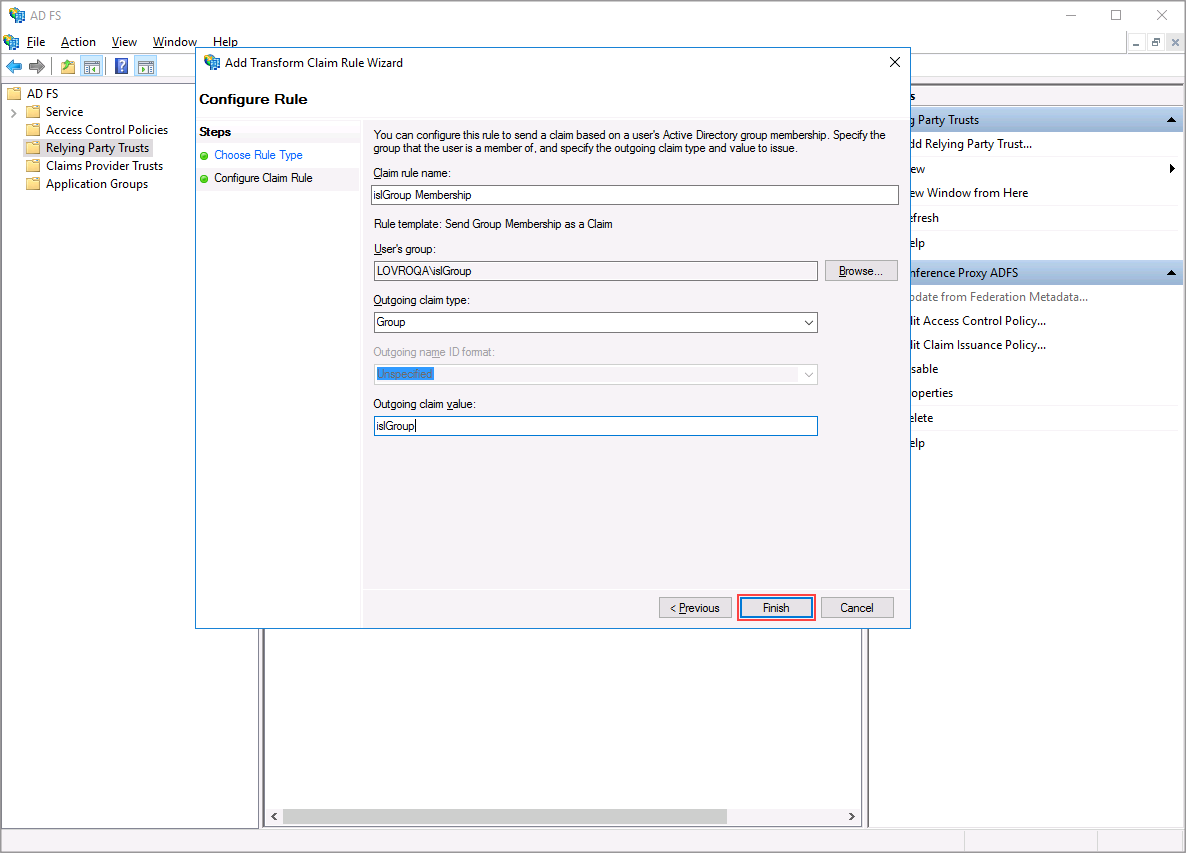
Select the group for which you wish to send membership information, in our case the group is islGroup. Then click "Finish".
Note: Group membership sent as a claim only specifies if a user is a member of a group for which you created the rule - e.g. is user member of islGroup group. This means that you will have to repeat Steps 5 - 7 for each group for which you wish to send membership information. ISL Conference Proxy internal limit is 100 groups per user.
Step 8
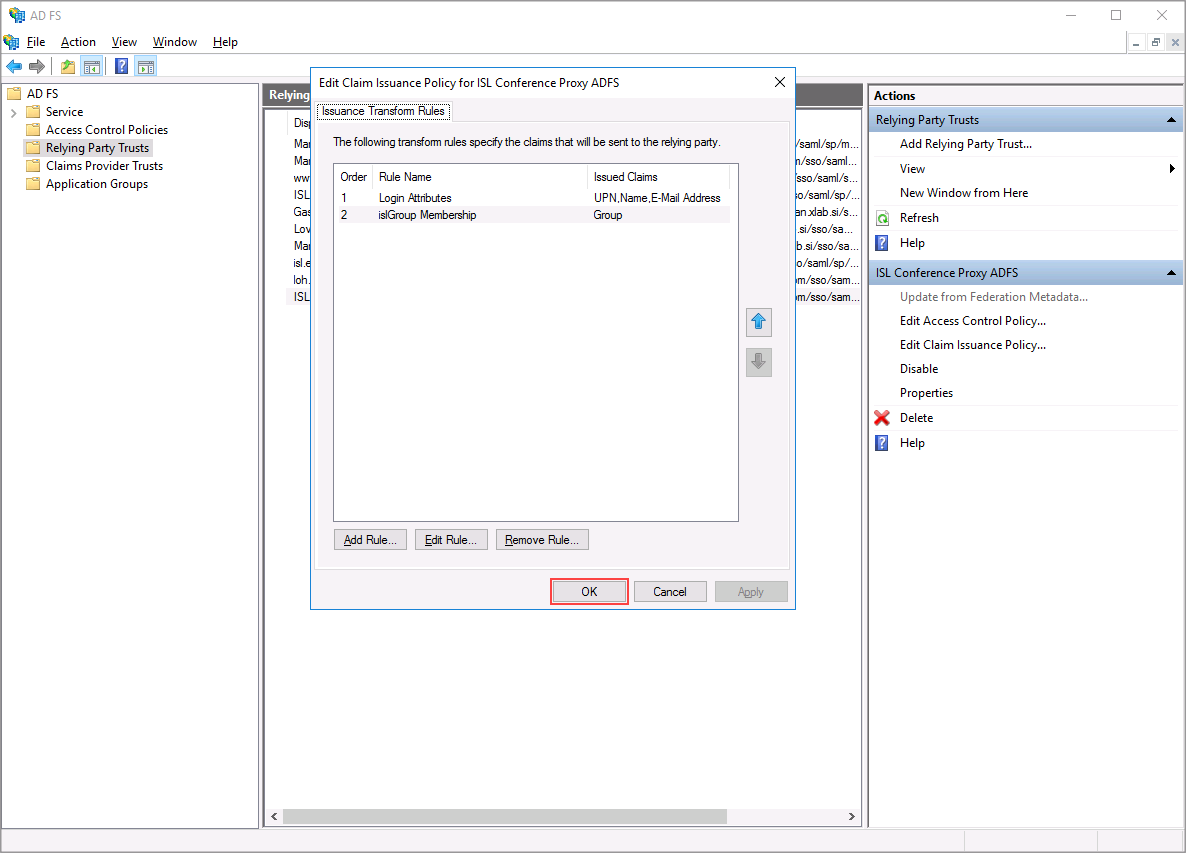
Click "OK" when you have configured all the rules.
Sign In - Web
Step 1
Click "Login" on the ISL Conference Proxy web page.
Step 2
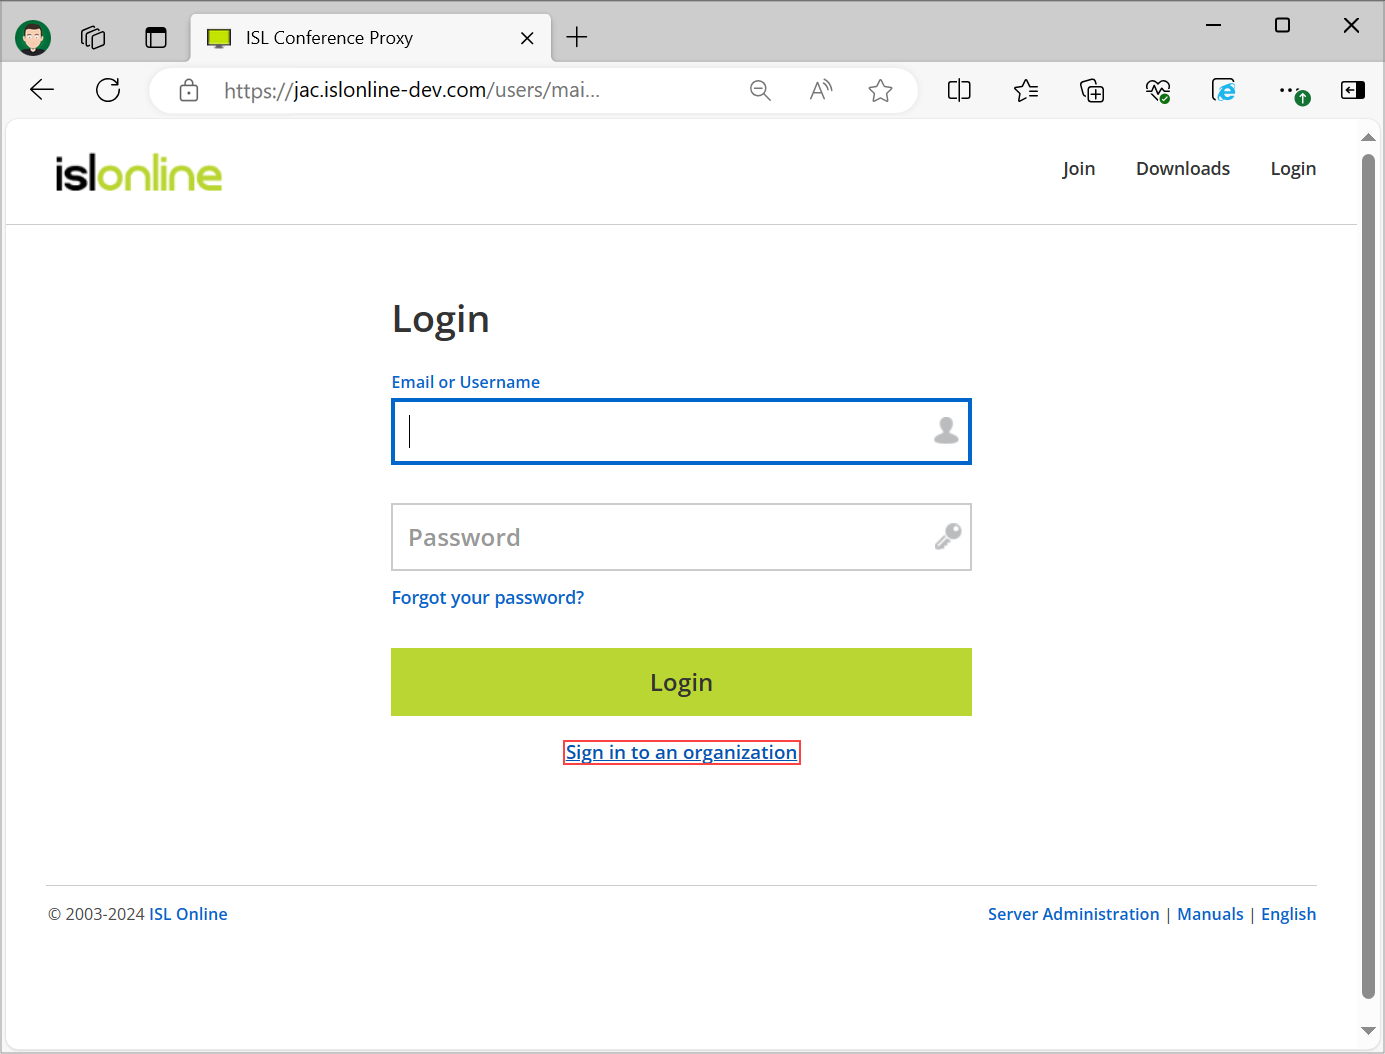
Select "Sign in to an organization".
Step 3
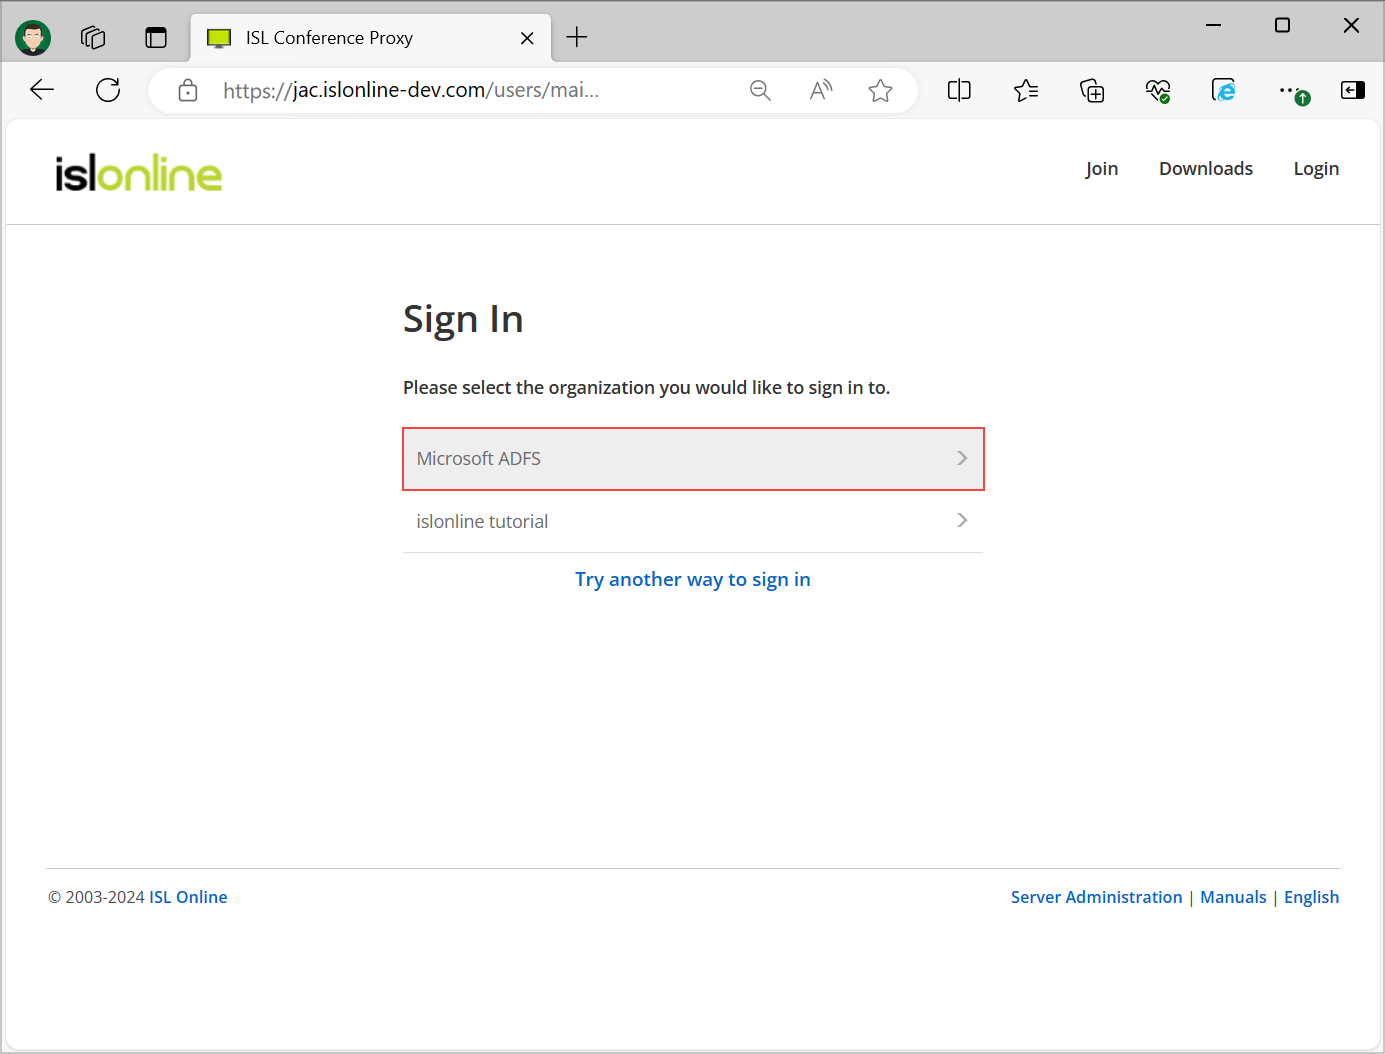
Select the organization that you have set up to proceed with the login. If the setup was successful you will be redirected to the Single Sign-On page.
Note: Redirection behavior can be different depending on your browser. In Microsoft edge you will not be redirected, rather the browser will display a pop-up window where you will enter your Microsoft AD FS credentials.
Step 4

Enter your Microsoft AD FS credentials and click "Sign in". You will be redirected back to ICP if login succeeds.
Step 5
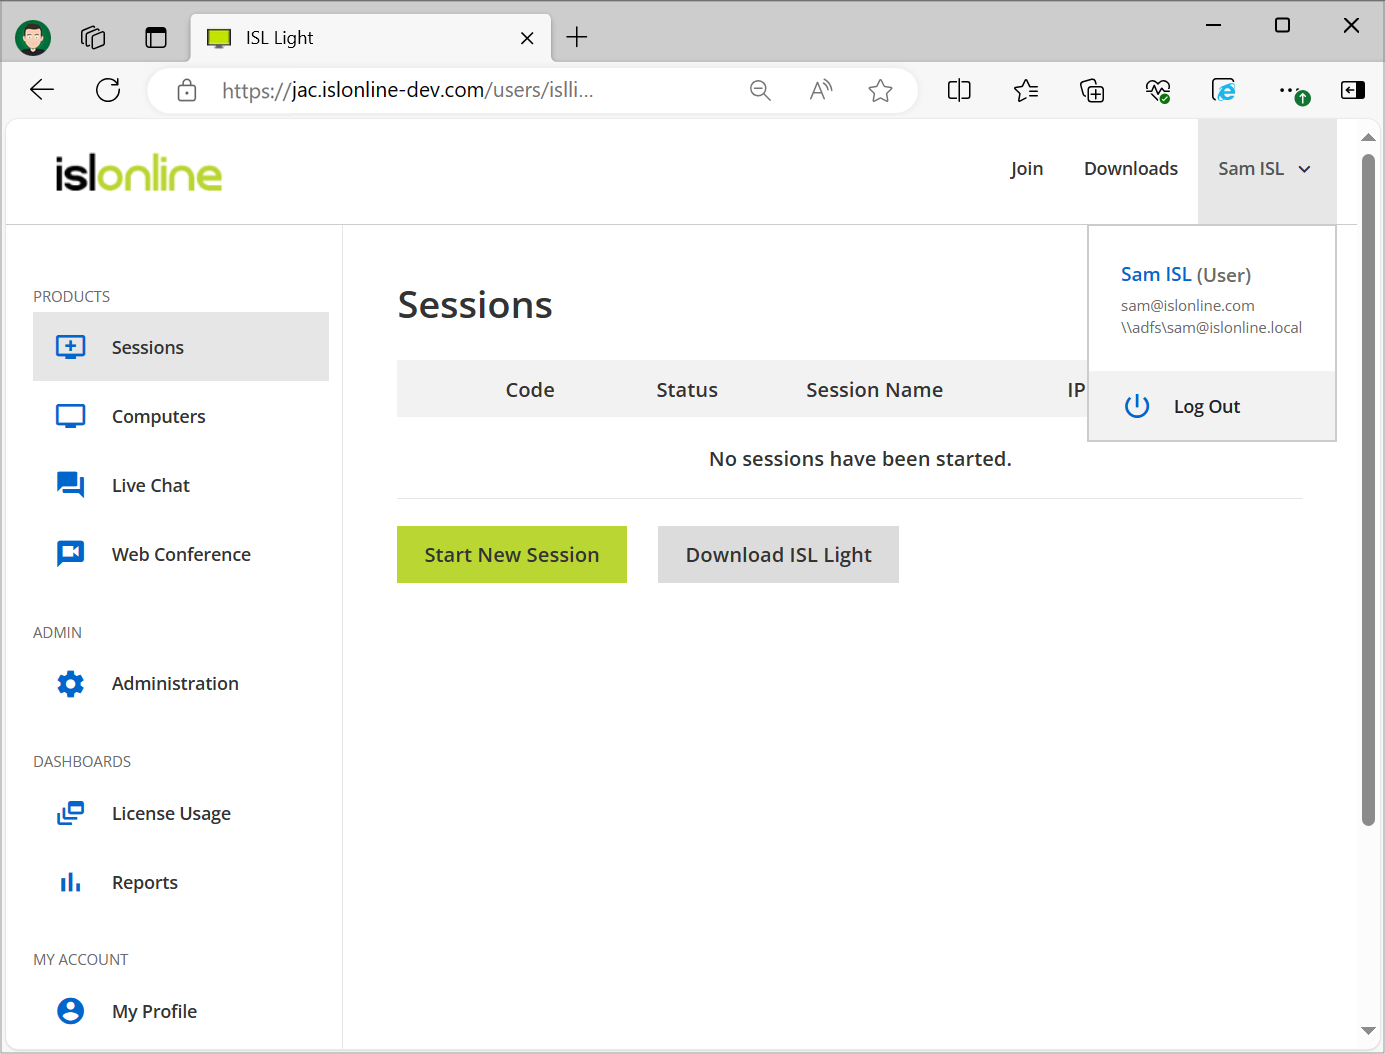
You are now logged in and can use all the functionalities of ICP normally. Note that the user is a part of the adfs (\\adfs\) domain we created during the setup.
Sign In - Application
Step 1
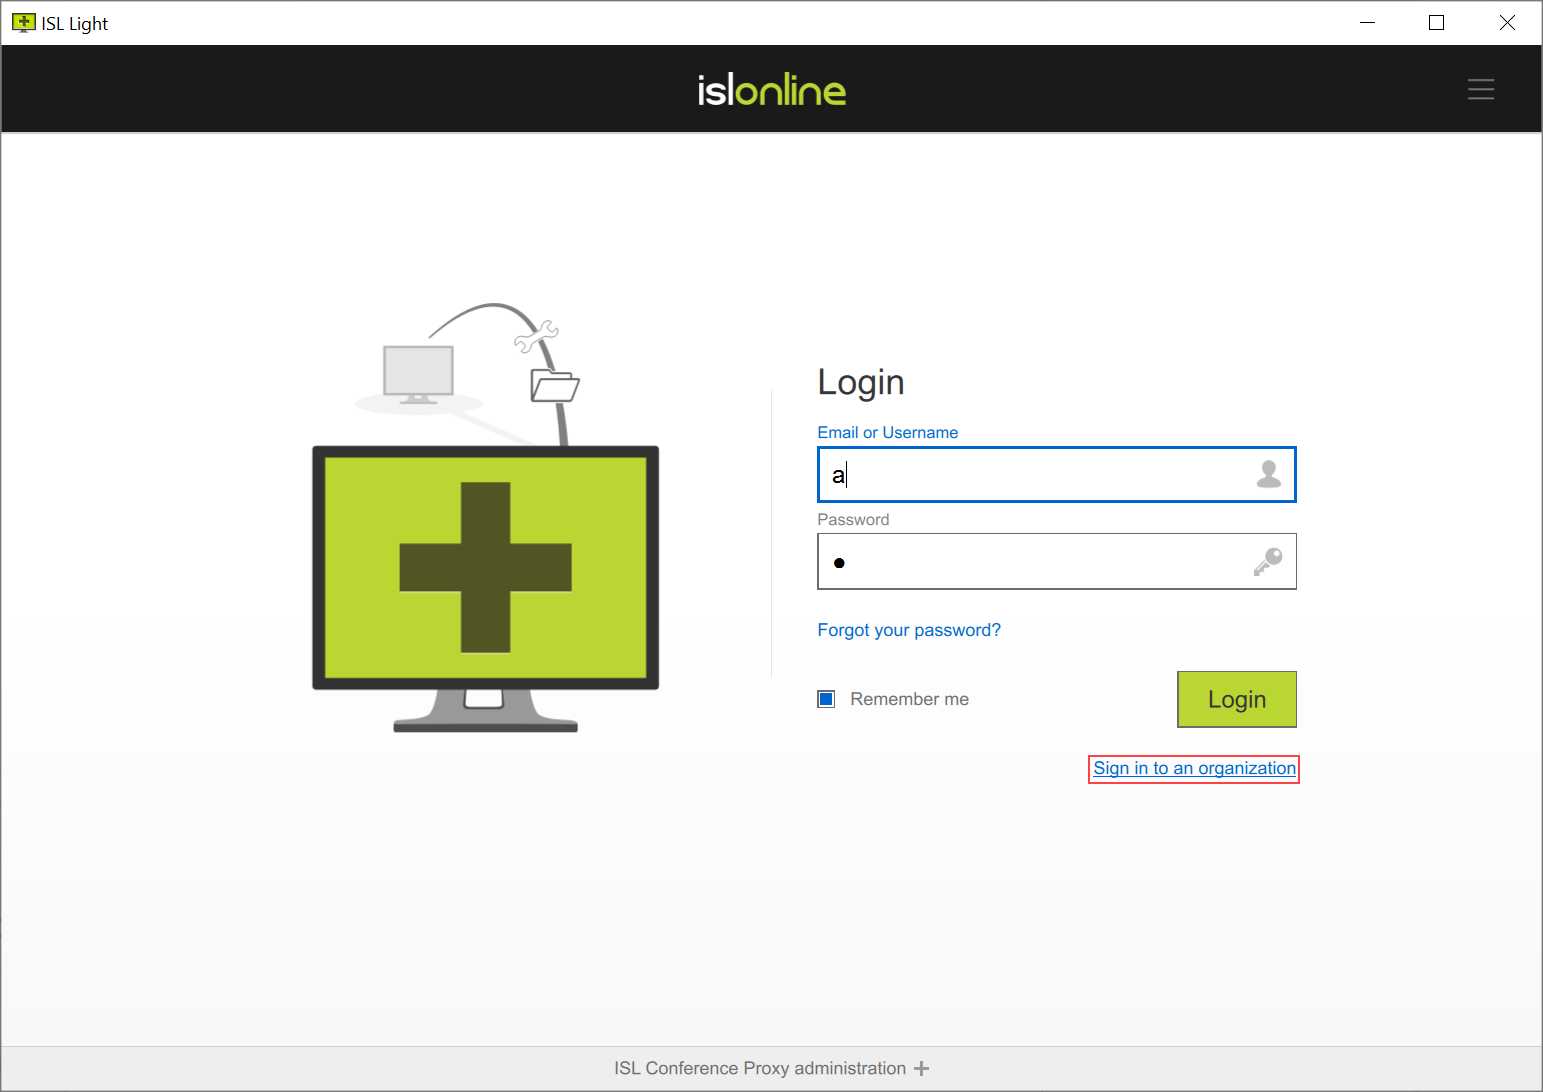
Login procedure for ISL Online applications differs with Single Sign-On as well. Select "Sign in to an organization" button.
Step 2

Select the organization that you have set up to proceed with the login.
Step 3
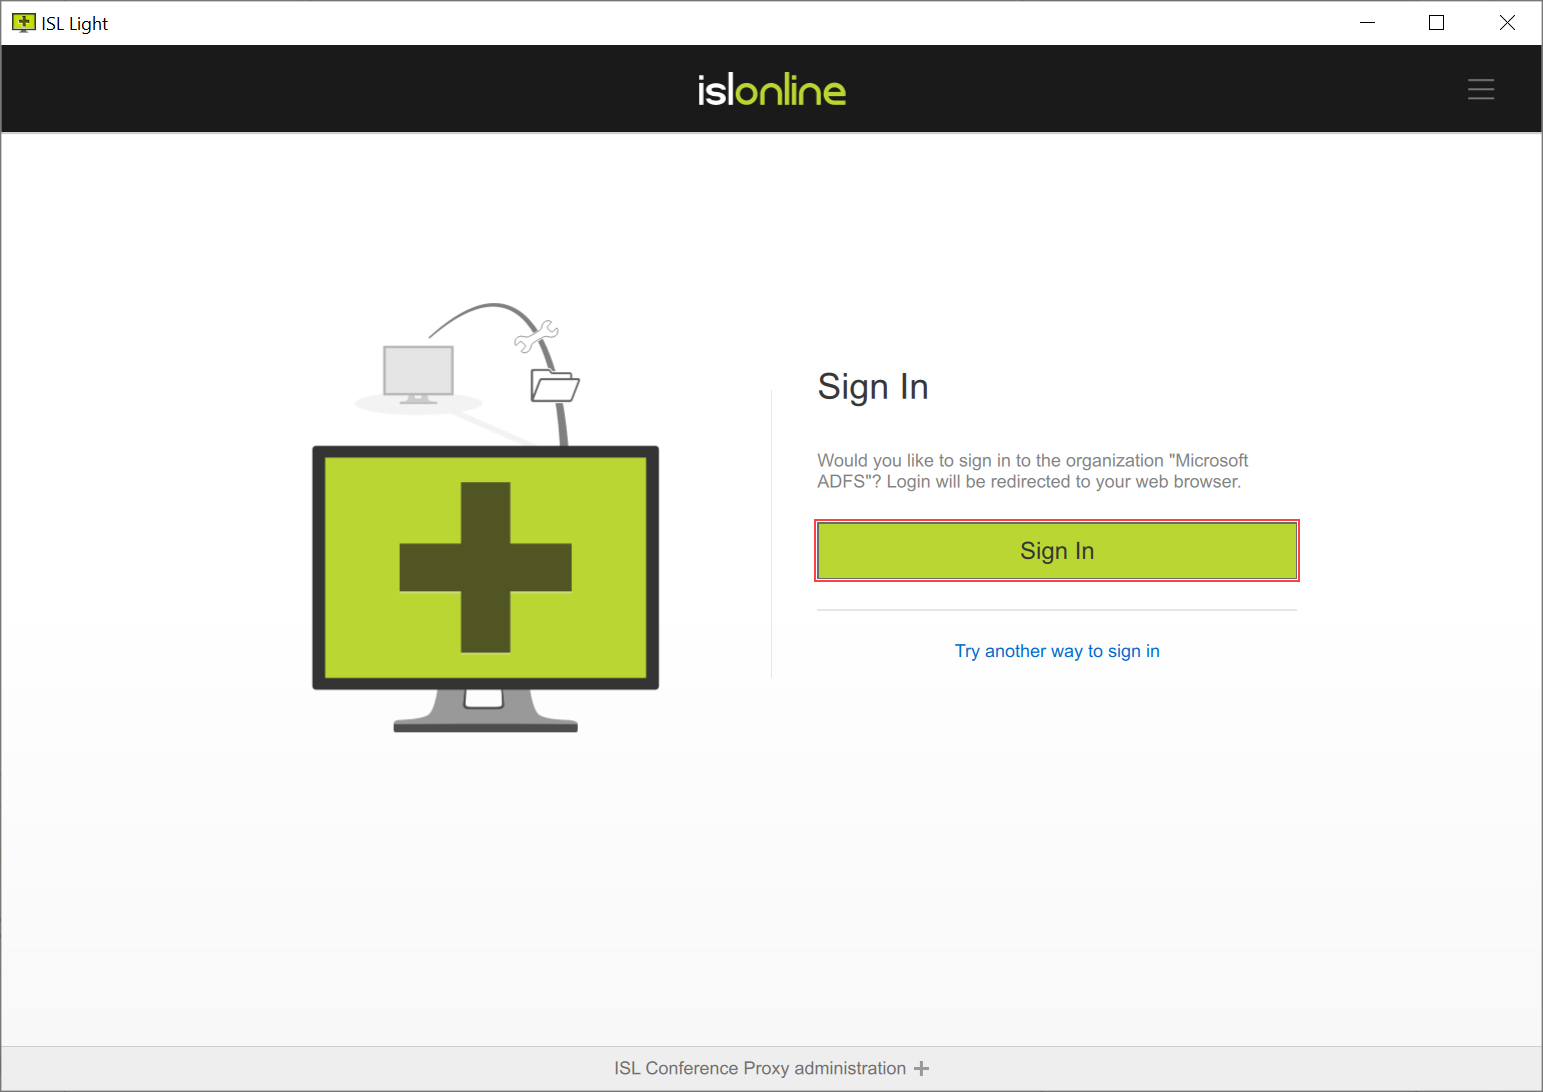
Select "Sign in" button in order to proceed to the Microsoft AD FS login. If the setup was successful you will be redirected to the Single Sign-On page.
Step 4 - Browser
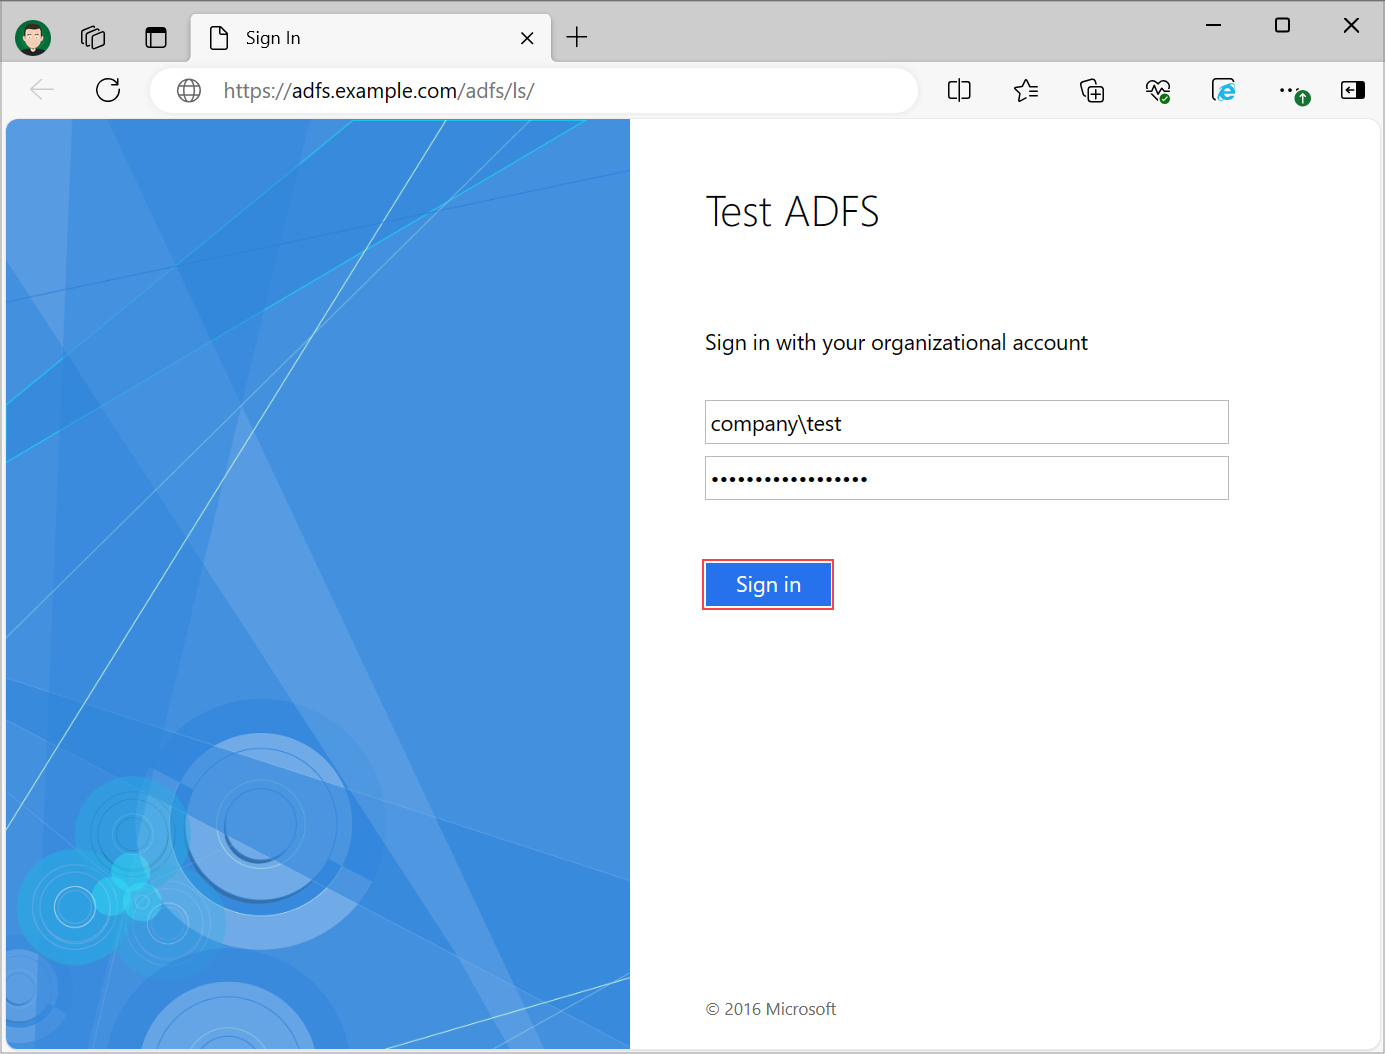
Enter your Microsoft AD FS credentials and sign in. You will be redirected back to the application if login succeeds.
Note: If the token received from Microsoft AD FS is still active in your default browser you won't have to enter your AD FS credentials again.
Step 5 - ISL Conference Proxy
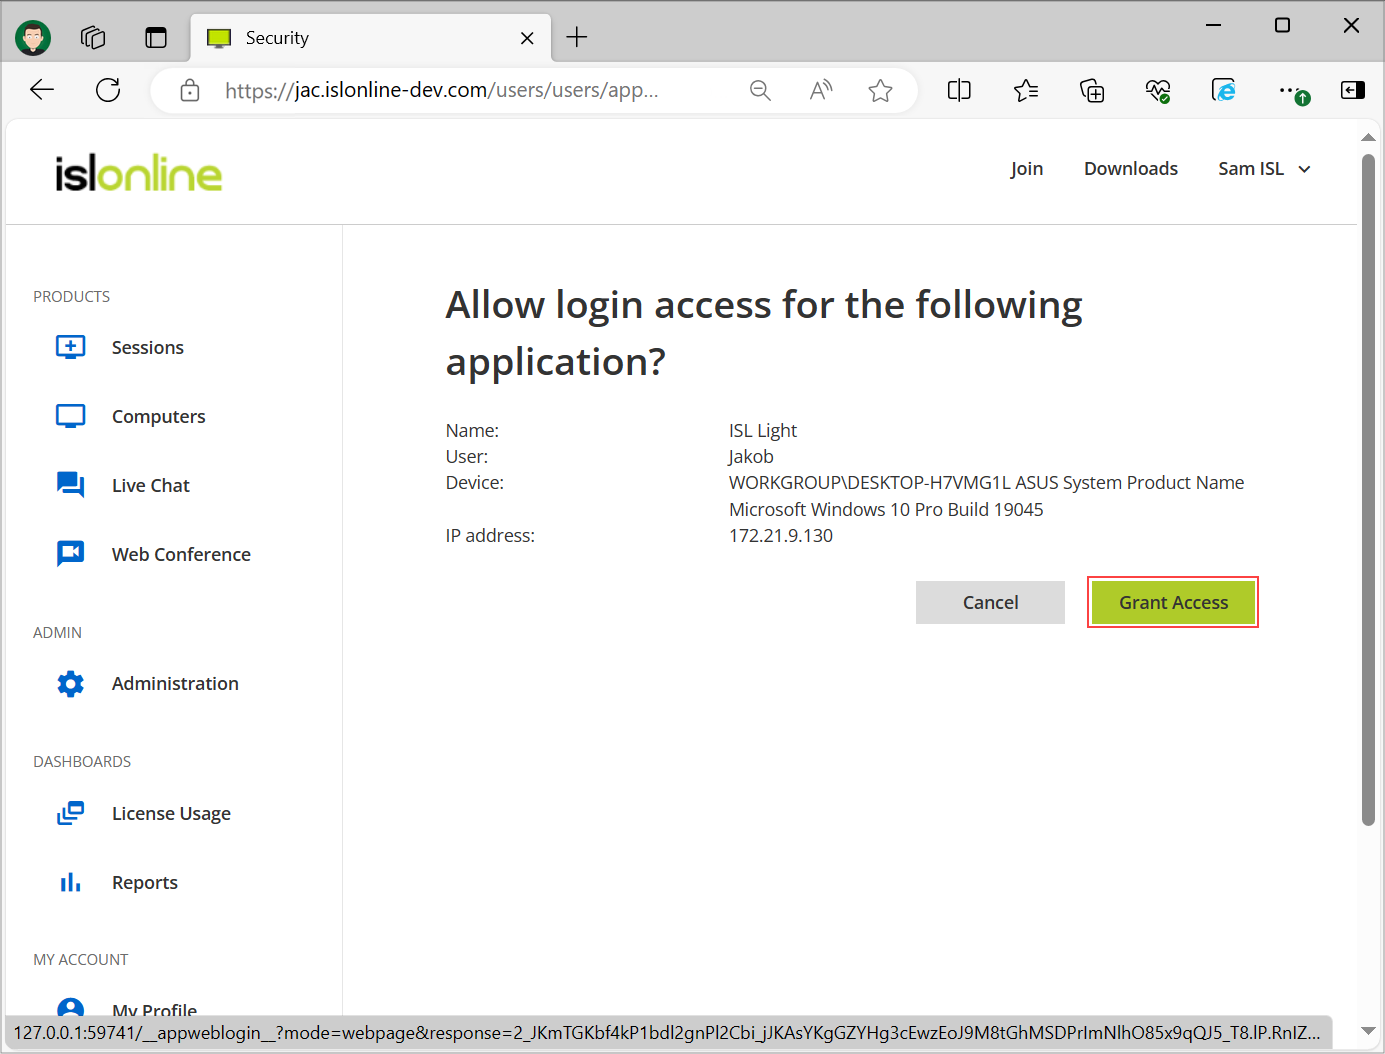
Click on "Grant Access" and you will be logged in and redirected back to the application.
Step 6
You are now logged in and can use the application normally.
Note:If you have enabled additional logs in the Core Login module for easier debugging, navigate to configuration page of your ISL Conference Proxy -> "Configuration" -> "Logs" and set the following settings back to default value: