The Microsoft Entra ID setup is separated into two parts. Firstly the steps that need to be performed on ISL Conference Proxy (ICP) are shown, followed by the steps that need to be performed on the Microsoft Entra ID and at the end the steps that need to be performed on ISL Conference Proxy (ICP) are shown again. Please refer to the relevant part:
- Create a new domain on ISL Conference Proxy
- Setup - Entra ID
- Setup - ISL Conference Proxy
- Sign In - Web
- Sign In - Application
Create a new domain on ISL Conference Proxy
Step 1
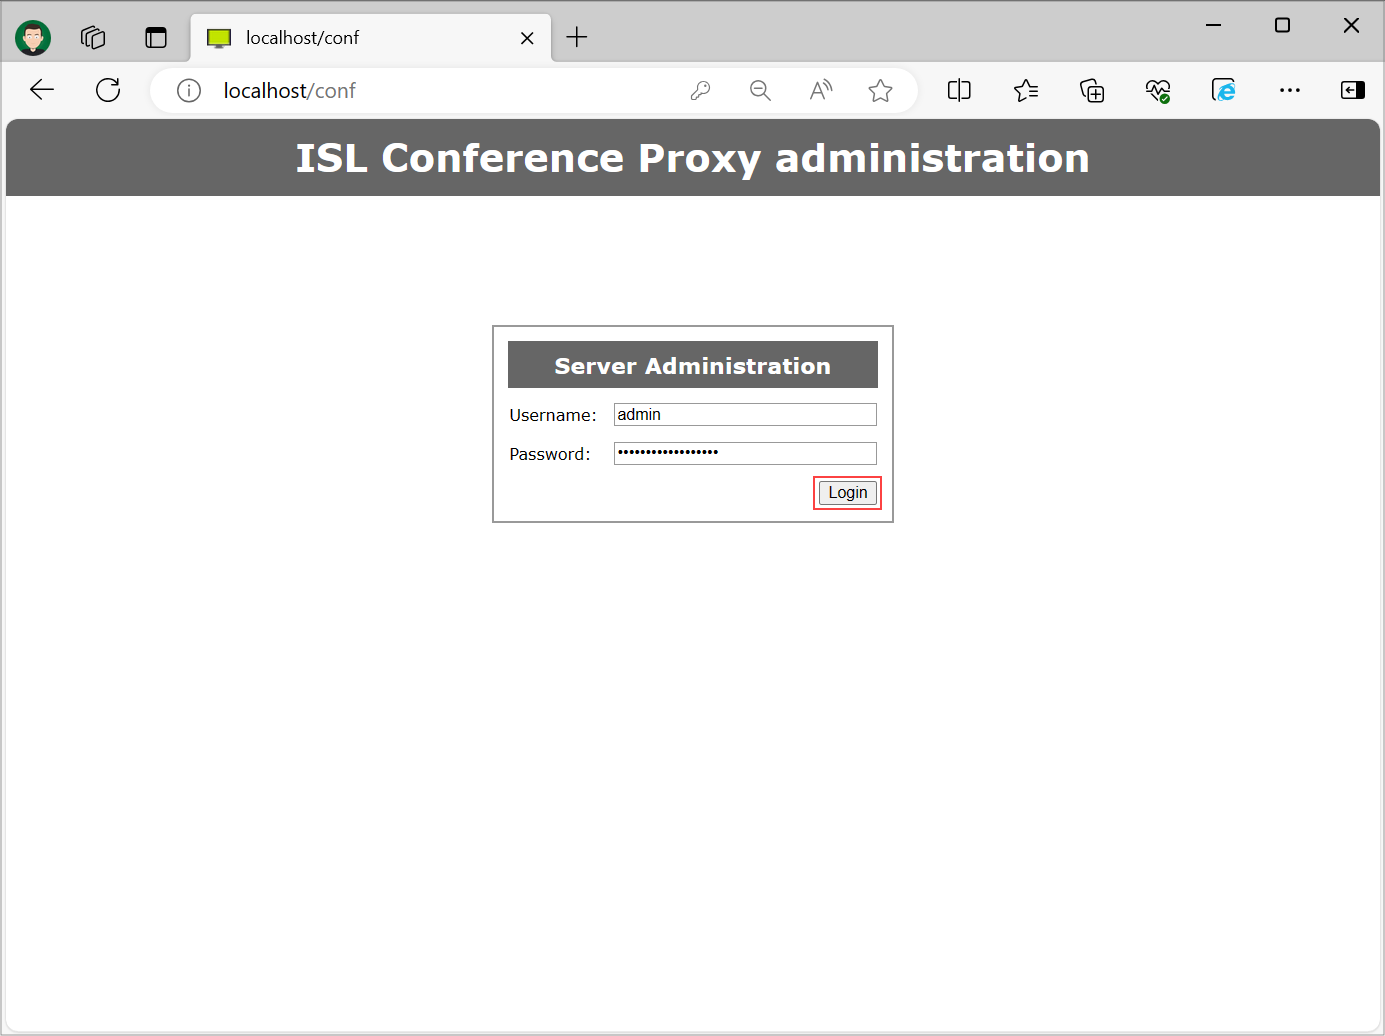
Login to your ISL Conference Proxy configuration page.
Step 2
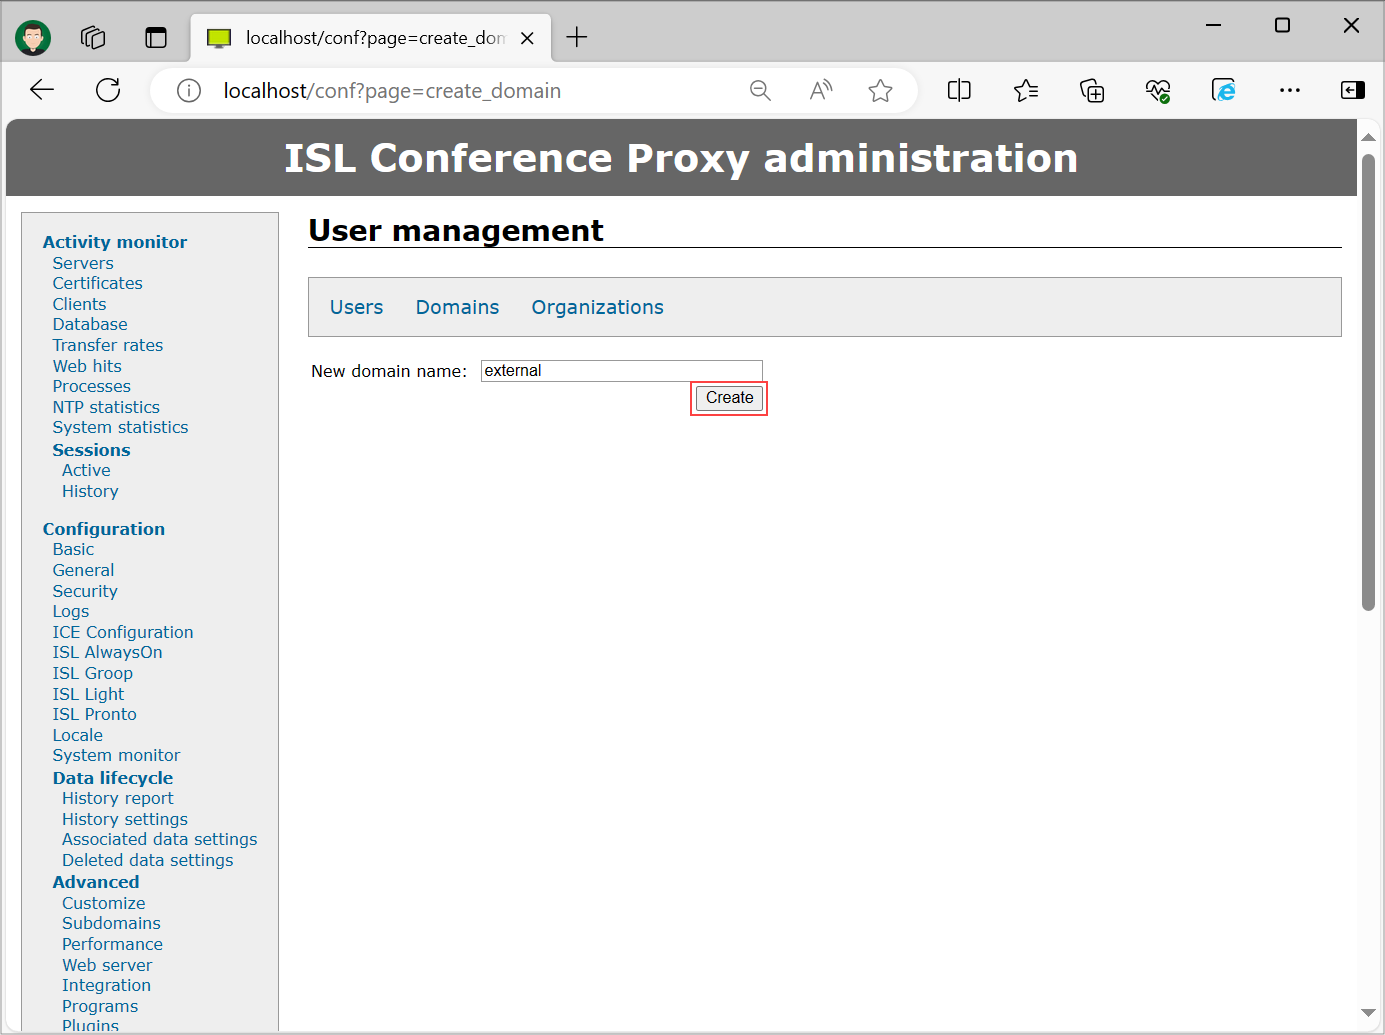
Create an additional domain for Single Sign-On users. A new domain can be created under "User management" -> "Domains" -> "Create domain".
Step 3
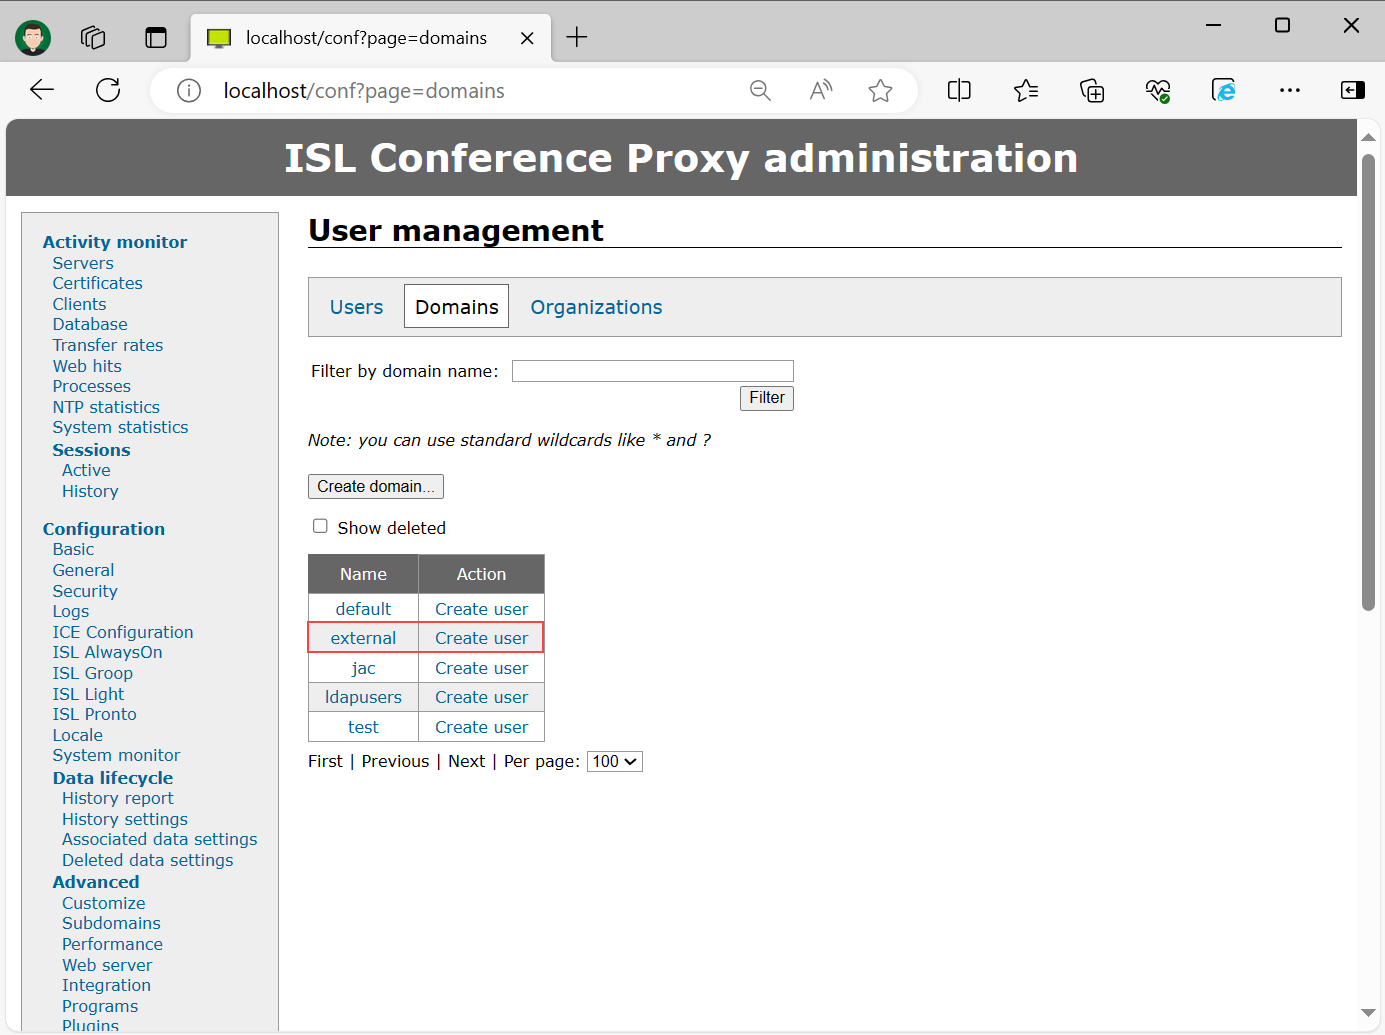
In this example we have created a Domain "external".
Setup - Entra ID
Step 1 (Adding Enterprise Application)
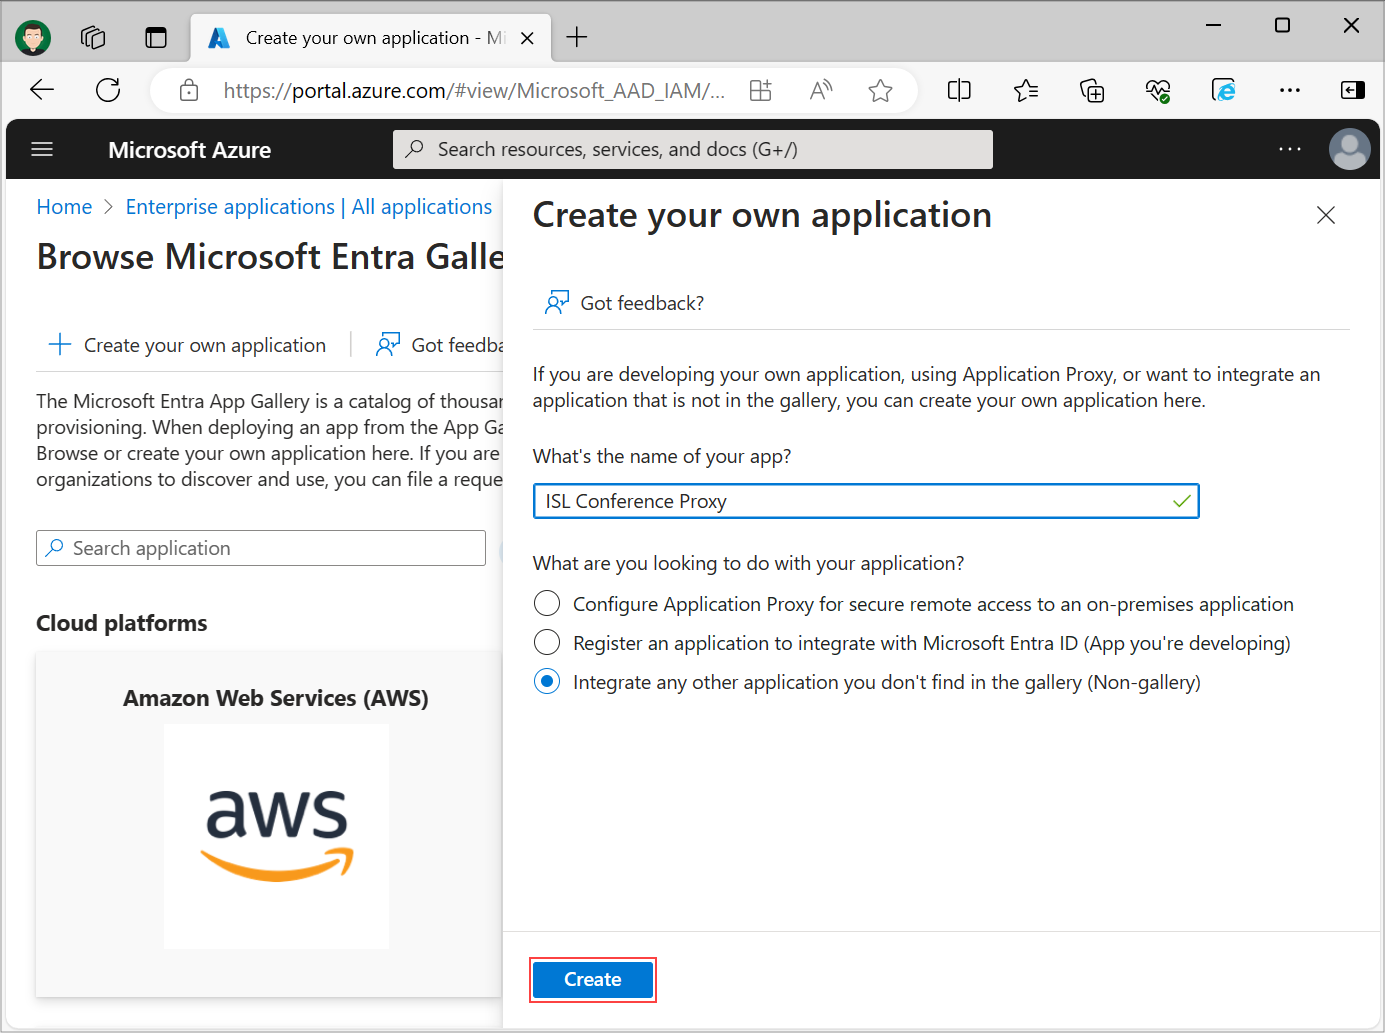
Sign in to the Microsoft Entra ID portal using your Microsoft Entra ID administrator account and navigate to "Microsoft Entra ID" -> "Enterprise Applications" -> "New Application" -> "Create your own application", enter the name of your Application (e.g. ISL Conference Proxy), select Integrate any other application you don't find in the gallery (Non-gallery) option and click Create.
Step 2
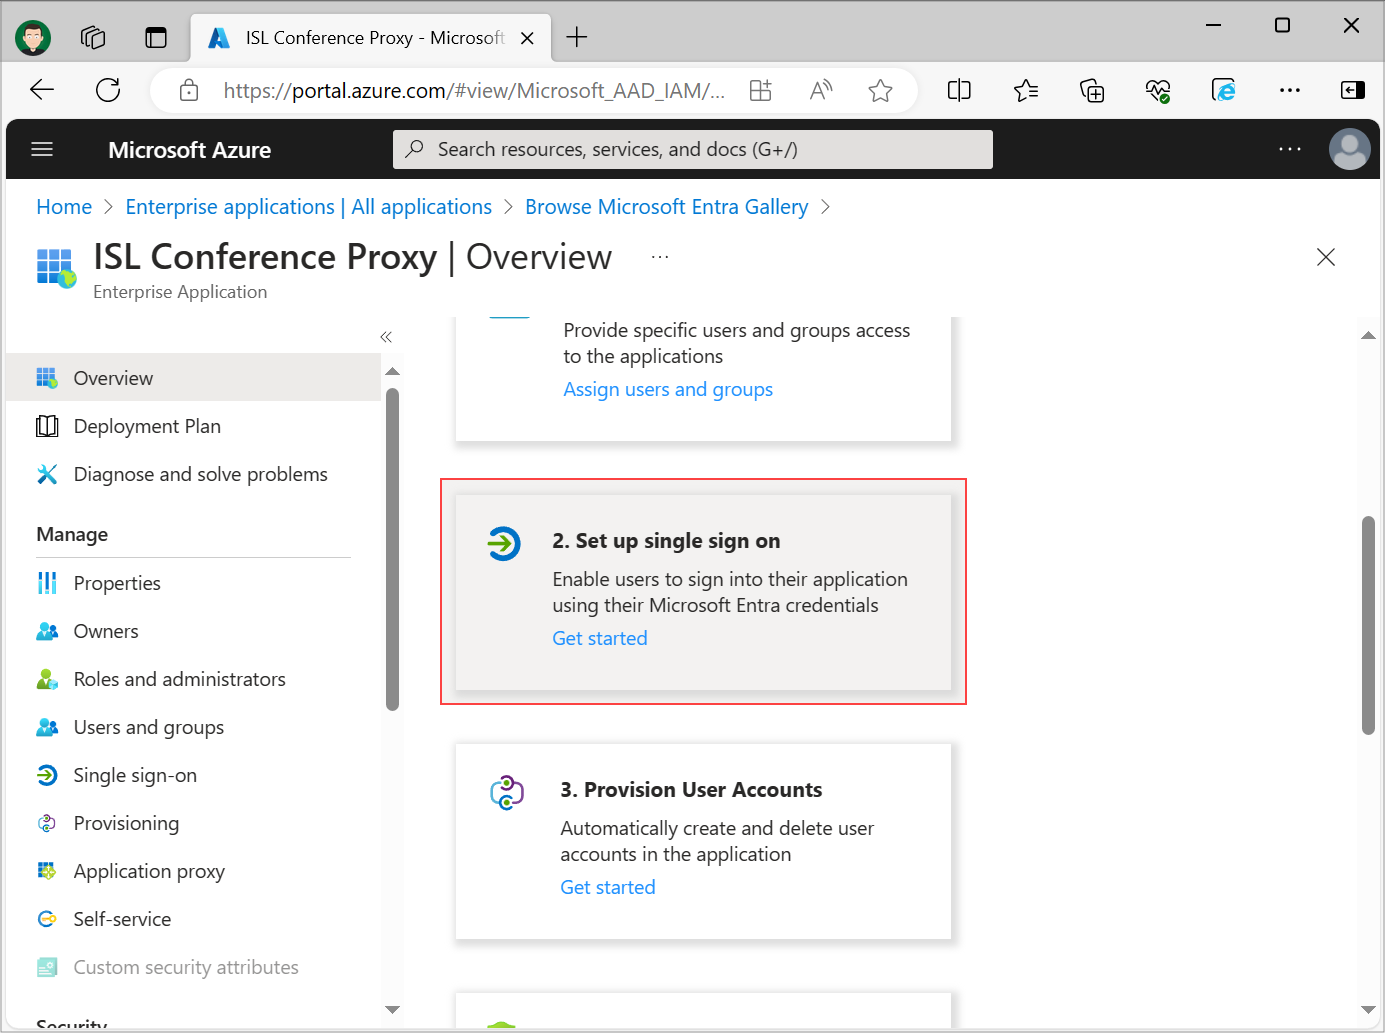
Select Set up single sign on option.
Step 3
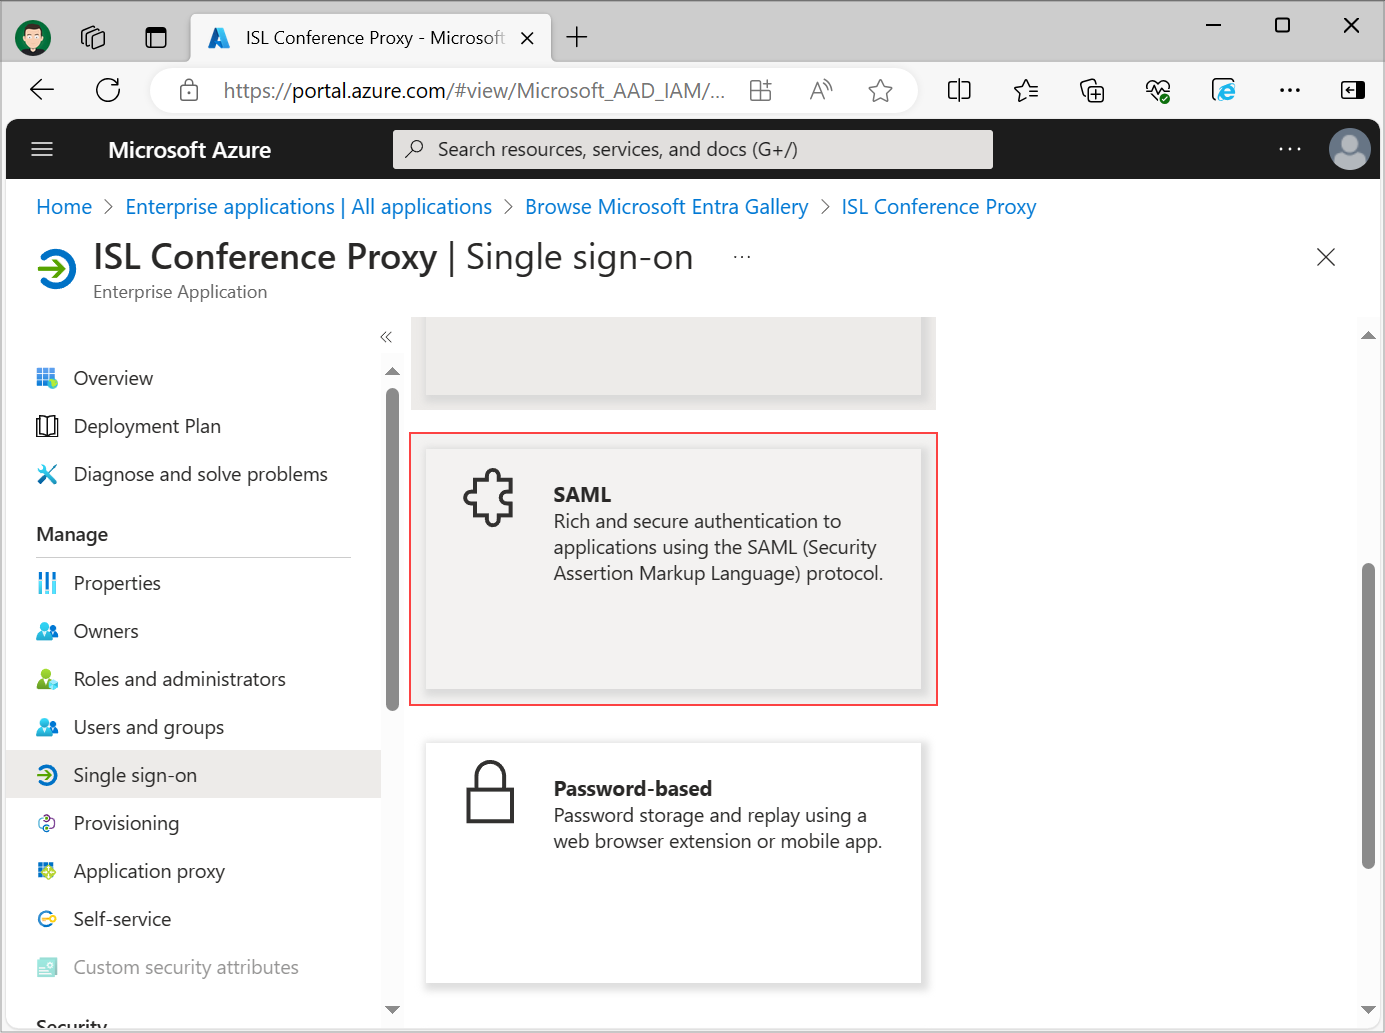
Select SAML Single Sign-On method.
Step 4
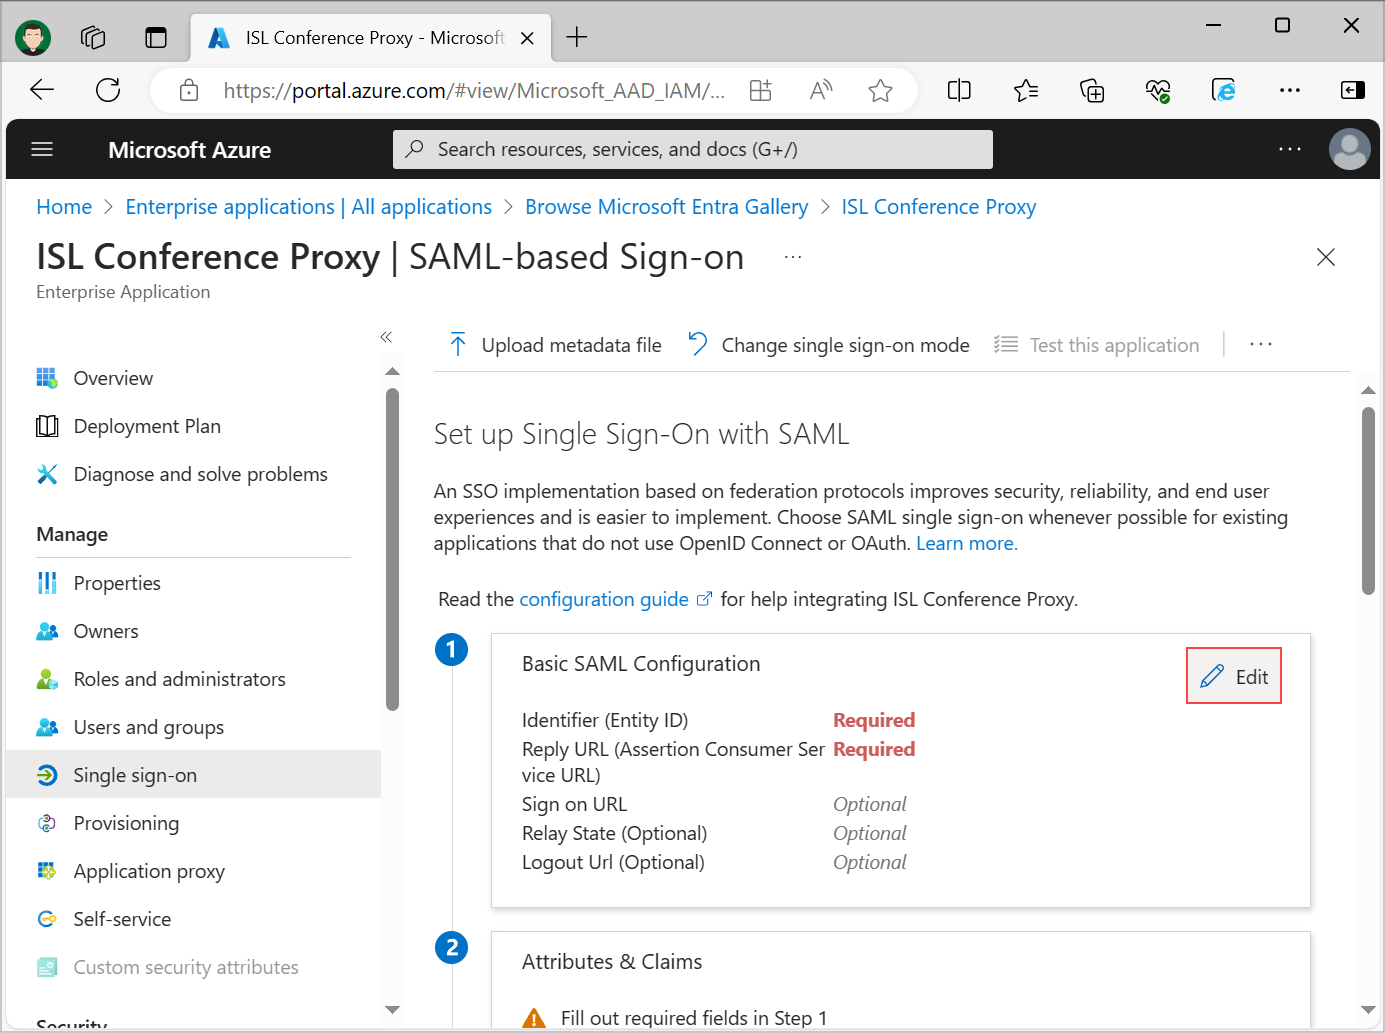
Click on Edit in the Basic SAML Configuration section.
Step 5
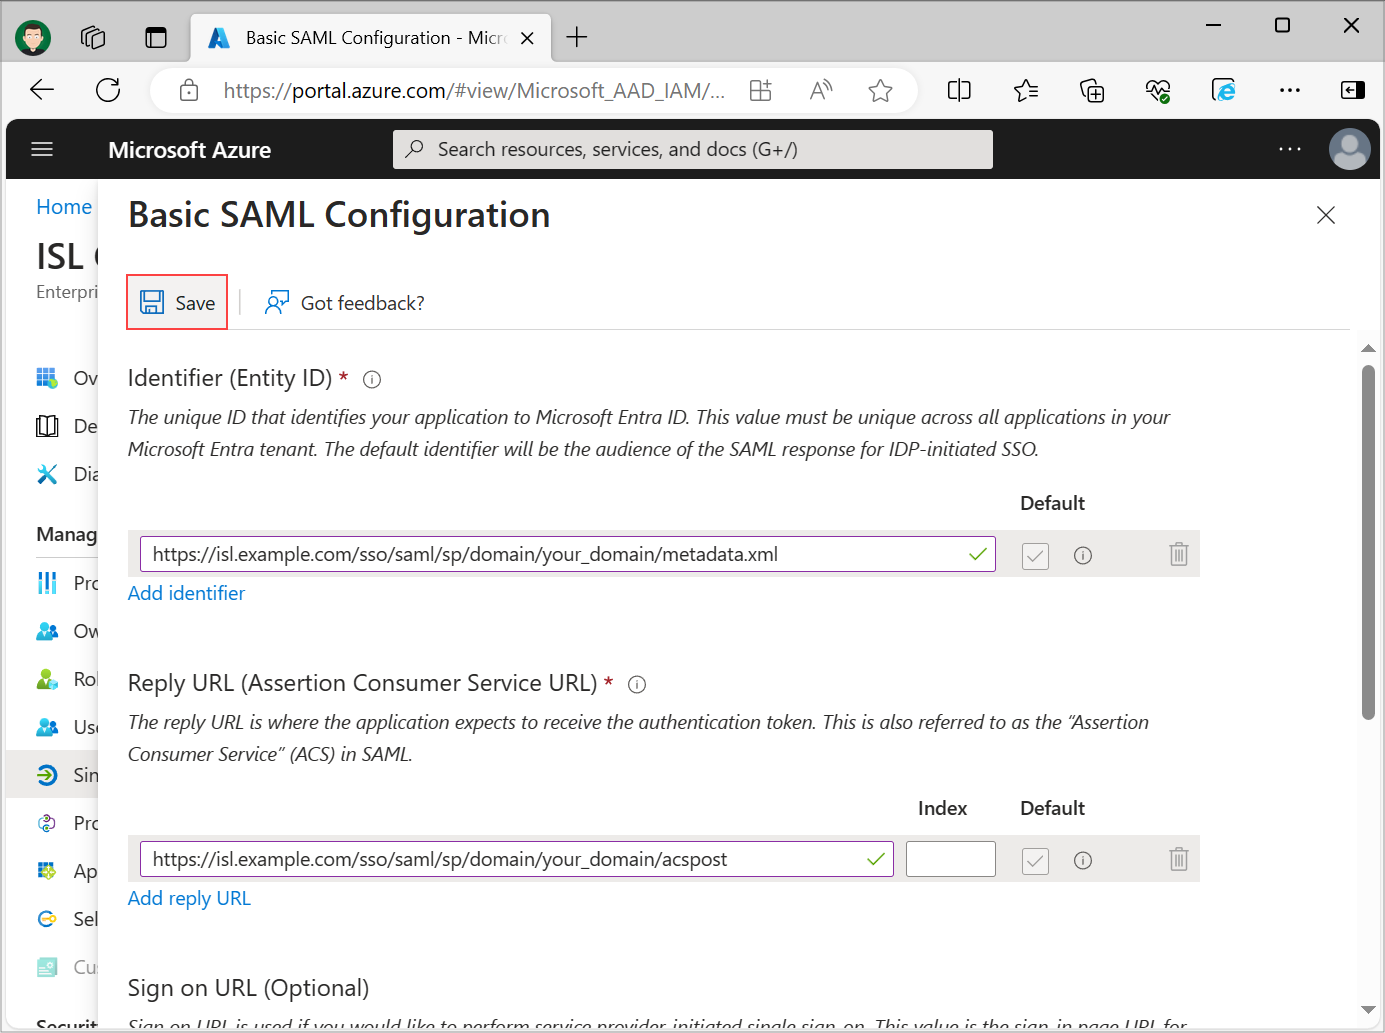
Set the following fields:
- Identifier (Entity ID): https://isl.example.com/sso/saml/sp/domain/your_domain/metadata.xml
- Reply URL (Assertion Consumer Service URL): https://isl.example.com/sso/saml/sp/domain/your_domain/acspost
- Sign on URL (Optional): https://isl.example.com/users/isllight/start.html
Replace https://isl.example.com/ with your ISL Conference Proxy server address and "your_domain" with the domain name of the ISL Conference Proxy domain which you have created at the beginning of this guide. Mark your Identifier and Reply URL entries as default. Review the information and click Save.
Step 6
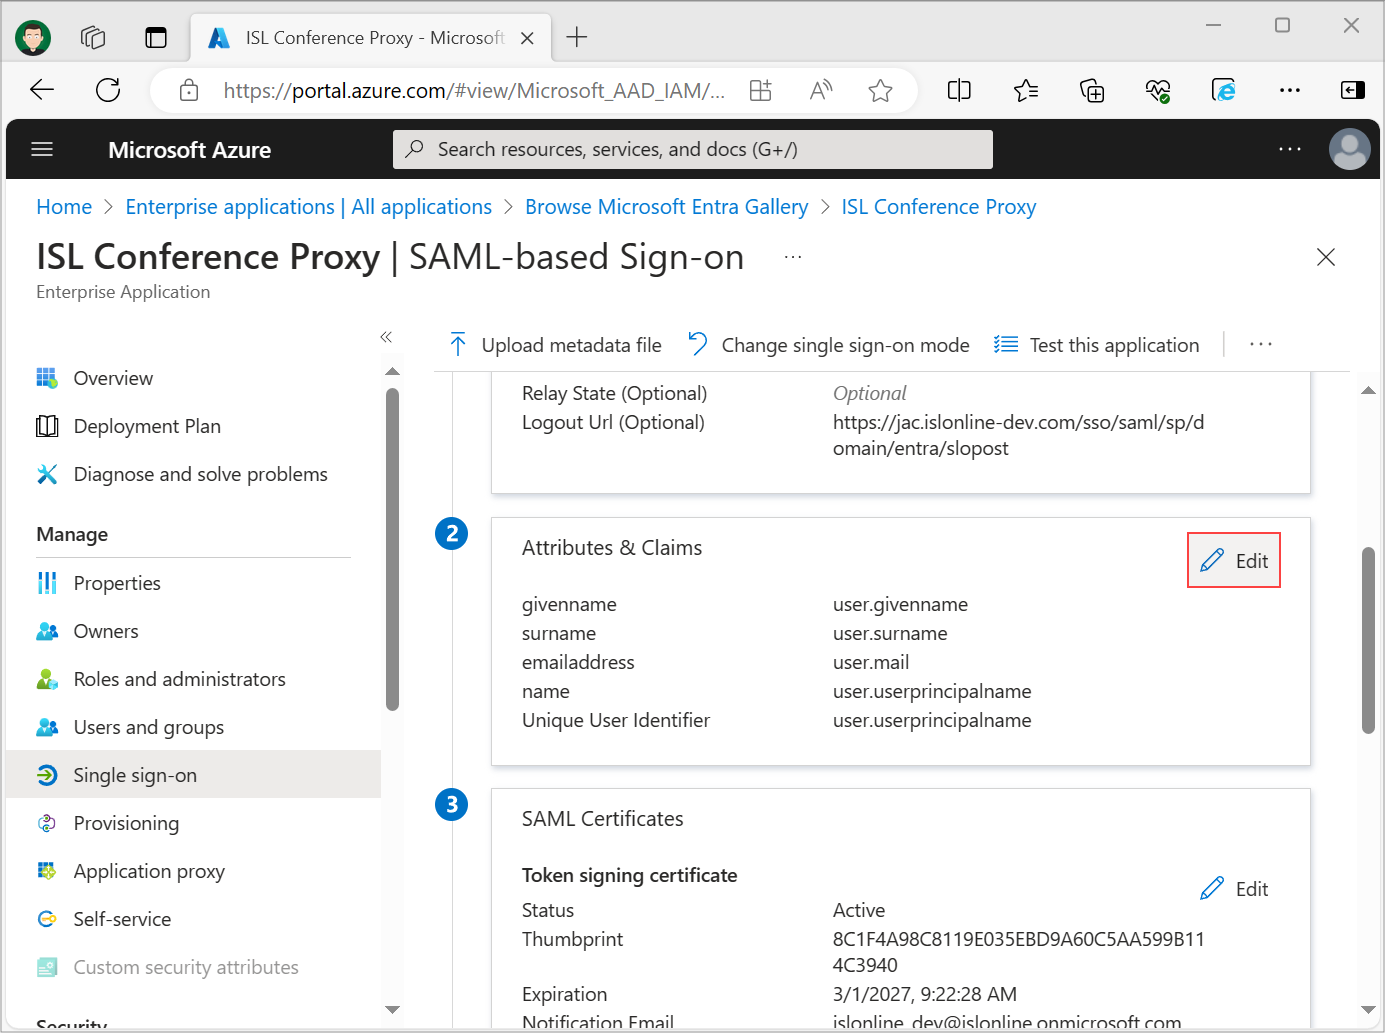
Click Edit under the Attributes & Claims section.
Step 1 (Edit Attributes & Claims)
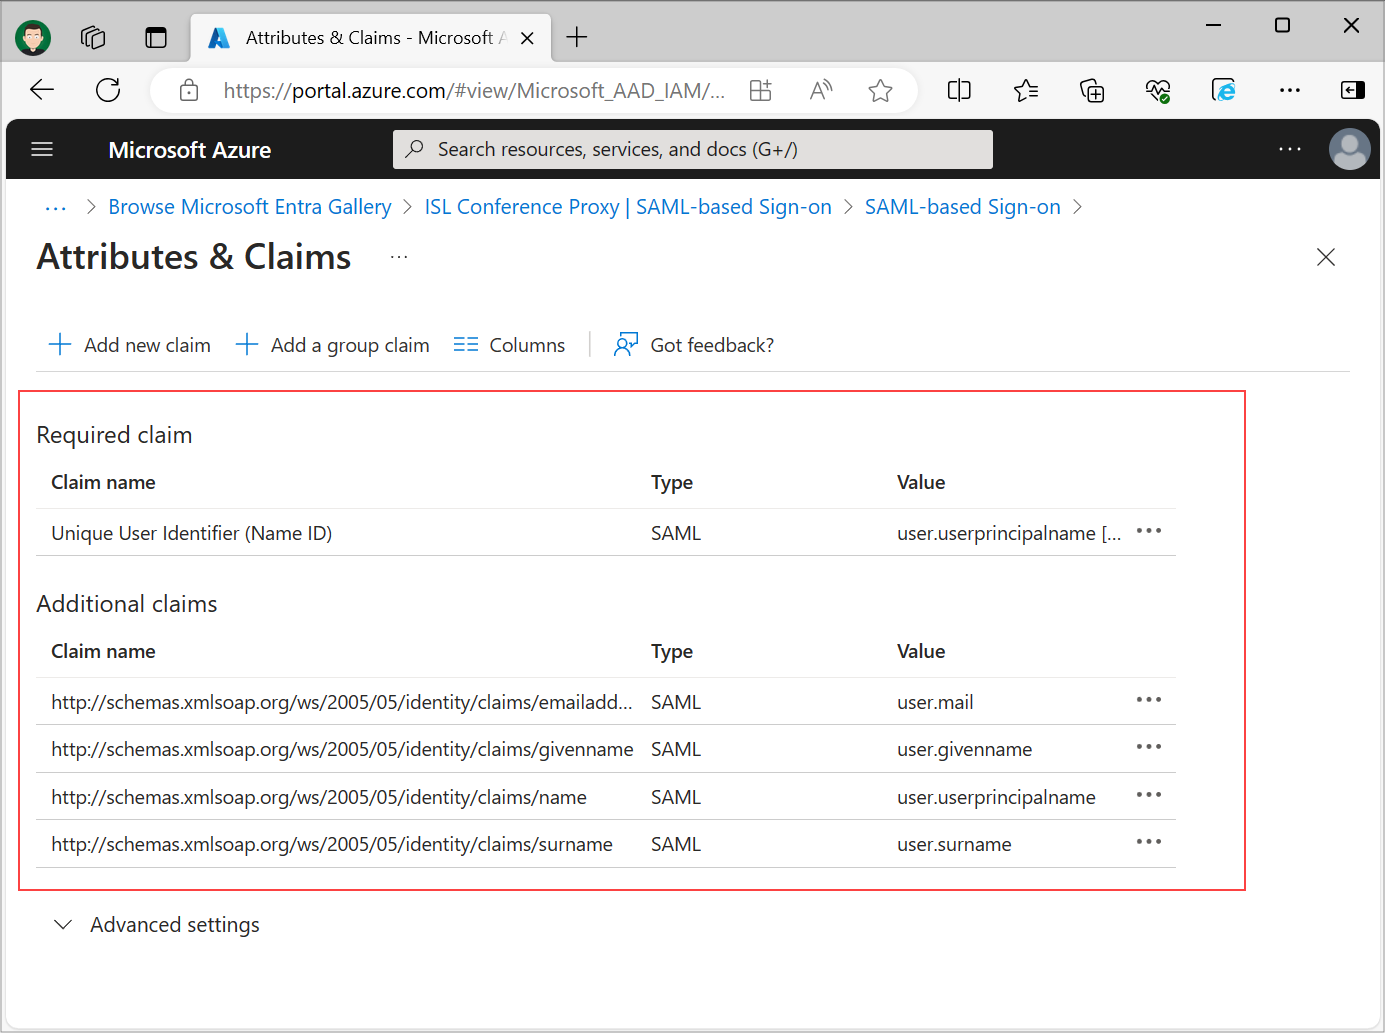
When a user authenticates to the ISL Conference Proxy application, Microsoft Entra ID will issue a SAML token to the ISL Conference Proxy, that contains unique information about the user. A unique User Identifier (Name ID) specifies the claim, which will uniquely identify the user on the ISL Conference Proxy (username). We can add additional claims, which will send the full name, email and group list of the user. Claim name values are used when creating SAML login setting rules.
Note: In larger organizations the number of groups a user is a member of may exceed the ISL Conference Proxy limit, that is 100 groups per user. If your user's group membership count exceeds this limit, we recommend restricting the groups emitted in claims only to the relevant groups for the application.
Step 2
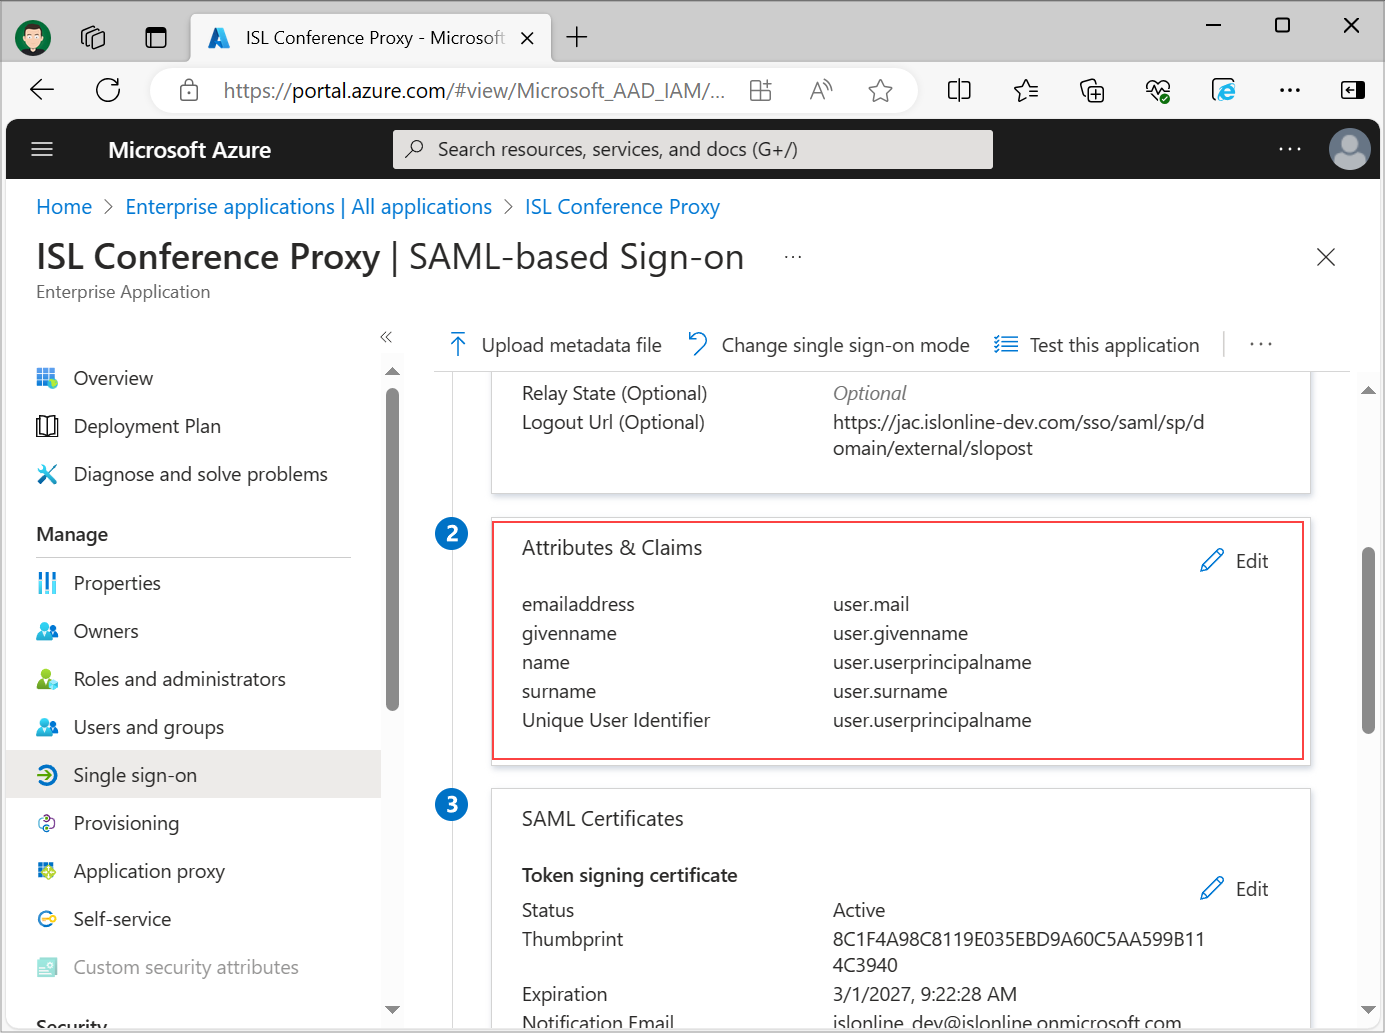
Review set User Attributes & Claims. The default settings are usually good as starting point.
Get Microsoft Entra ID metadata XML URL

After basic SAML configuration and set up of user attributes/claims are finished, copy the Microsoft Entra ID metadata XML URL link by clicking on the "Copy to clipboard" button beside App Federation Metadata Url. Store the App federation metadata XML URL as it will be used in Step 2 of ISL Conference Proxy SAML 2.0 setup.
Important: Make sure to complete the Basic SAML Configuration section before downloading federation metadata XML, otherwise metadata signature certificates won't match.
Verification certificates (optional)

In the Verification Certificates section, click Edit. Check Require Verification Certificates and select Upload certificate.
Before uploading the certificate which you generated previously, you will have to rename it to ".cer" instead of ".cert".
Example of a valid Certificate:
sso-dn1983791873298739287-20250529-saml-sp.cer
Review the changes and click Save.
Assign users to the application
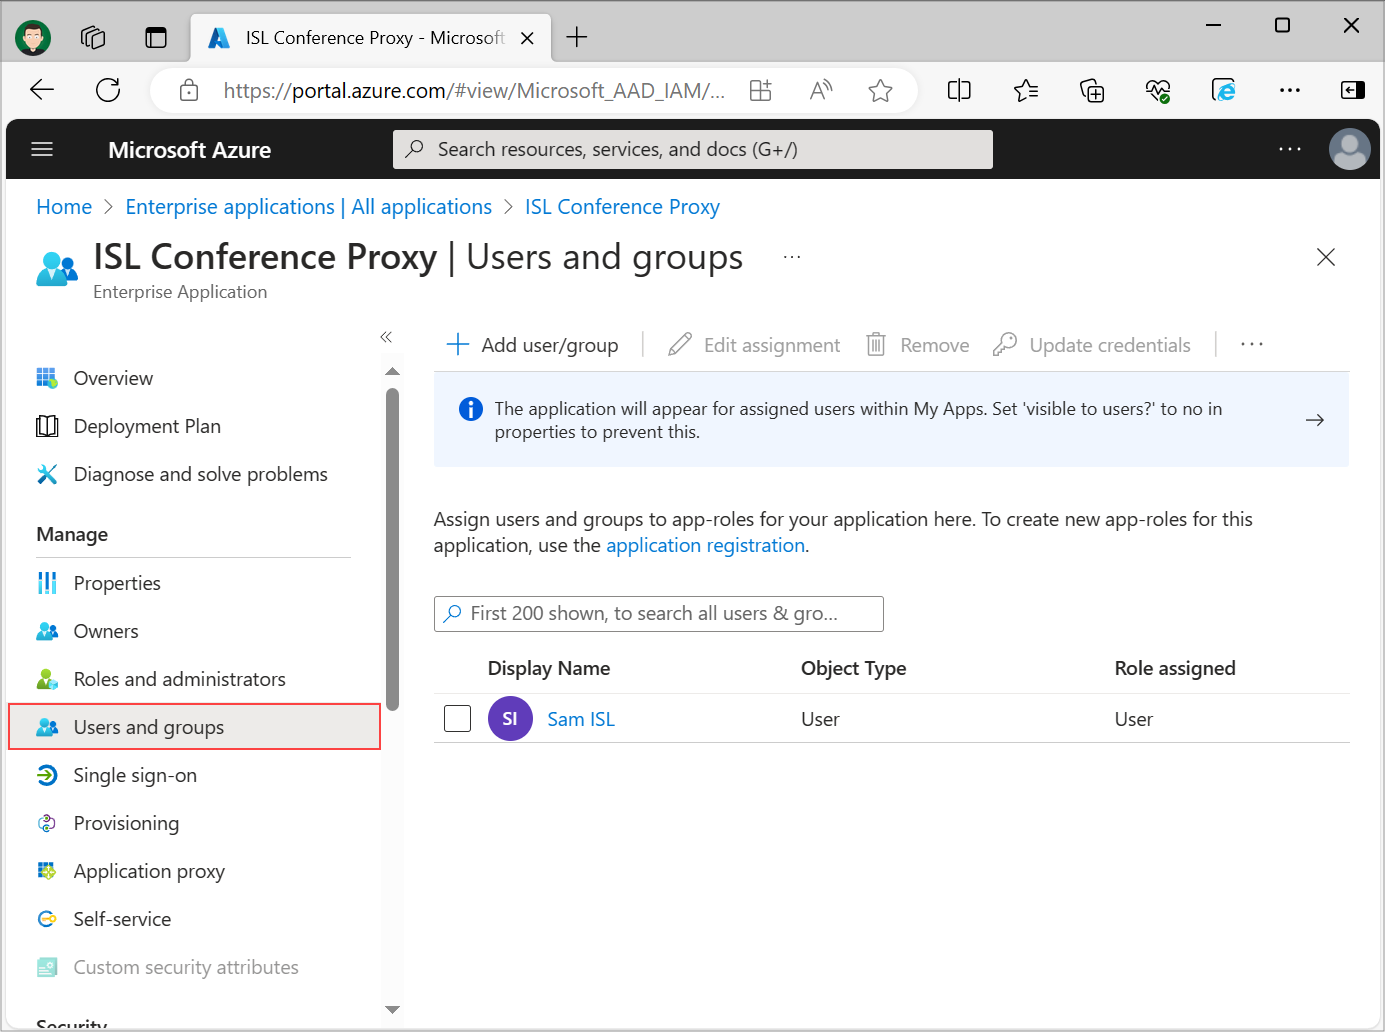
Usually, users must first be assigned to the application before being able to access it. Select User and groups from the Enterprise application panel and add users who will have access to your ISL Conference Proxy application.
Setup - ISL Conference Proxy
Step 1
Generate Service Provider (ICP) key-pair (public certificate file and private key). These keys will be used when the Service Provider (ICP) communicates with the Identity Provider (Microsoft Entra ID). The simplest way of generating the key-pair is using the OpenSSL tool and issuing the commands below. In the first and the second command replace the domain with your domain that you have created on ISL Conference Proxy and in the second command replace the isl.example.com with your ISL Conference Proxy server address.
openssl genrsa -out sso_saml_domain_sp.key -aes128 2048
openssl req -x509 -key sso_saml_domain_sp.key -out sso_saml_domain_sp.cert -days 3650 -subj "/CN=isl.example.com"
Important: ISL Conference Proxy supports the traditional PEM format (Non PKCS 8). If you are generating a key with OpenSSL 3.x.y, which generates the PKCS 8 by default, use the -traditional flag.
openssl genrsa -traditional -out sso_saml_domain_sp.key -aes128 2048
Step 2
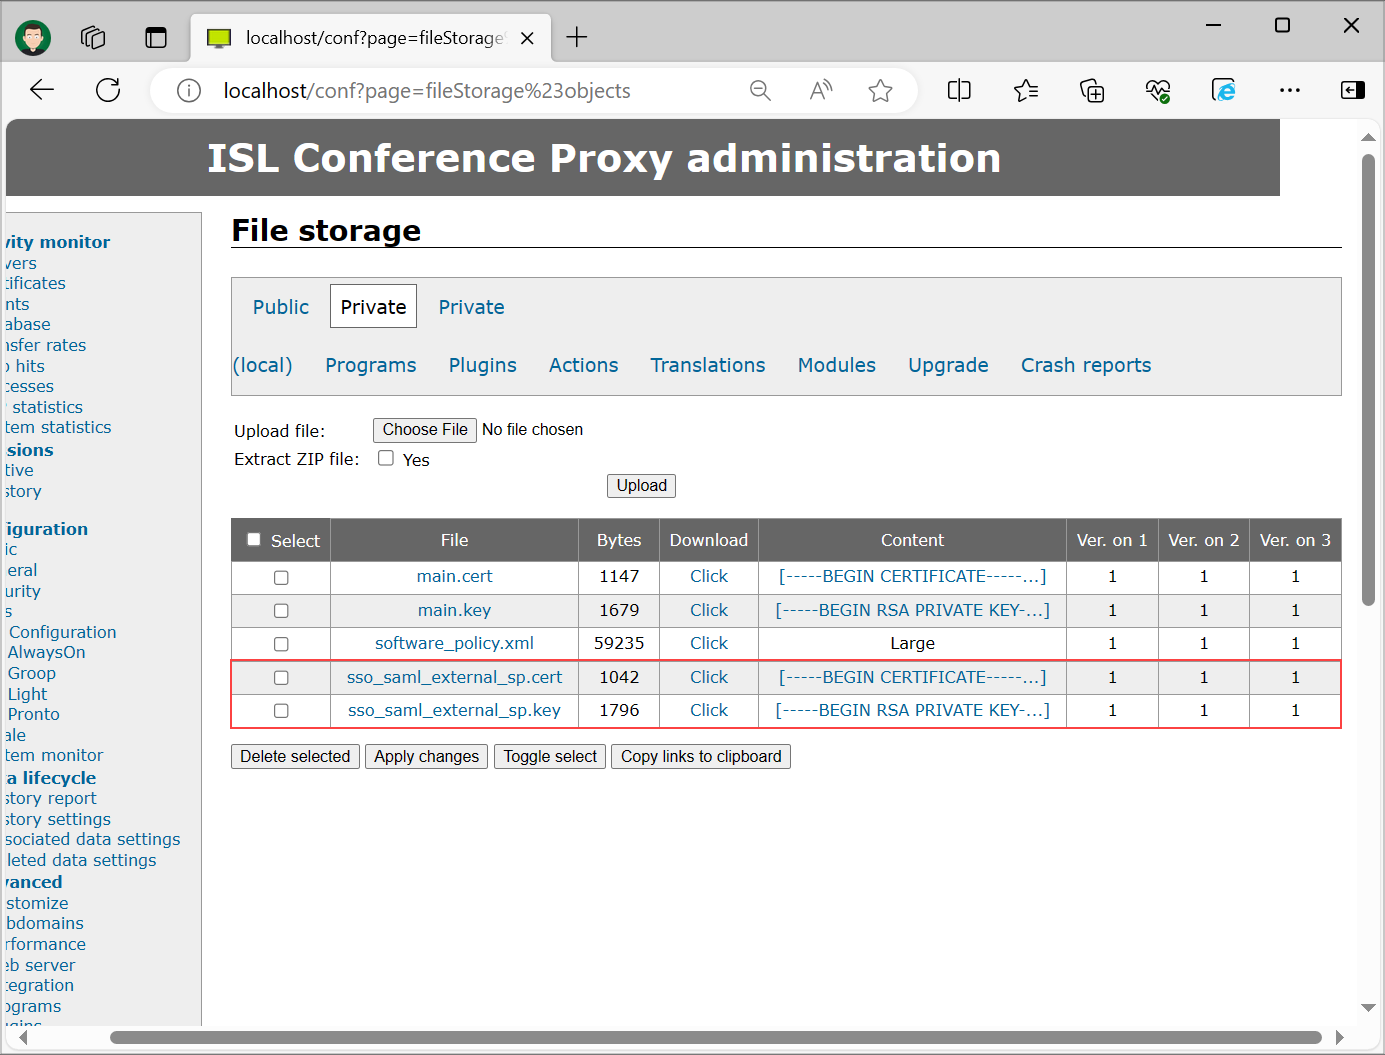
Upload the key-pair (from Step 1) to ISL Conference Proxy Private File storage. You can access Private File storage by opening “ISL Conference Proxy web administration" -> "Configuration" -> "Advanced" -> "File storage" -> "Private”.
Step 3
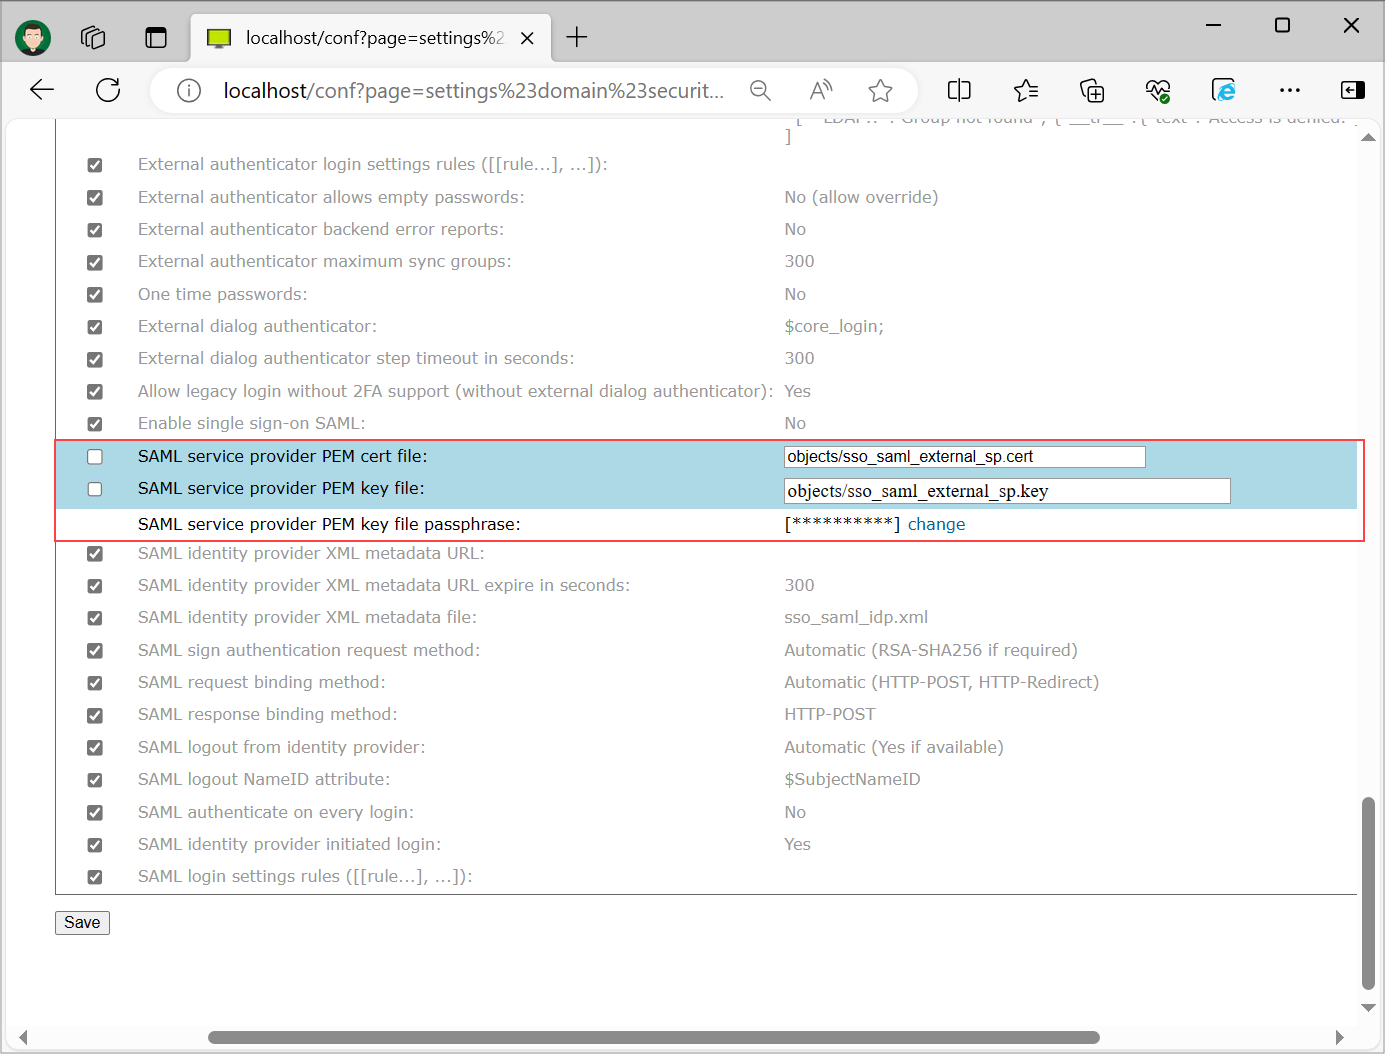
Configure the ISL Conference Proxy to use the uploaded files in Step 2 for SAML communication. Settings are found under "User management" -> "your_domain" -> "Security". To access files placed in Private storage you have to append "objects/" before the filename.
Important: For the "SAML service provider PEM key file passphrase" enter the passphrase that you entered when generating the key-pair in Step 1.
Step 4
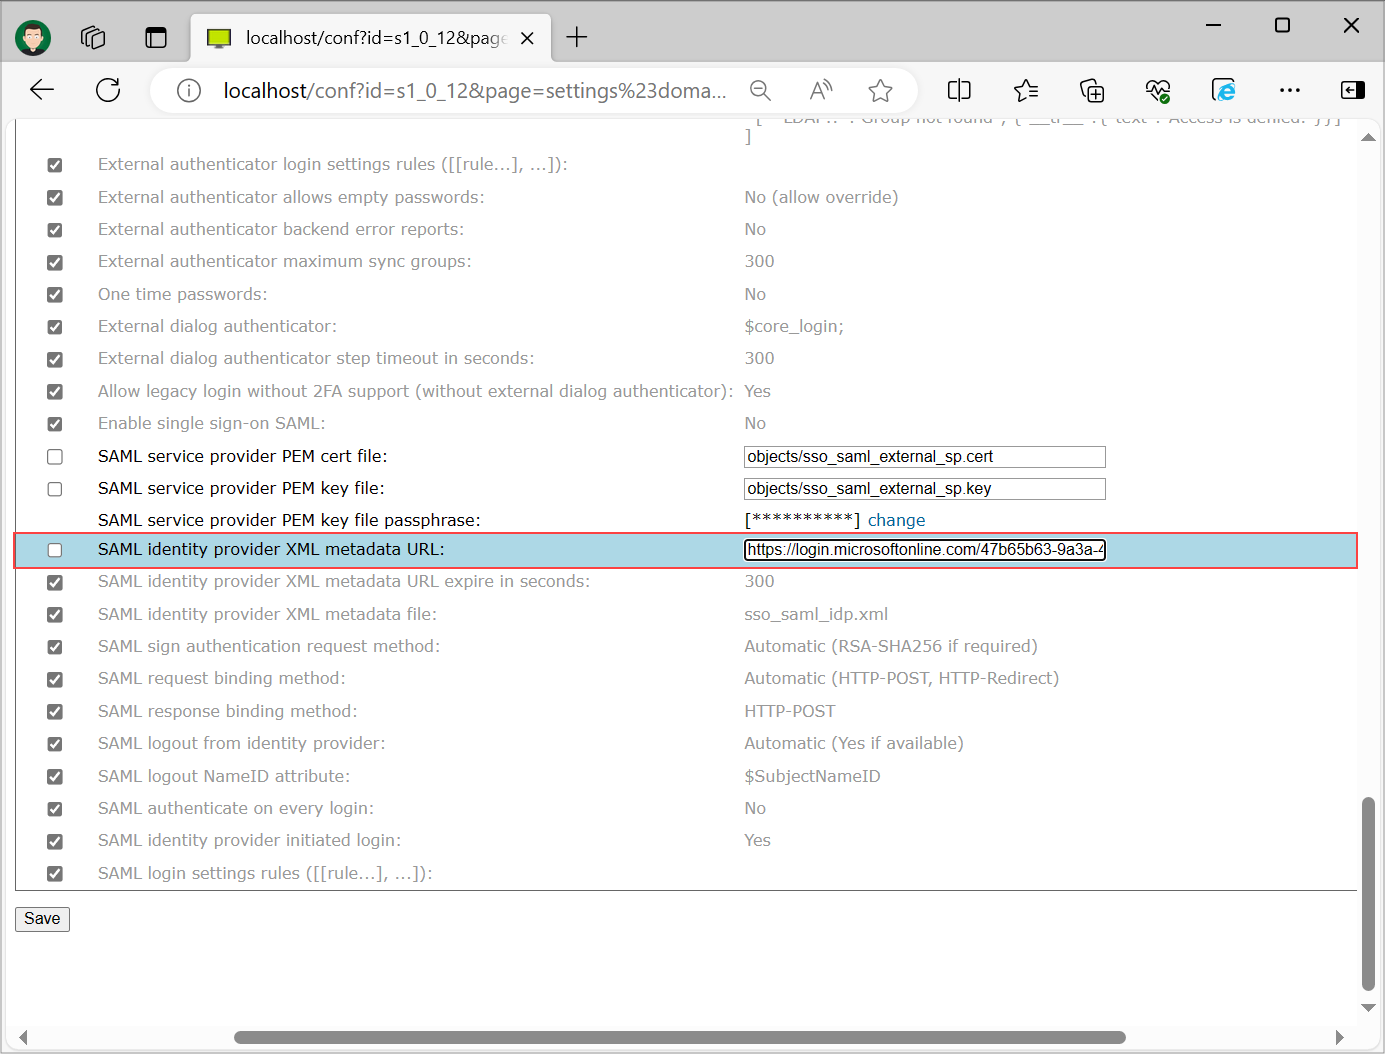
On the same page configure the setting "SAML identity provider XML metadata URL" with the URL that you have stored in "Get Microsoft Entra ID metadata XML URL" part of this guide and select "Save" at the bottom of the page.
Important: Replacing the Identity Provider metadata XML file on your ISL Conference Proxy requires restart of the module apps. Navigate to “ISL Conference Proxy web administration" -> "Activity monitor" -> "Servers", select each server, and click "Restart module apps" one by one.
Step 5 (Optional)
Enable additional logs in the Core Login module for easier debugging. Under "Configuration" -> "Logs" set the following settings to log anything with a severity greater than 6 (info):
- Log subsystem [Core Login] Application web login severity report level
- Log subsystem [Core Login] Login dialog severity report level
- Log subsystem [Core Login] Single sign-on: SAML severity report level
Step 6
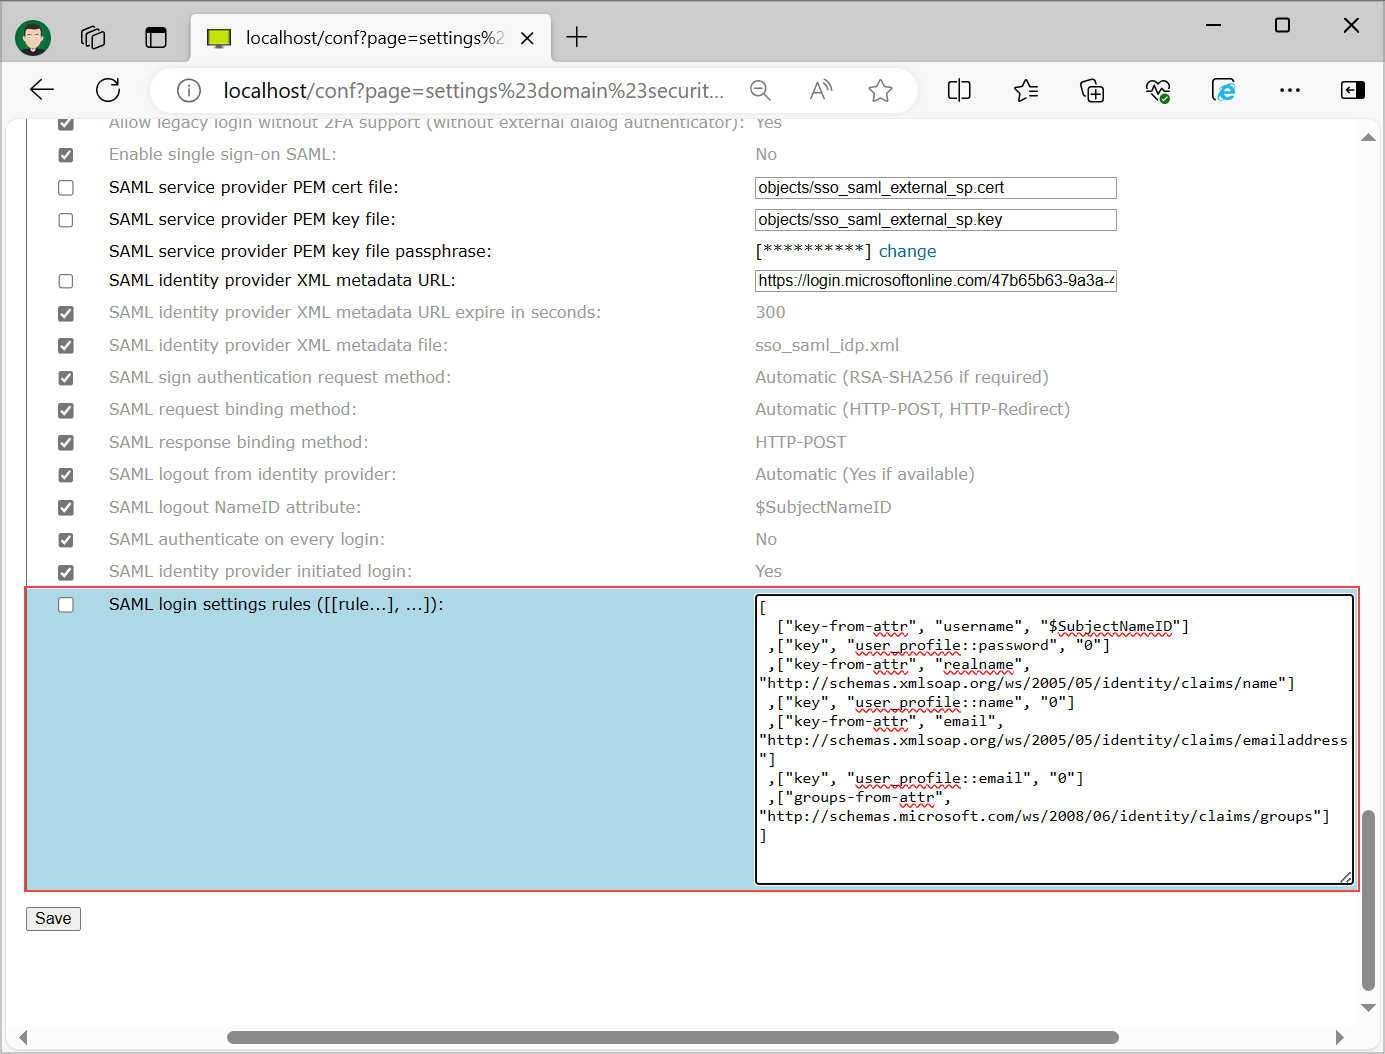
Set SAML login setting rules under "User management" -> "your_domain" -> "Security". These settings specify how credentials obtained via SAML are mapped to ISL Conference Proxy credentials and settings. An example configuration looks like this:
[
  ["key-from-attr", "username", "$SubjectNameID"]
 ,["key", "user_profile::password", "0"]
 ,["key-from-attr", "realname", "http://schemas.xmlsoap.org/ws/2005/05/identity/claims/name"]
 ,["key", "user_profile::name", "0"]
 ,["key-from-attr", "email", "http://schemas.xmlsoap.org/ws/2005/05/identity/claims/emailaddress"]
 ,["key", "user_profile::email", "0"]
 ,["groups-from-attr", "http://schemas.microsoft.com/ws/2008/06/identity/claims/groups"]
]
Settings are described in depth in the following topic: Security.
Note: If you want to synchronize external user groups with ISL Conference Proxy user groups, add ["sync-external-groups", ""] SAML login rule after "sync-external-groups-rename" and "groups-from-attr" rules.
Step 7
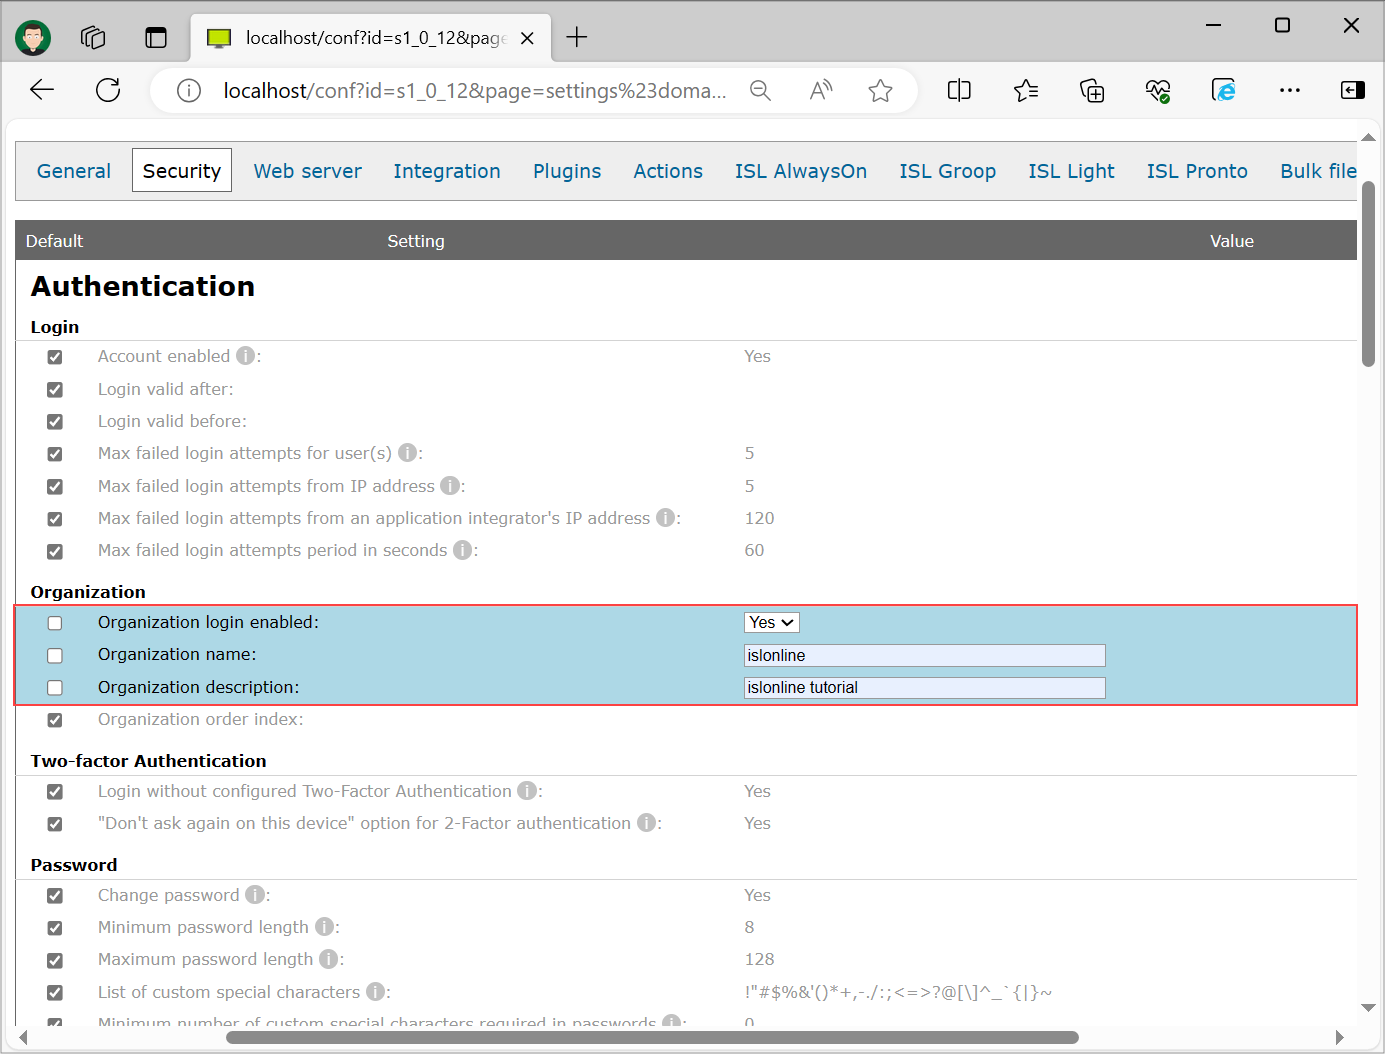
On the same page enable the setting "Organization login enabled", set the "Organization name" and "Organization description". You can set custom name and description, make sure that name and description are unique in order to avoid confusion for users upon logging in.
Note: The "Organization name" parameter must be a valid identifier, starting with a letter or underscore, followed only by letters, digits, or underscores — spaces are not allowed.
Step 8
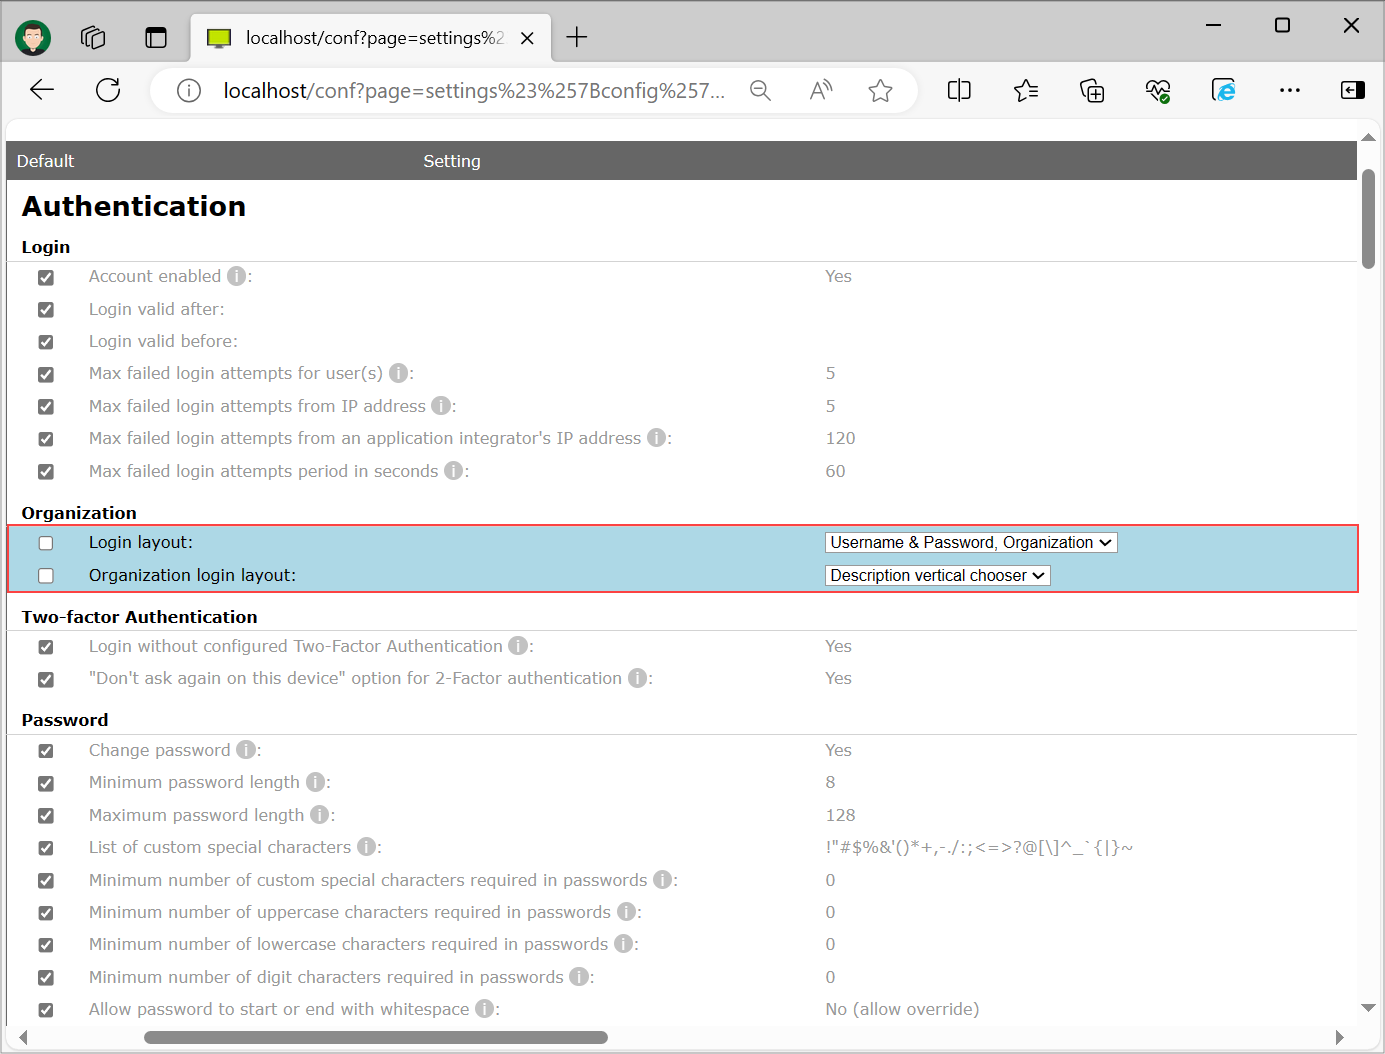
Navigate to "Configuration" -> "Security", find settings "Login layout" and "Organization login layout" and set them to settings that will suit your use case. In our case we've set the settings to "Username & Password, Organization" and "Description vertical chooser".
Important: If you are going to set "Login layout" setting to "Organization", users on domains that don't have Single Sign-On enabled, will not be able to log in to their account on ISL Conference Proxy.
Step 9
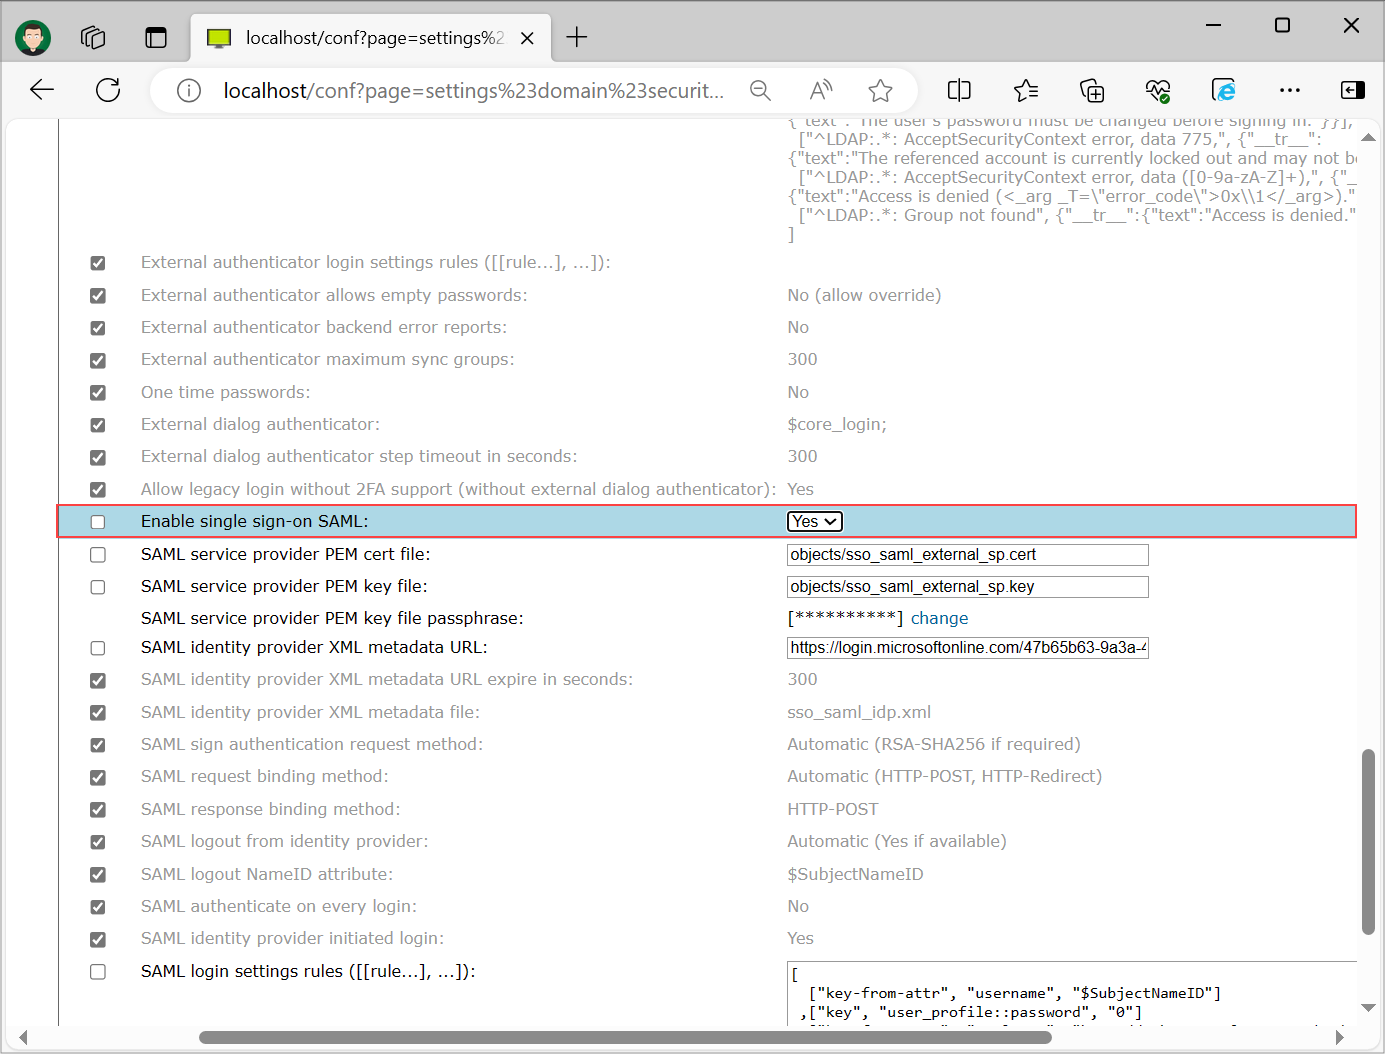
Enable Single Sign-On under "User management" -> "your_domain" -> "Security" to force the logins to be redirected to the Identity Provider and thus enable the Single Sign-On functionality. Restart module apps in ISL Conference Proxy when prompted.
Sign In - Web
Step 1
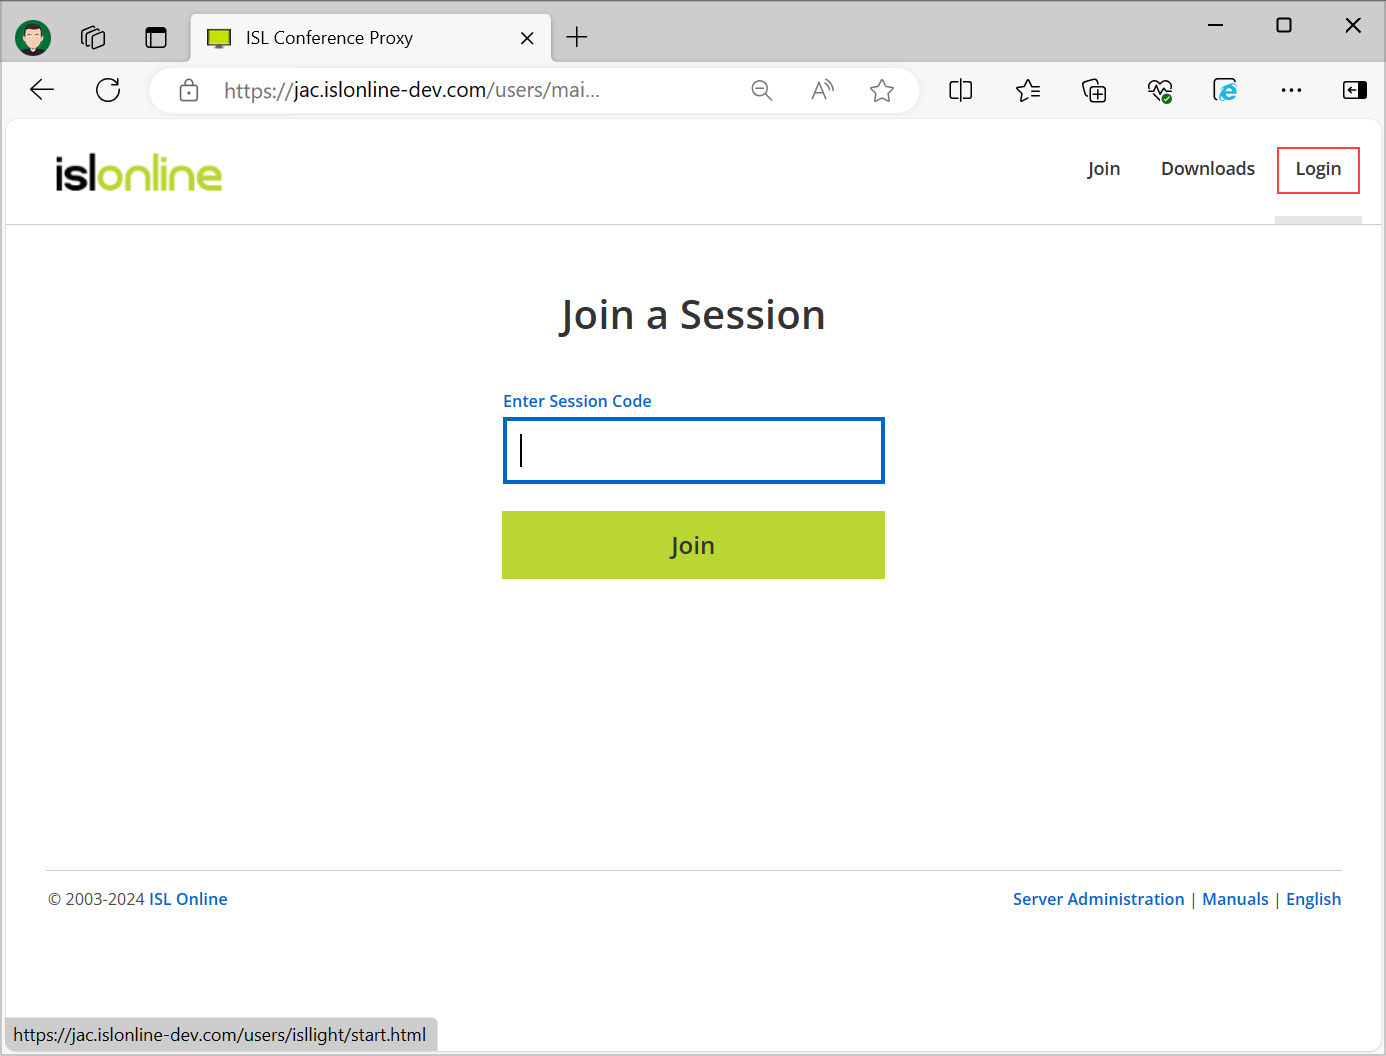
Click "Login" on the ISL Conference Proxy web page.
Step 2
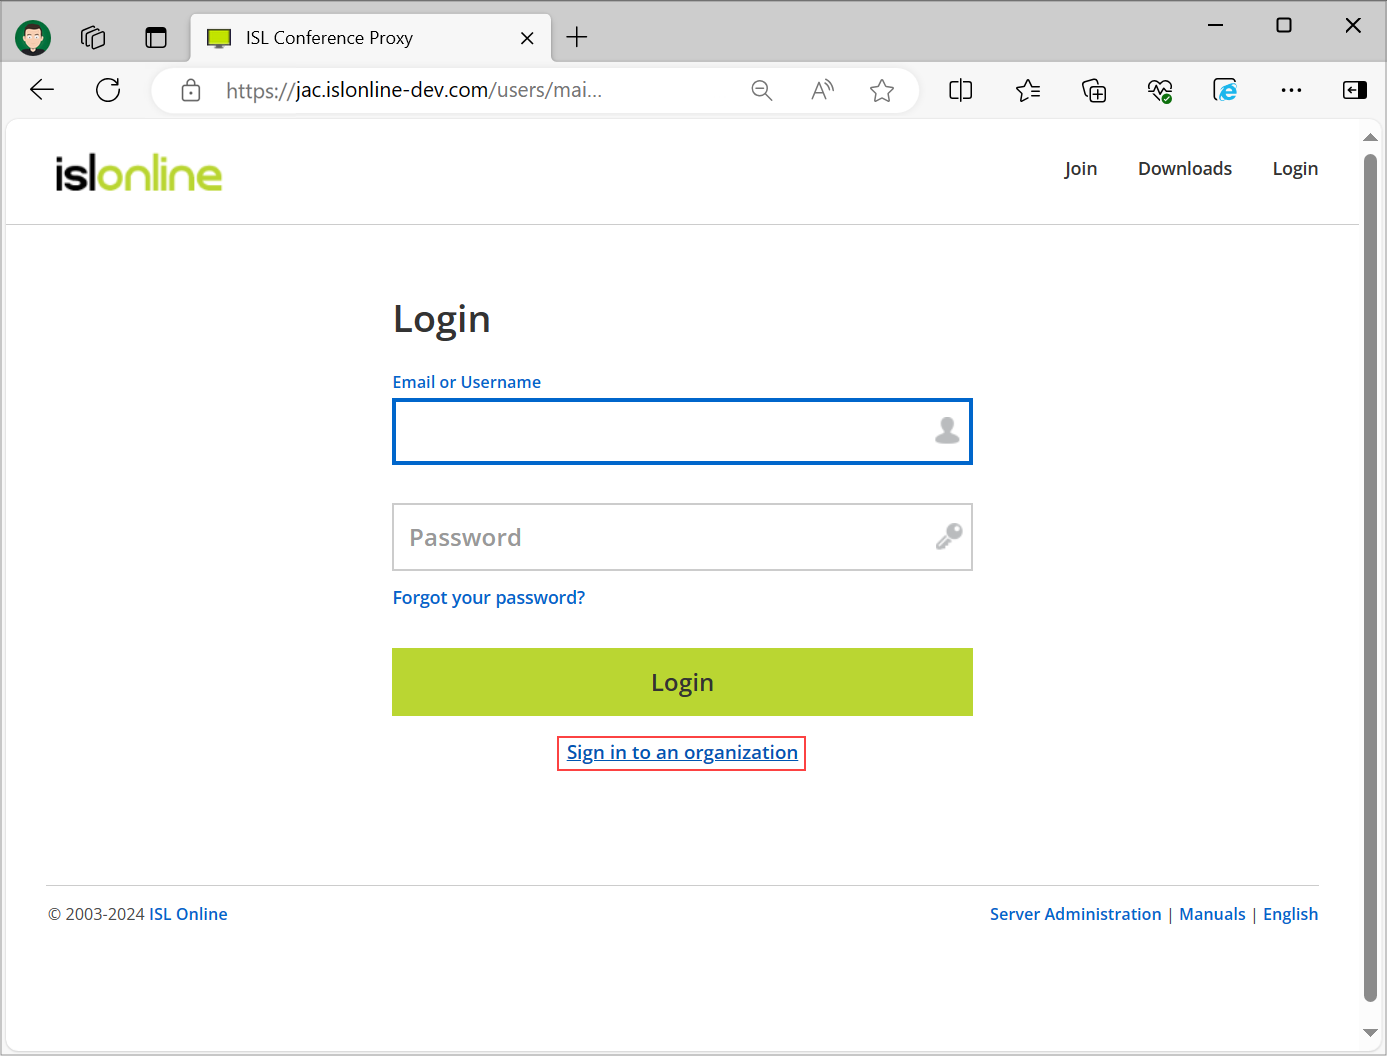
Select "Sign in to an organization".
Step 3
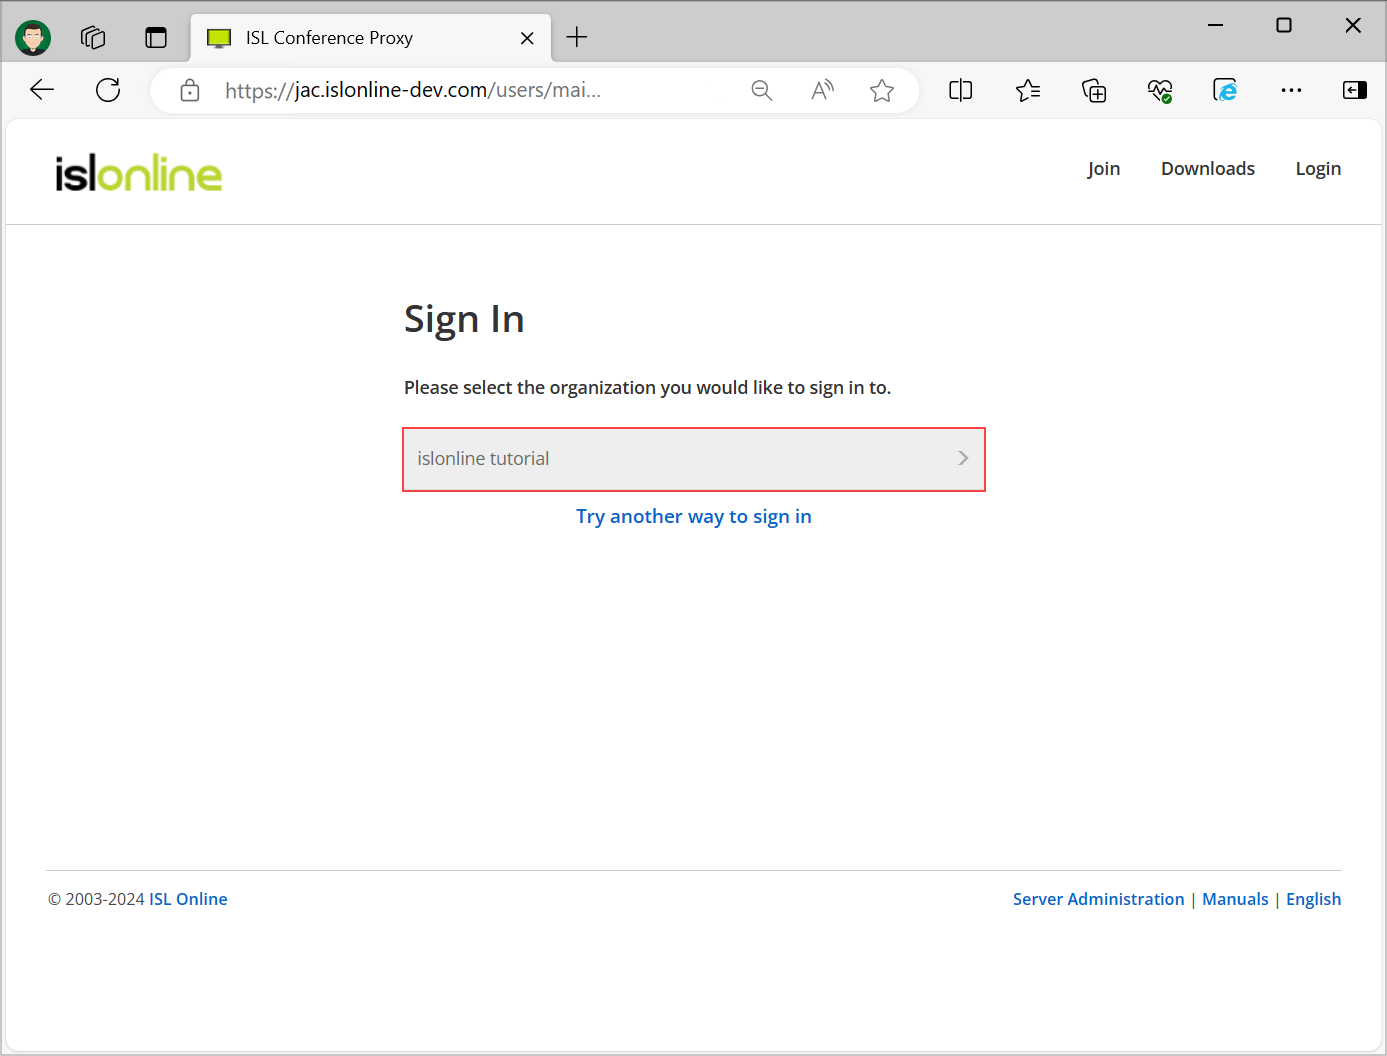
Select the organization that you have set up to proceed with the login. If the setup was successful you will be redirected to the Single Sign-On page.
Note: Redirection behavior can be different depending on your browser. In Microsoft edge you will not be redirected, rather the browser will display a pop-up window where you will enter your Microsoft Entra ID credentials.
Step 4

Enter your Microsoft Entra ID credentials and sign in. You will be redirected back to ICP if login succeeds.
Step 5
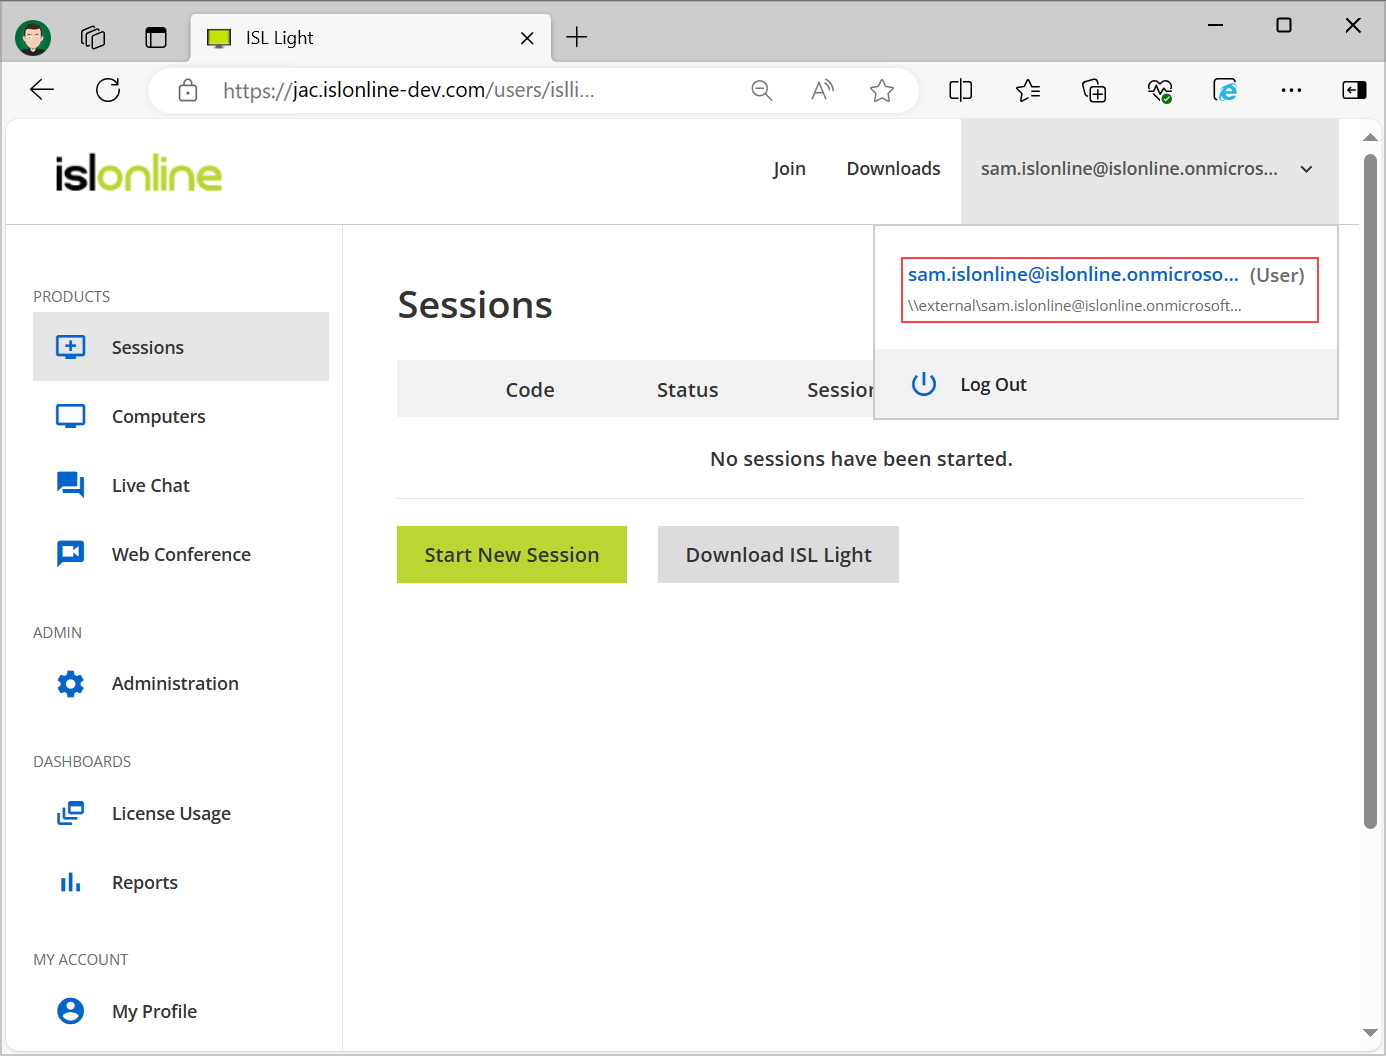
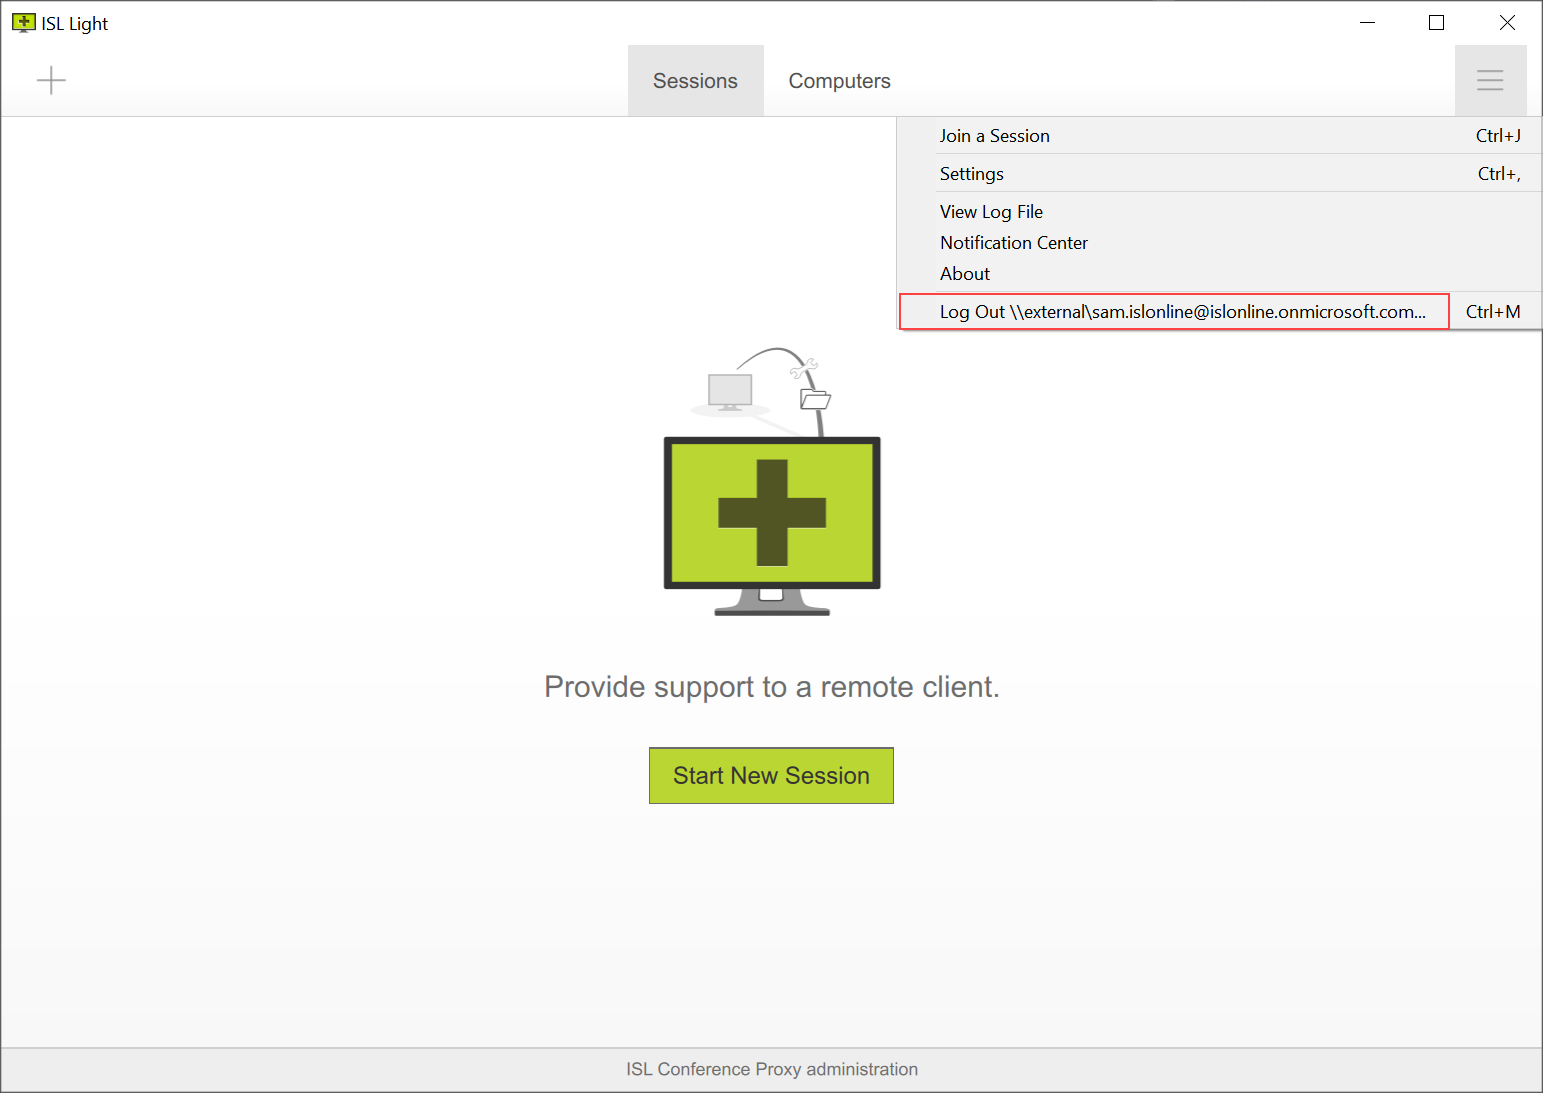
You are now logged in and can use all the functionalities of ICP normally. Note that the user is a part of the external (\\external\) domain we created during the setup.
Sign In - Application
Step 1
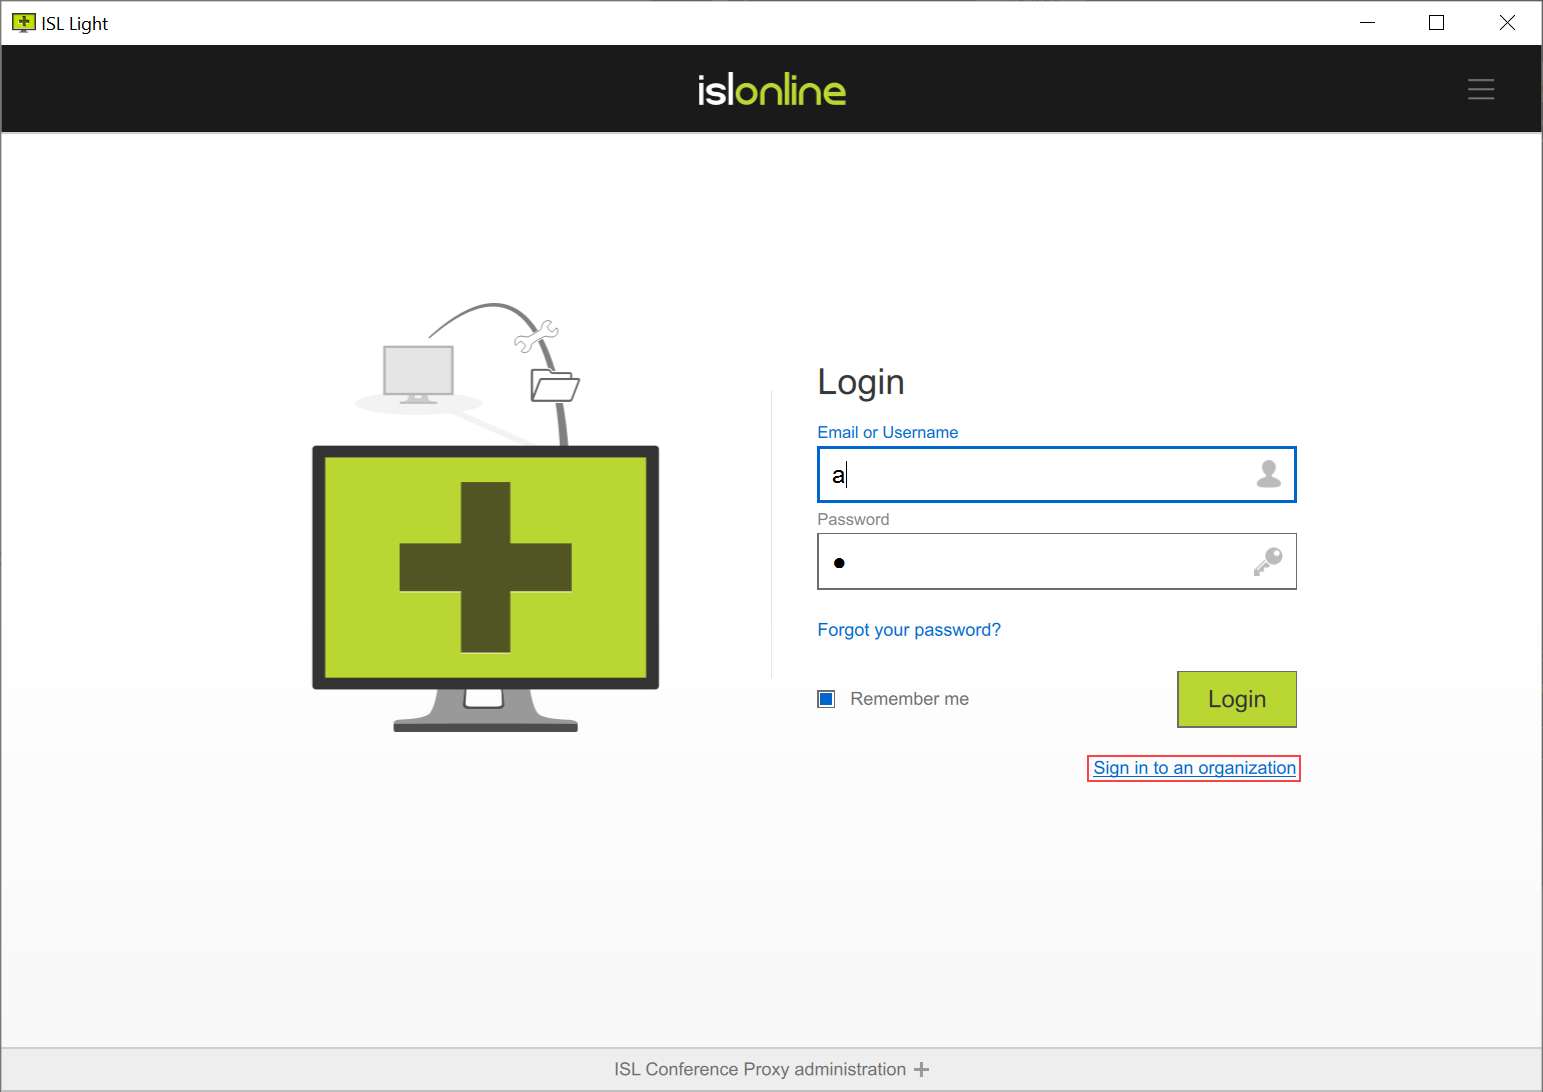
Login procedure for ISL Online applications differs with Single Sign-On as well. Select "Sign in to an organization" button.
Step 2
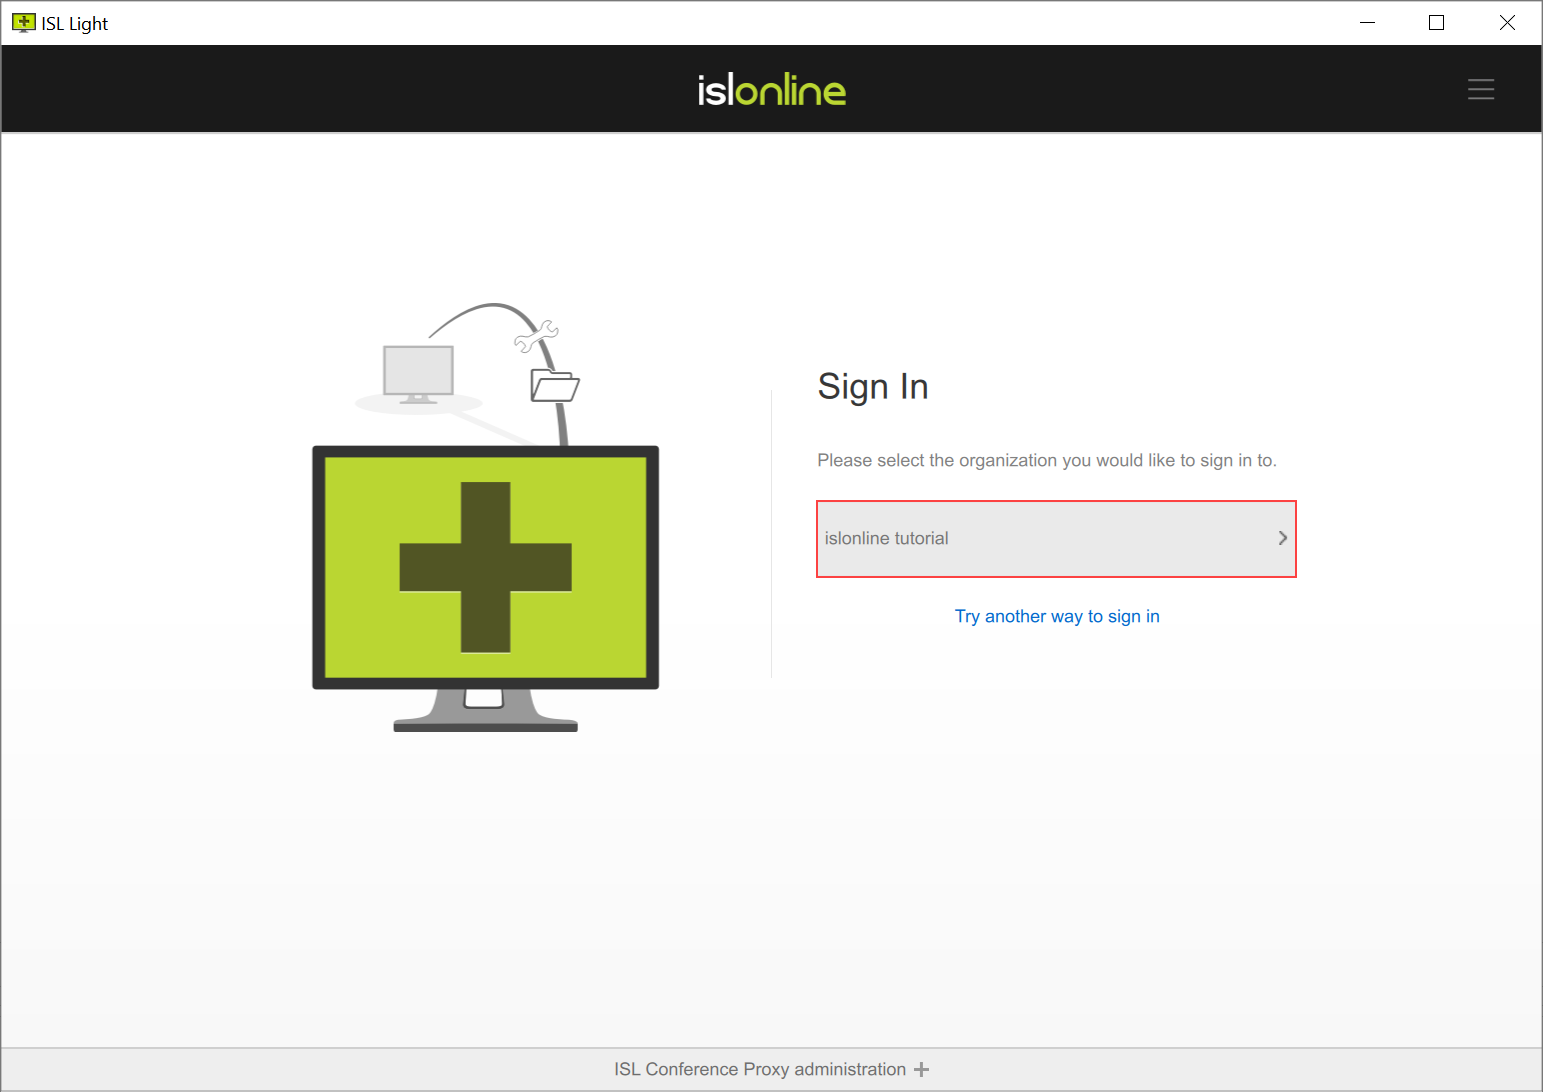
Select the organization that you have set up to proceed with the login.
Step 3

Select "Sign in" button in order to proceed to the Microsoft Entra ID login. If the setup was successful you will be redirected to the Single Sign-On page.
Step 4 - Browser
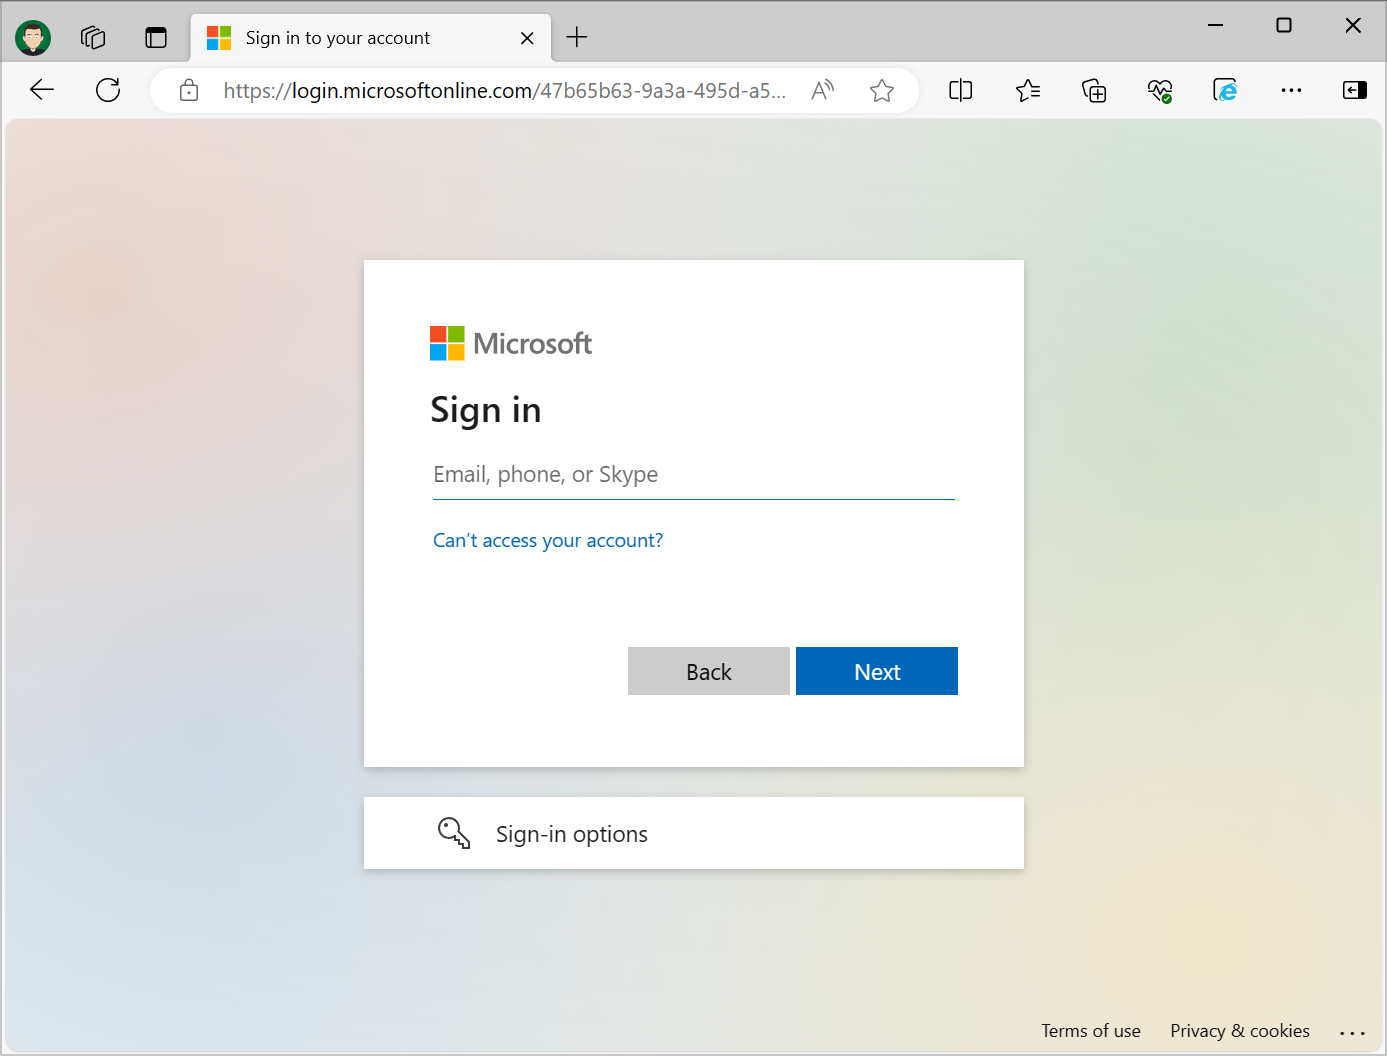
Enter your Microsoft Entra ID credentials and sign in. You will be redirected back to the application if login succeeds.
Note: If the token received from Microsoft Entra ID is still active in your default browser you won't have to enter your Microsoft Entra ID credentials again.
Step 5 - ISL Conference Proxy
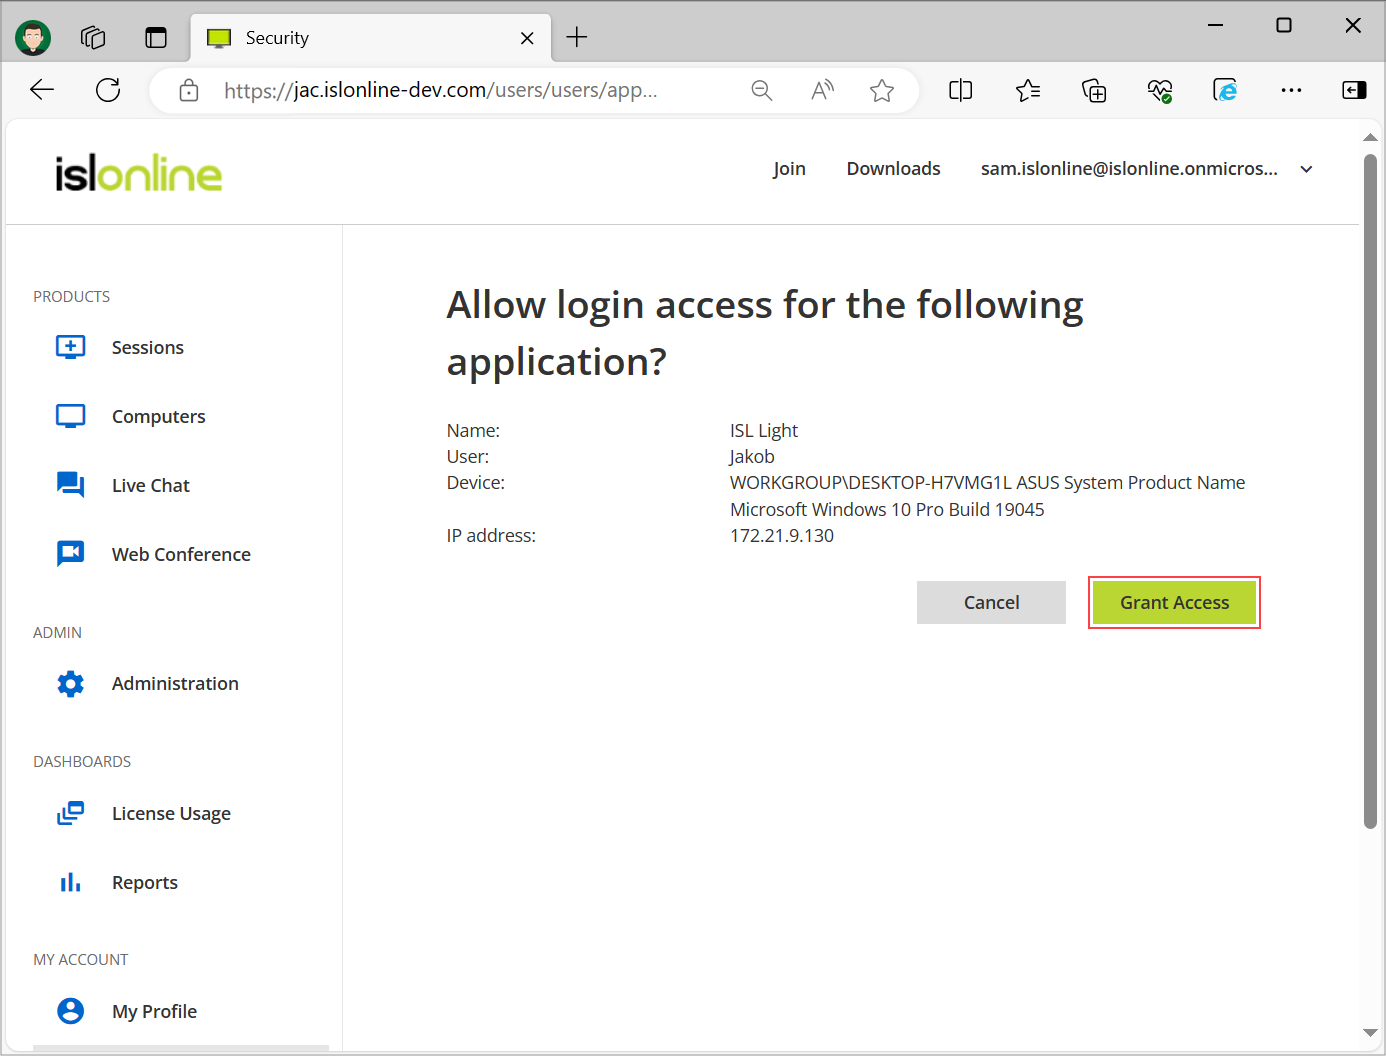
Click on "Grant Access" and you will be logged in and redirected back to the application.
Step 6
You are now logged in and can use the application normally.
Note: If you have enabled additional logs in the Core Login module for easier debugging, navigate to configuration page of your ISL Conference Proxy -> "Configuration" -> "Logs" and set the following settings back to default value: