You can share a "Computer Group" or a "Single Computer" with "User Groups" or single "Users" inside your domain thus giving them access to the shared computer(s). Users will still need to know the access passwords to connect to any shared computer.
We recommend sharing via "Computer Groups", as this allows you to set the permission level when sharing the group with other users. Additionally, when you add a new computer to an existing computer group it will automatically be shared with users and user groups with whom the computer group is already shared.
Note - Server License Users:
Before you can share computers and computer groups with other users in your domain and on your server, you will need to adjust the following settings in ISL Conference Proxy to the value "Yes" based on your requirements:
- User can view the list of domains on the server
- User can view a list of users in their own domain
- User can view the list of users on the server
This allows the specific user to list other domains and users within them, allowing them to share computers and computer groups.
These settings are further described in the following topic: Users
Please follow the steps below:
Video Tutorial
Share Computer Group
Step 1

Click the "Menu" button next to the group name and click "Share".
Step 2

You can share Computer Groups with:
- User Groups (Recommended)
- Users
Select the "User Group" from the table.
Step 3

Select the "User Groups" and specify Permissions. Then click the "Share" button.
There are 4 basic permissions when sharing a "Computer Group" (sharing a "Single Computer" does not have permissions features):
- None
- Connect Only
- Computers) Manager
- Group Admin
None
Default permission for other users. If the permission for a user is set to None then they can not see the group and the computers inside.
Connect Only
If the permission for a user is set to Connect Only, then they can connect to computers inside of group and execute actions like getting system information, etc.
Computers Manager
If the permission for a user is set to Computer Manager, they have the same permissions as the Connect Only users; however, they can edit and delete computers and execute actions on them.
Group Admin
If the permission for a user is set to Group Admin, they have the same permissions as the Computers Manager users; however, they can give and change the permissions of other users. Each group has to have at least one Group Admin. The user that creates the group is assigned the role of Group Admin and he can not be demoted.
Important: If you are a Group Admin, you can demote yourself to a role with fewer permissions; however, you will not be able to promote yourself afterwards, as you will lose administrative rights.
Step 4

The "Computer Group" is now shared with "User Groups".
Once "Users" from "User Groups" log in with their username and password, they will see the shared computer group and its computers.
Share Single Computer
To share a single computer, please follow the steps below:
Step 1

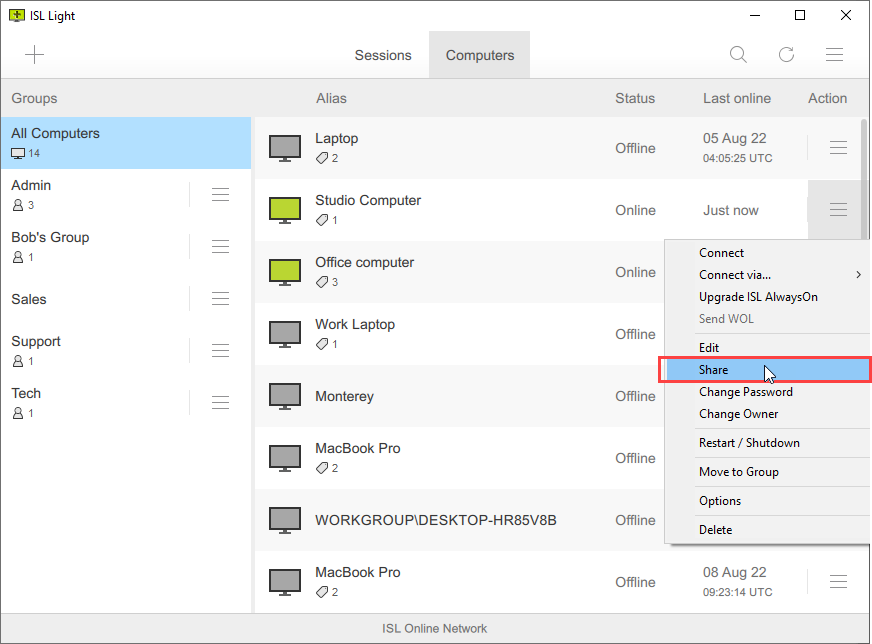
Click the "Menu" button from the computer row and click "Share".
Step 2

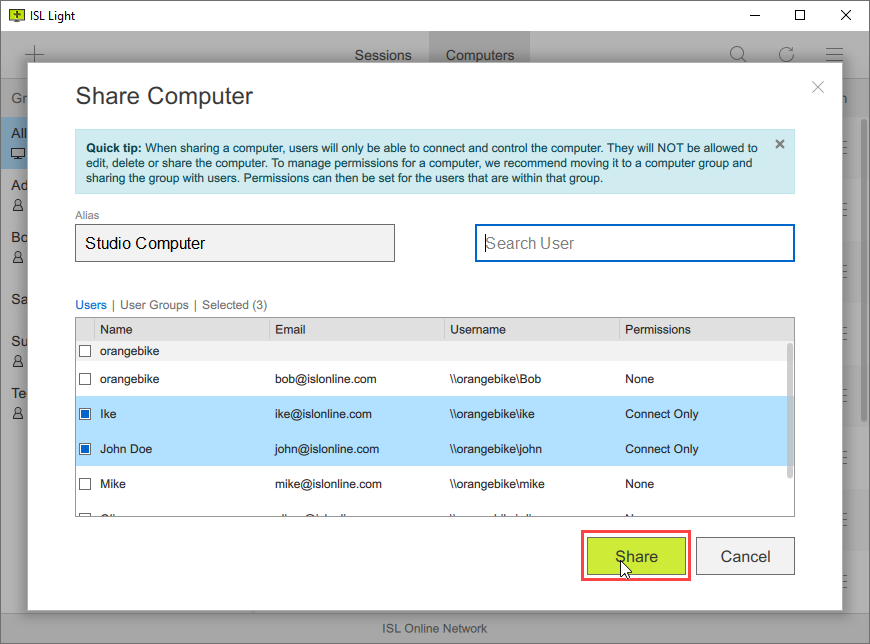
You can share the Computer with:
- User Group(s) (Recommended)
- Users
Select the "Users" or click "User Groups" from the table and click "Share".
Step 3

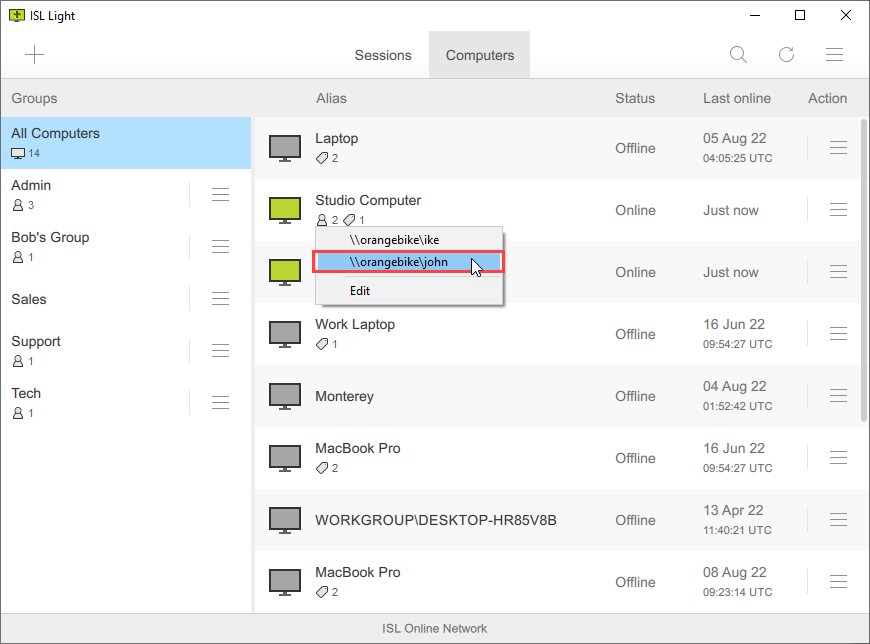
"The Computer" is now shared with Users, and they can connect to remote computer when they log into ISL Light with their account.
Related Articles:
Move Computer to Computer Group
Create User Group (Server License)